Adding a NIC Tag to a CN
This section reivews the steps necessary to assign the external NIC Tag to a compute node (which will, at the very least, correspond to the External network created at install time), and is primarily geared towards bringing a Triton deployment to a point where it can be tested. A full discussion of NIC Tag and their usage is outside of the scope of this document, and users are urged to review NIC Tags for an in-depth review of the creation, management, and assignation of NIC Tag within Triton.
Note: To view a larger version of any image, please click on it and a full sized version will open in a new window.
-
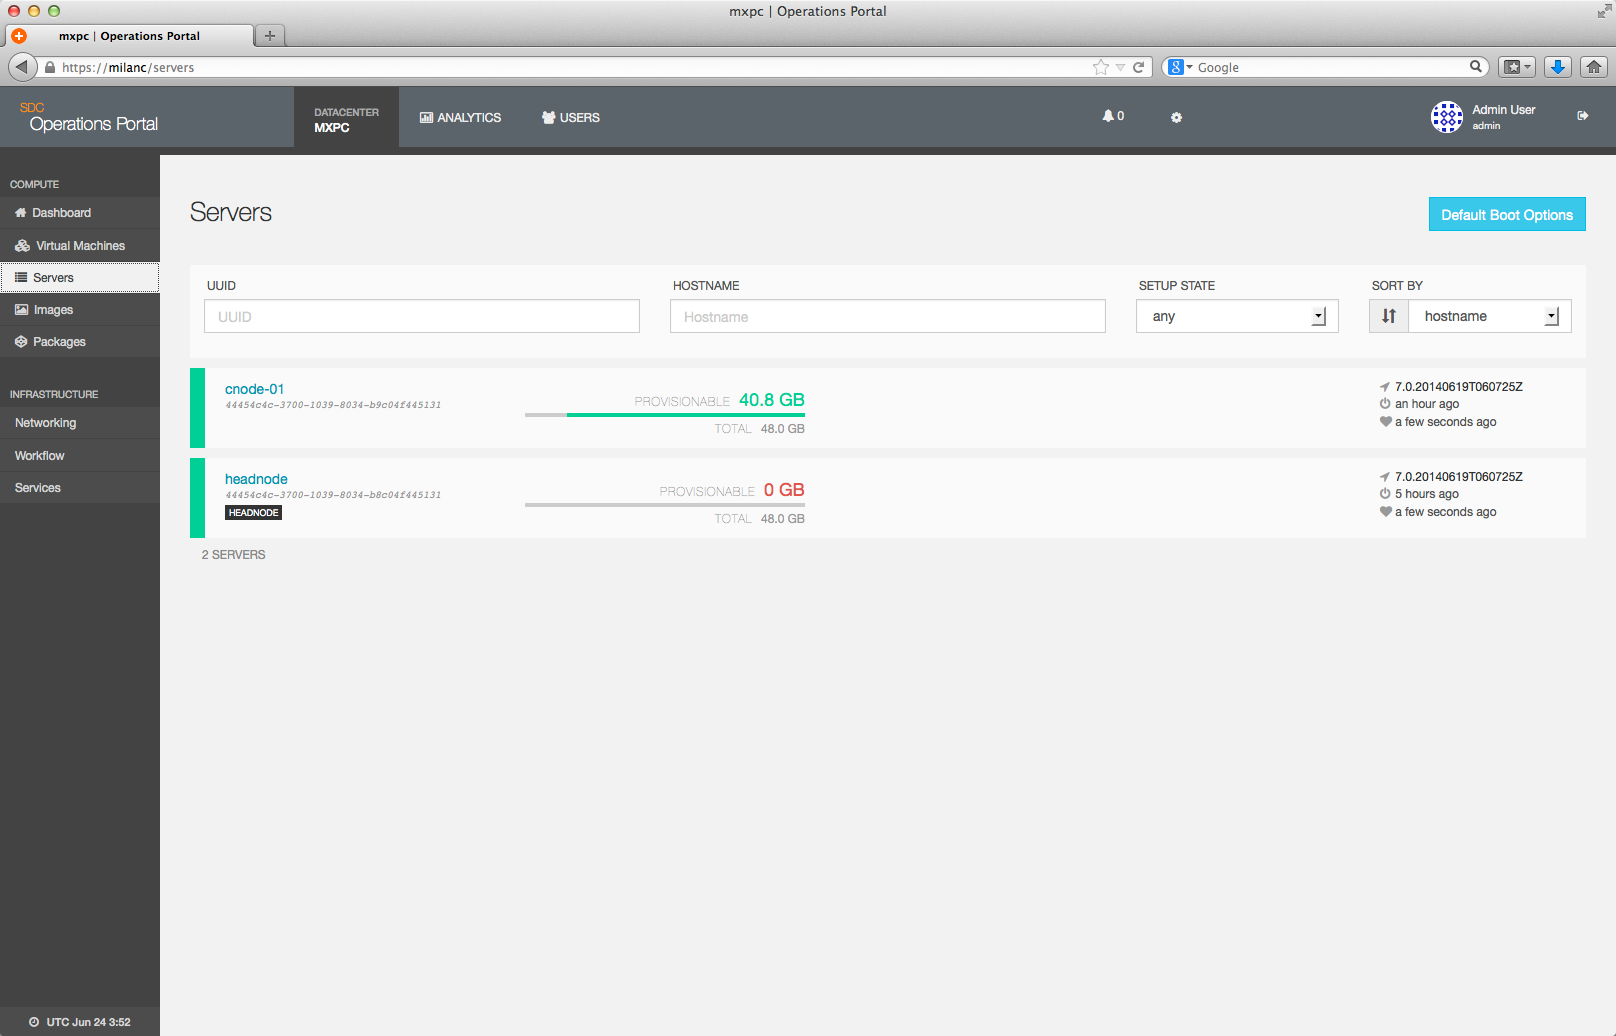
NIC Tags assigned to a compute node are viewable via the Servers tab in the Operations Portal:
-
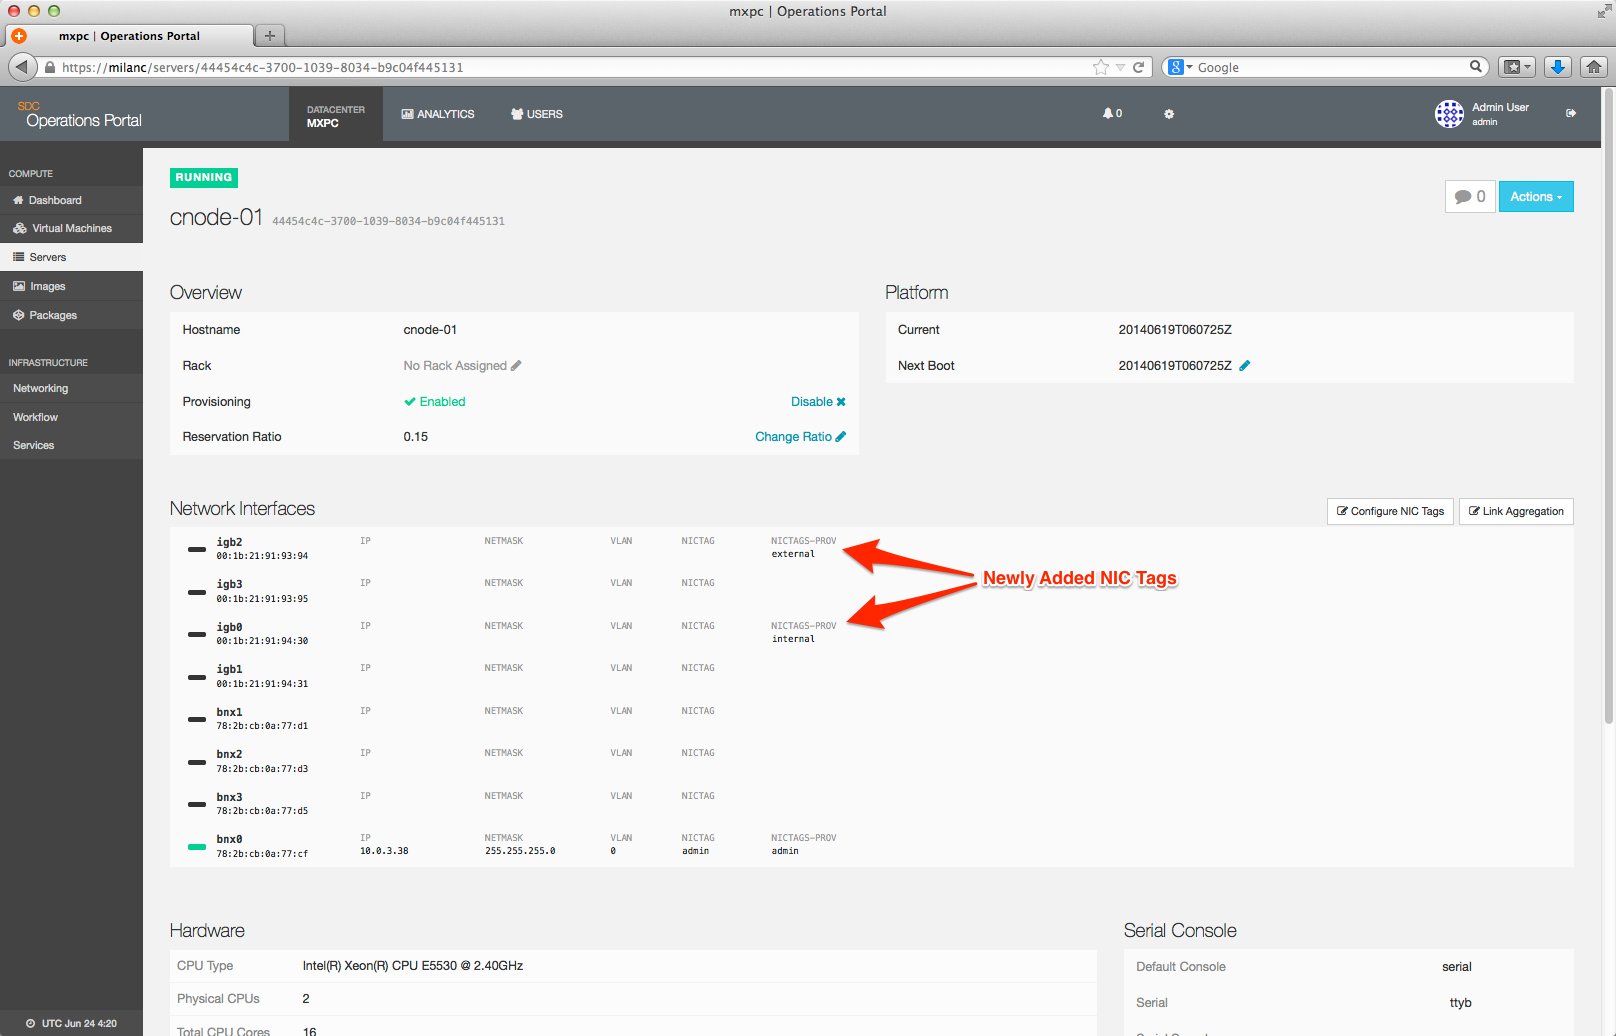
In the example below, the only NIC Tag assigned is the default Admin network on
bnx0. Note that this network/tag are required for Triton to function properly.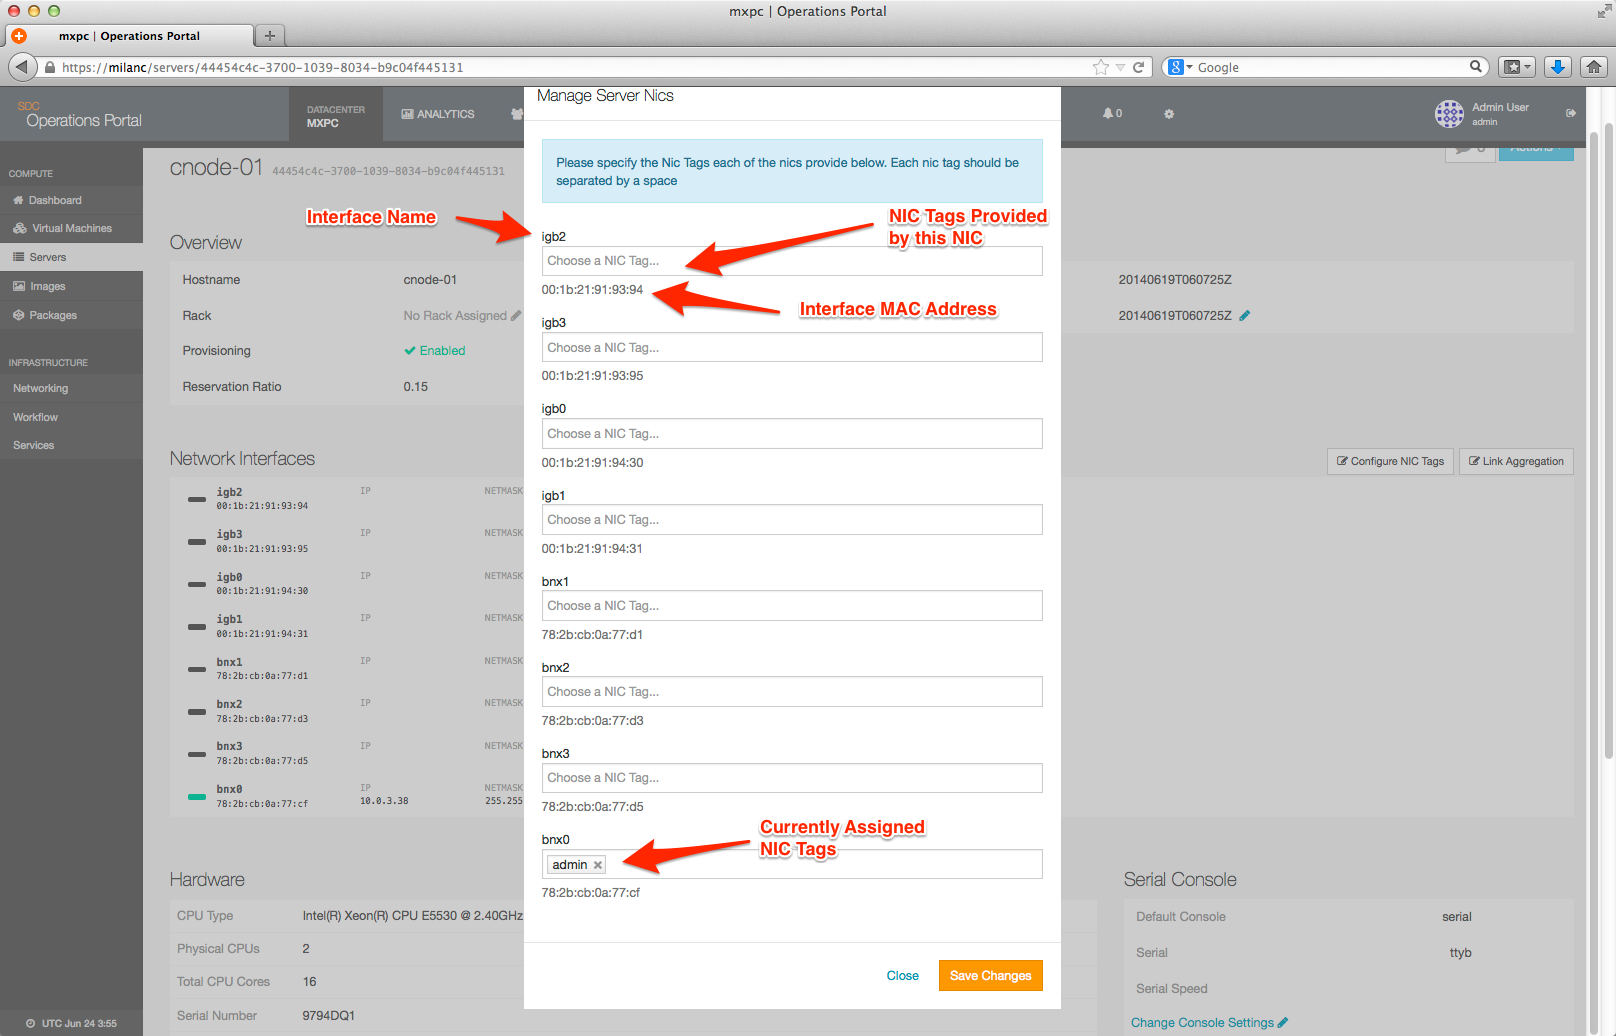
Adding a NIC Tag via the Operations Portal
-
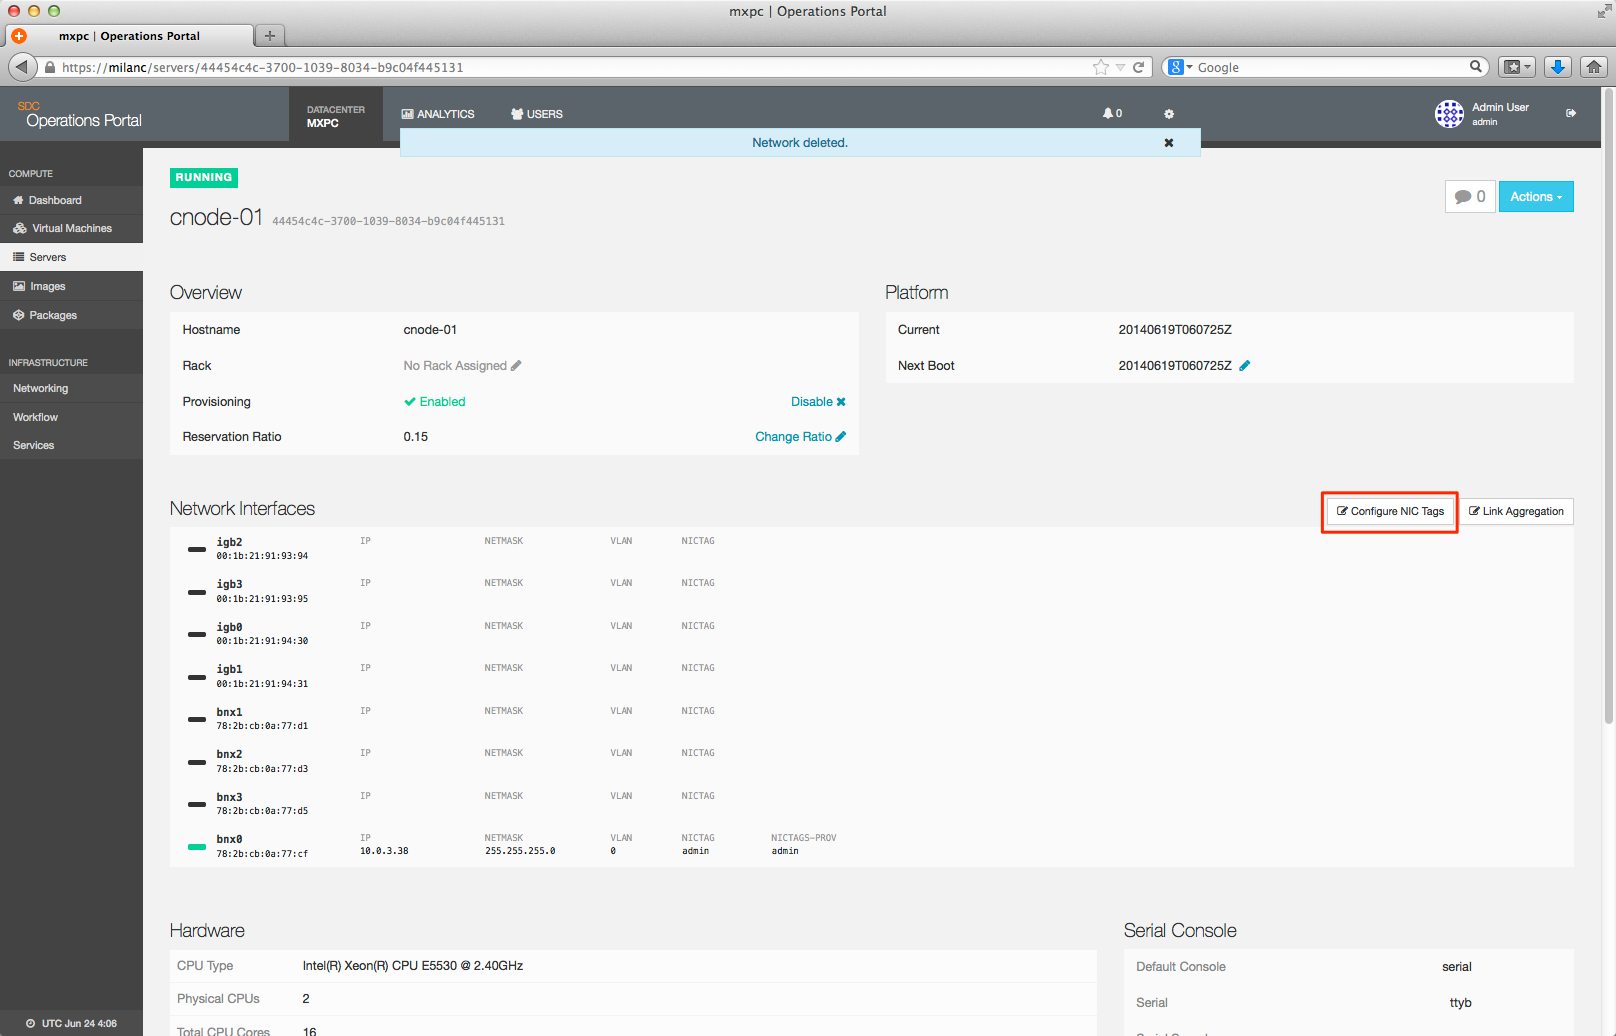
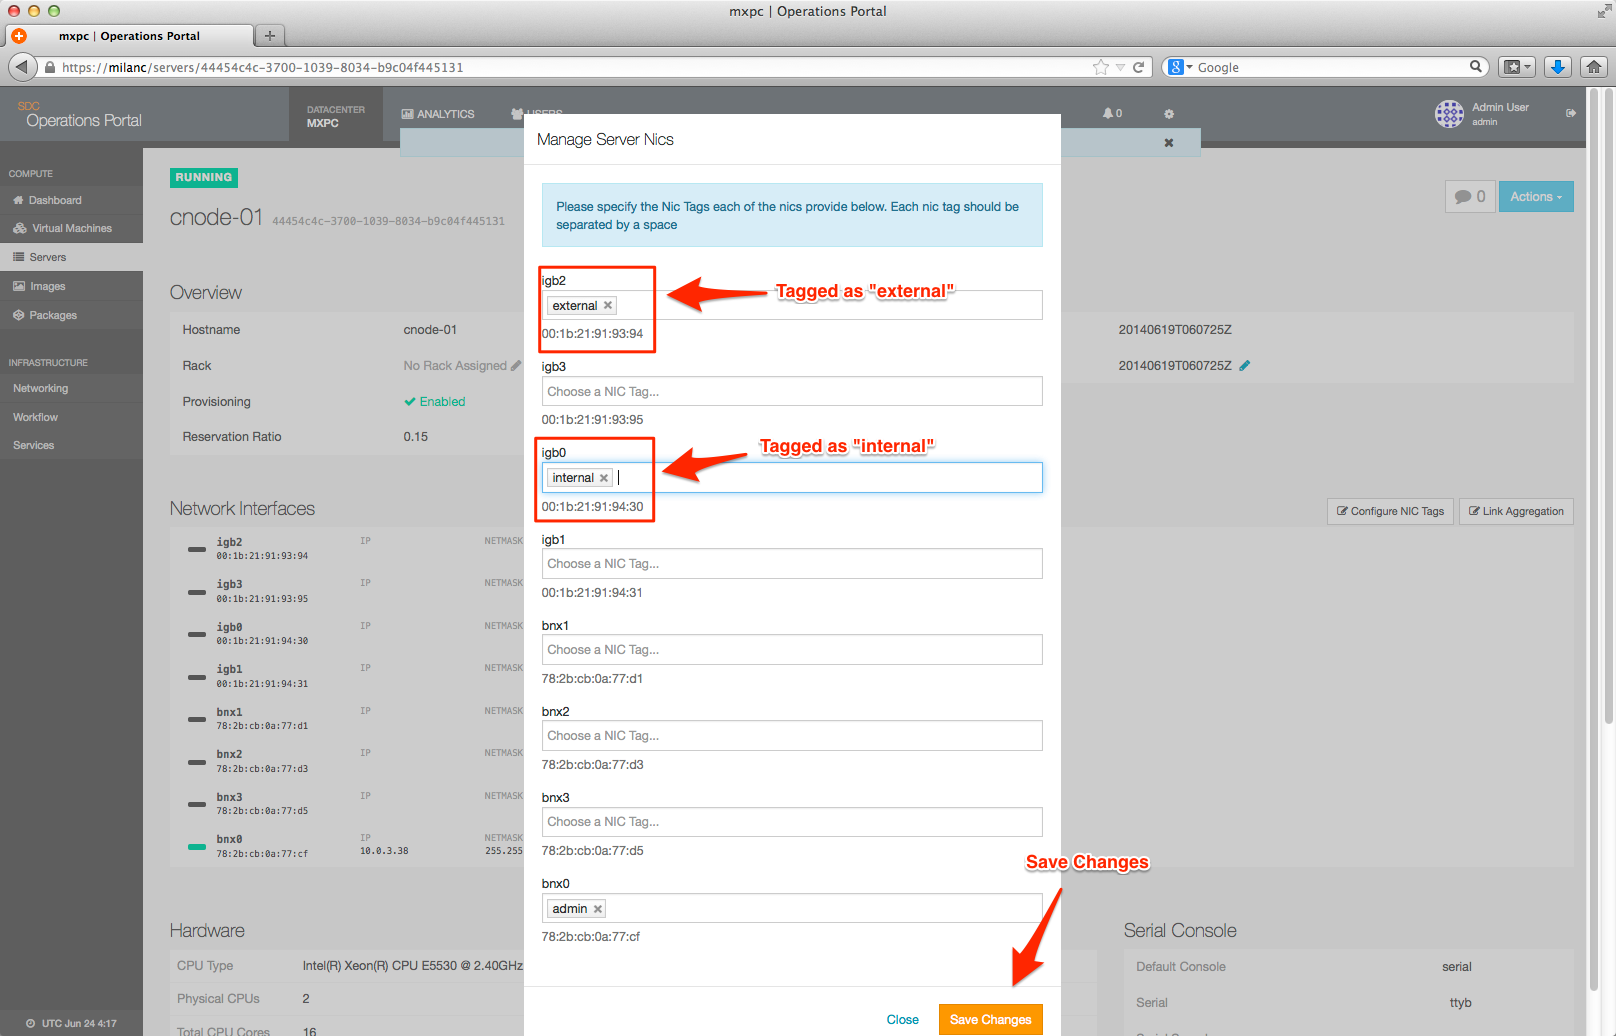
To add a NIC Tag to a CN, click on the Configure NIC Tags button.
-
This will bring up the detail dialog.

-
To add a new tag, begin typing the name of the NIC Tag in the box associated with the interface you wish to tag, and Triton will attempt to complete it for you, or you can select from the drop down list.

-
Once you've added the full NIC tag click Save Changes.
-
This will spawn an update job.
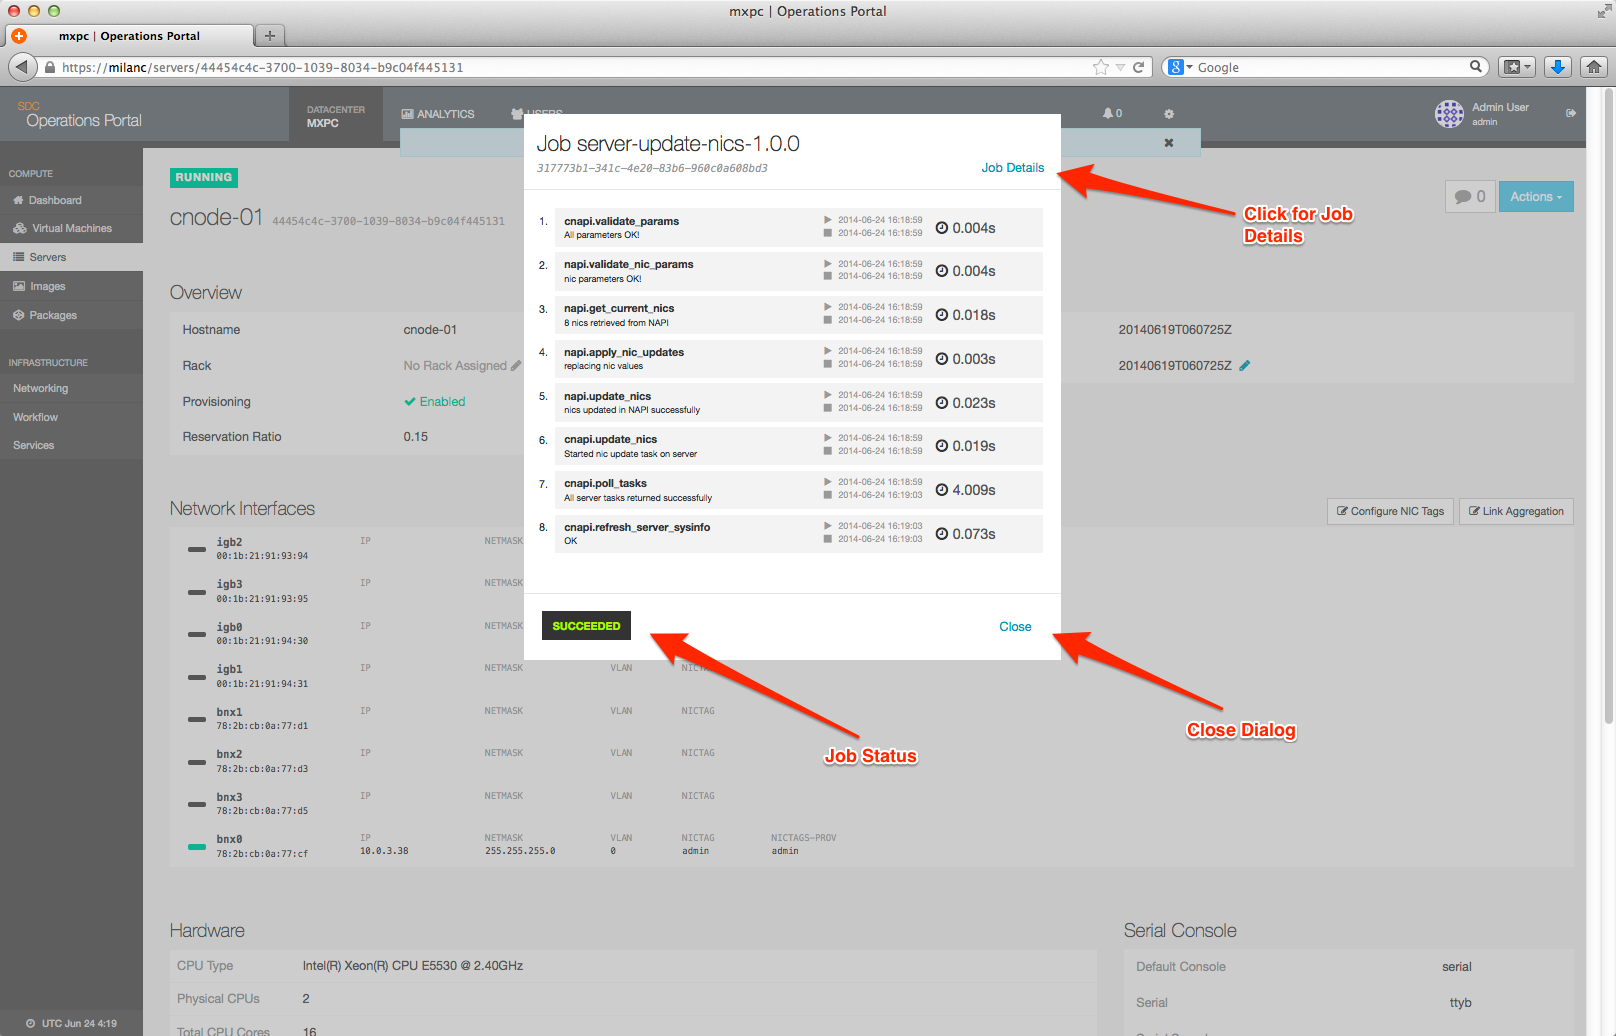
- When finished, the CN will now have the new NIC Tag assigned.