Triton compute node setup
After installing the head node you will need to boot and set up the compute node(s). This page describes the steps to achieve this. These steps can also be used to add additional compute nodes to an existing Triton deployment.
This document makes the assumption that you have reviewed the information provided in the sections entitled Triton hardware selection and Triton hardware configuration in order to ensure your hardware is compatible with Triton and is configured properly from a BIOS, RAID, console, and boot order standpoint. If not, please review those documents before proceeding.
Note: To view a larger version of any image, please click on it and a full sized version will open in a new window.
Booting the compute node
-
Once you have inserted the USB key into the slot (for systems booting via USB and iPXE) or enabled the hardware based PXE, boot the system.
- You will be presented with a boot loader menu similar to one of the following:
       #
       #  ####  #   # ###### #    # #####
       # #    #  # #  #      ##   #   #
       # #    #   #   #####  # #  #   #
 #     # #    #   #   #      #  # #   #
 #     # #    #   #   #      #   ##   #
  #####   ####    #   ###### #    #   #  TM

              Welcome to SmartOS

          1. Compute Node (PXE)
          2. Boot 20190204T130507Z
          3. [Esc]ape to loader prompt
          4. Reboot

          Options:
          5. Configure Boot [O]ptions...
- Press 1 to select Compute Node (PXE), which is the default option for the server.
Note: If the system displays flashing cursor or does not show any activity for an extended period of time (greater than 20 minutes) you most likely need to redirect the console from the Options menu. The console defaults to ttyb. If you have redirected the console, you will need to change it back to ttyb. To do so:
- Press 5 to configure Boot options.
- Press 2 to cycle through the available choices for OS Console.
For more information, refer to the Advanced head node boot options document.
After the server boots, a login prompt displays, similar to the following image. Do not log in at this point. First, set up the compute node.
         *--+--*--*
         |\ |\ |\ |\      J O Y E N T
         | \| \| \| \     #####  ####   #  #####  ###   #   # TM
         +--*--+--*--*      #    #   #  #    #   #   #  ##  #
         |\ |\ |\ |\ |      #    ####   #    #   #   #  # # #
         | \| \| \| \|      #    #  #   #    #   #   #  #  ##
         *--+--+--+--+      #    #   #  #    #    ###   #   #
          \ |\ |\ |\ |
           \| \| \| \|     SmartOS
            *--+--*--*      build: 20190209T003652Z

 90-e2-ba-68-81-c1 ttyb login:
Setting up a compute node via the Operations Portal
-
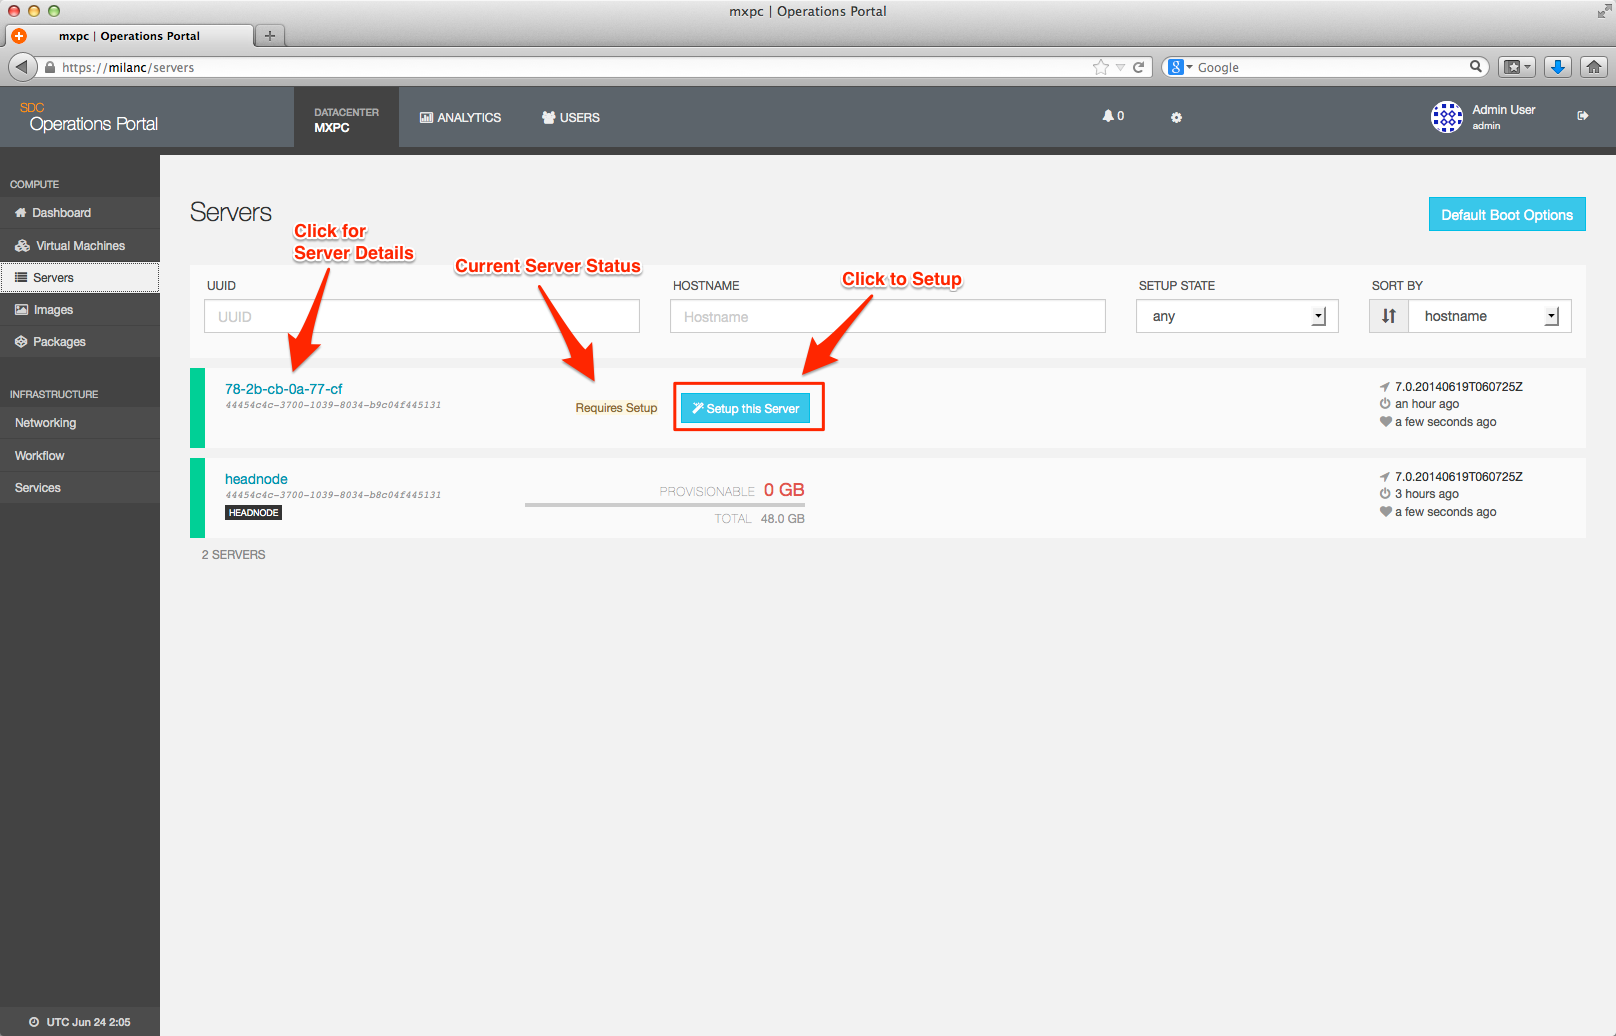
Once the compute node has booted up it will be displayed in the Operations Portal like this.

-
You can start the set up process directly from this page by clicking on the Setup This Server button:

-
Or you can click on the server name and use the Setup Button on Server Detail page.

-
In both cases the set up dialogue is the same; by default, the compute node will be named based on the MAC address of the Admin NIC. If you wish to specify a custom hostname, you can do so via the checkbox/entryfield on this screen.
- Note: Once set, a compute node's hostname cannot be changed.

-
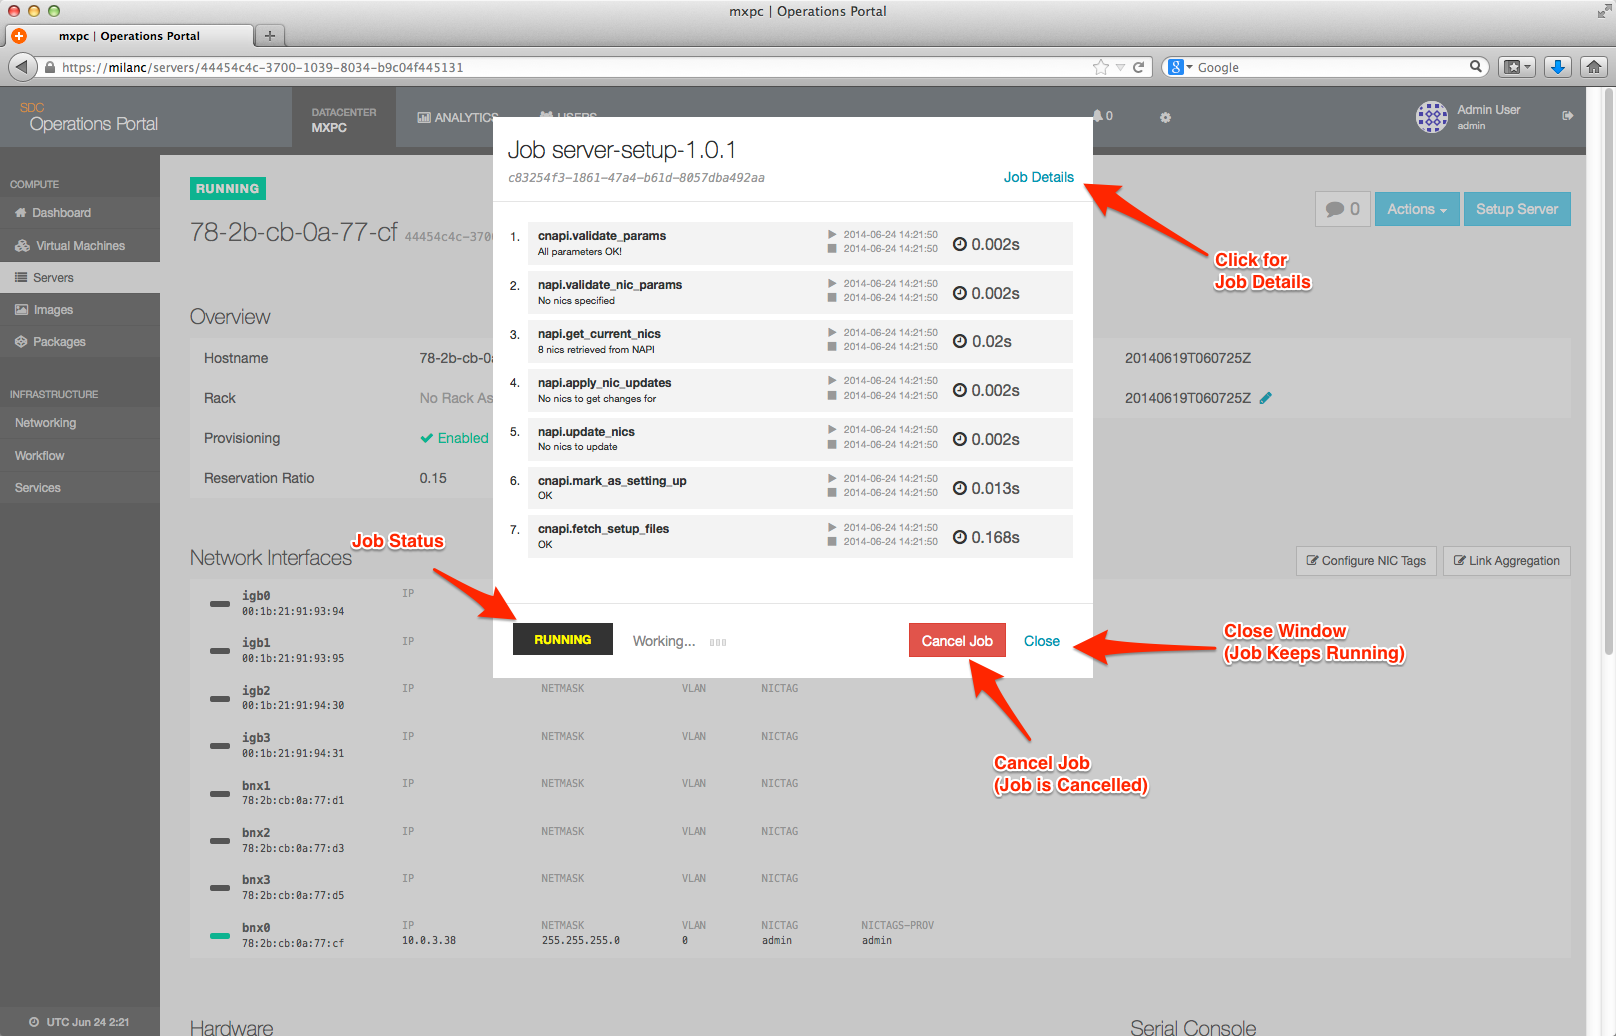
Once you click setup, a job will be submitted on your behalf by the Operations Portal and will run to setup the compute node.

- Note: If you chose to specify a custom hostname another reboot of the compute node will take place.
-
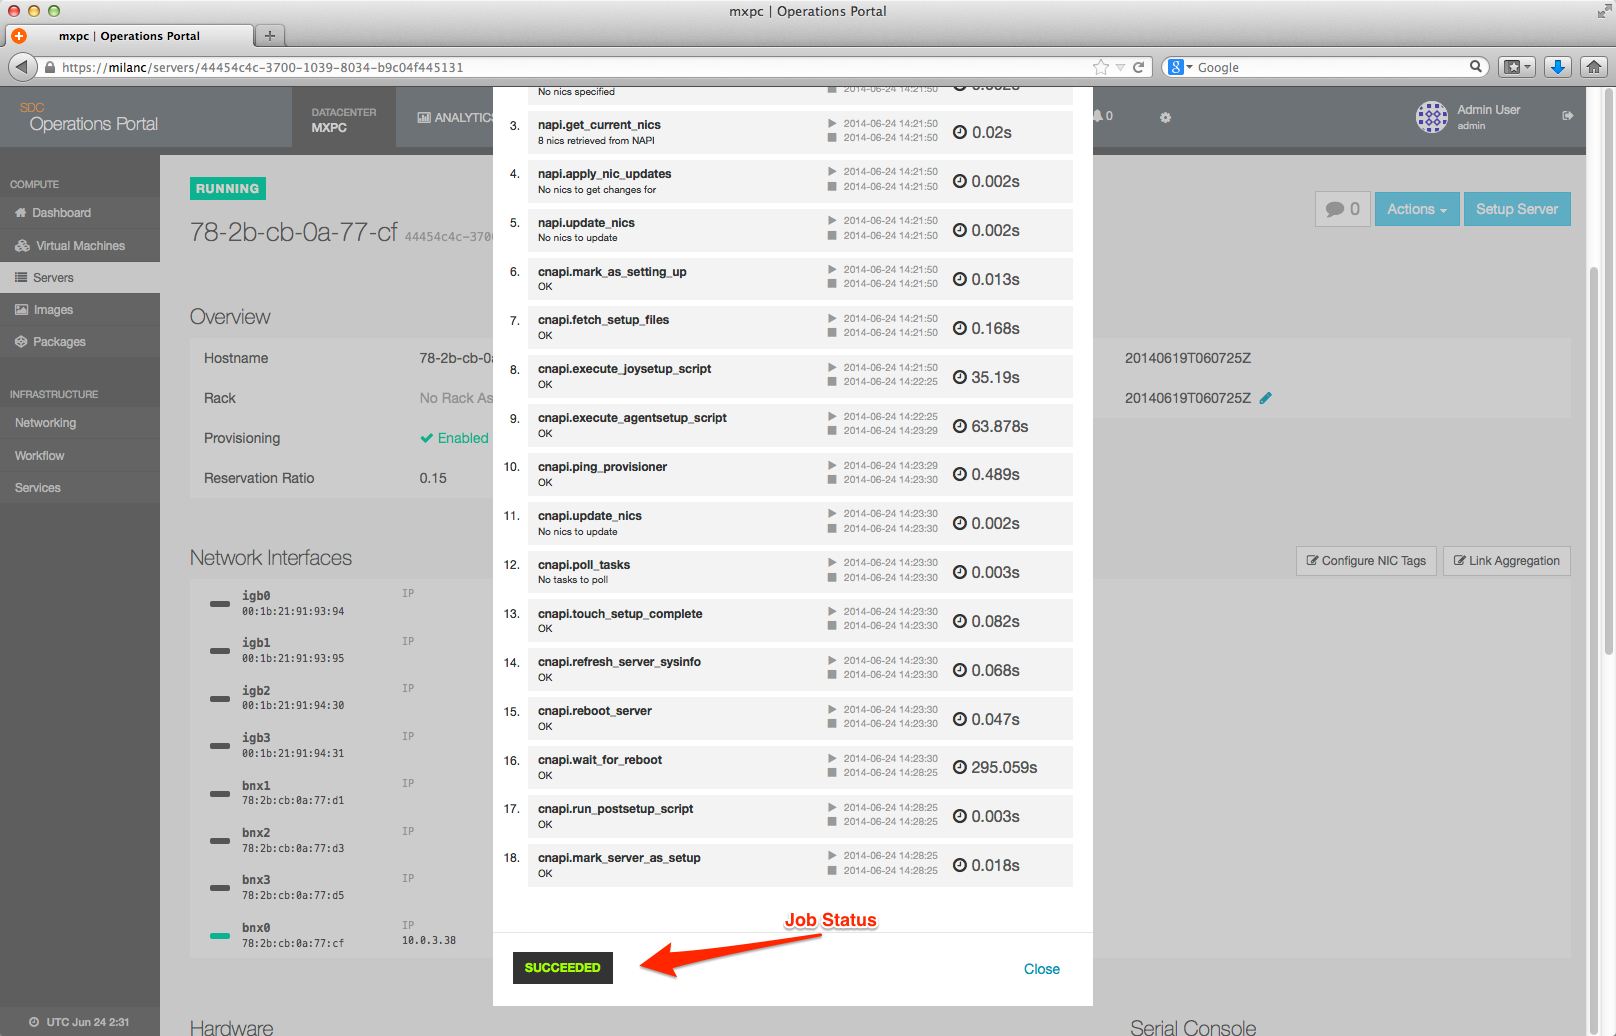
On completion, you will receive an indication as to the job status at the bottom of the job output:

-
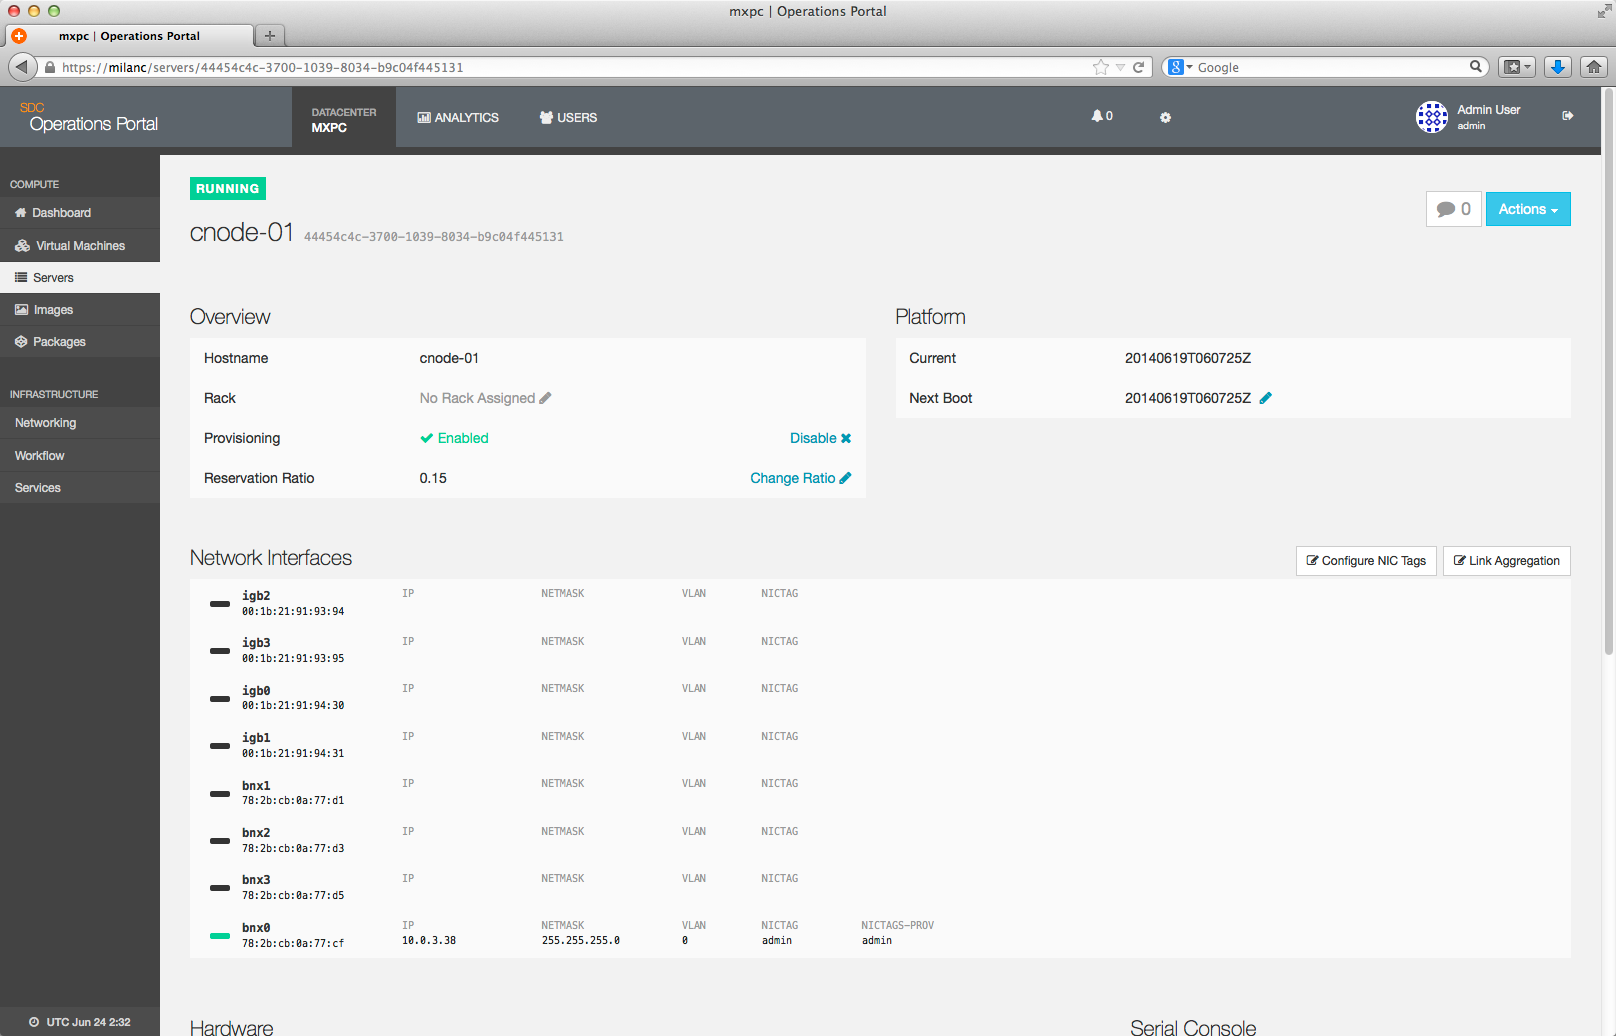
Once you clear this dialog, you will be at the Server Details page for your new compute node.
- Note: You may need to refresh your browser to see the updated hostname.

Setting up a compute node via sdc-server
-
You can also setup a compute node via the
sdc-servercommand. To begin with, first list the servers in the current Triton installation:headnode# sdc-server list HOSTNAME UUID VERSION SETUP STATUS RAM ADMIN_IP headnode 44454c4c-3900-1046-8059-c6c04f395231 7.0 true running 98291 192.168.216.6 90-e2-ba-68-81-c1 532abfa0-11df-11e4-94d3-002590e4f150 7.0 true running 262111 192.168.216.40 90-e2-ba-68-82-bd 6cd80e1e-11e2-11e4-baec-002590e4ebf0 7.0 true running 262111 192.168.216.42 90-e2-ba-6a-e2-c5 715020ea-11e1-11e4-bb8a-002590e4edcc 7.0 true unsetup 262111 192.168.216.41 -
Start the setup process by passing the setup option to
sdc-server, using the UUID of the compute node you wish to setup as an argument.headnode# sdc-server setup -s 715020ea-11e1-11e4-bb8a-002590e4edcc- Note: As shown in the following example, additional data - such as a custom hostname or ZFS zpool layout - can be passed through to the
sdc-server setupcommand by adding them on the command line following the CN UUID in "key=value" format, such as "hostname=cnode01" or "layout=raidz2 spares=0 cache=true". For more details about ZFS Pool Layout options, please see RFD 53.
headnode# sdc-server setup -s 715020ea-11e1-11e4-bb8a-002590e4edcc hostname=cnode01 layout=raidz2 spares=0 cache=true-
This process will output a status line while it is running and explain the steps that are being taken - these are identical to the workflow steps that you can view in the Jobs screen on AdminUI and will conclude once the server is successfully setup.
- To verify the compute node has been setup, you can run the
sdc-server listcommand again:
headnode# sdc-server list HOSTNAME UUID VERSION SETUP STATUS RAM ADMIN_IP headnode 44454c4c-3900-1046-8059-c6c04f395231 7.0 true running 98291 192.168.216.6 90-e2-ba-68-81-c1 532abfa0-11df-11e4-94d3-002590e4f150 7.0 true running 262111 192.168.216.40 90-e2-ba-68-82-bd 6cd80e1e-11e2-11e4-baec-002590e4ebf0 7.0 true running 262111 192.168.216.42 90-e2-ba-6a-e2-c5 715020ea-11e1-11e4-bb8a-002590e4edcc 7.0 true running 262111 192.168.216.41- The compute node is now showing as setup.
- Note: As shown in the following example, additional data - such as a custom hostname or ZFS zpool layout - can be passed through to the
Simultaneous multi-threading setting
By default, all newly installed Triton systems have simultaneous multi-threading enabled. If desired, you can modify this default by setting the suitable server parameter.
