Advanced Triton configuration
This page will walk you through the process of adding fabric networks and Docker functionality to Triton.
NOTE: To view a larger version of any image, click on the image and a full-sized version will open in a new window.
Install Sample Packages
By default, Triton will use the sample packages for docker. To install these, please run:
headnode# sdcadm post-setup dev-sample-dataNOTE: If the packages have already been installed, this step will produce a warning. This warning can be ignored.
Setup Fabric Networks
These steps will use the Underlay network and NAT Pool described in the documents titled Triton networking layout and Triton initial network configuration. Reminder, the use of network fabrics requires Jumbo Frames (MTU 9000) be enabled for the Underlay network; it is currently not possible to use network fabrics without using Jumbo Frames. Additionally, it is not possible to change the MTU of the Underlay network or NIC Tag once fabrics have been deployed.
NOTE: These are recommended values that are used by convention; although it is possible to use different values for some of the parameters below (such as network and tag names) it is highly recommended that you use the conventional values.
Create the underlay tag
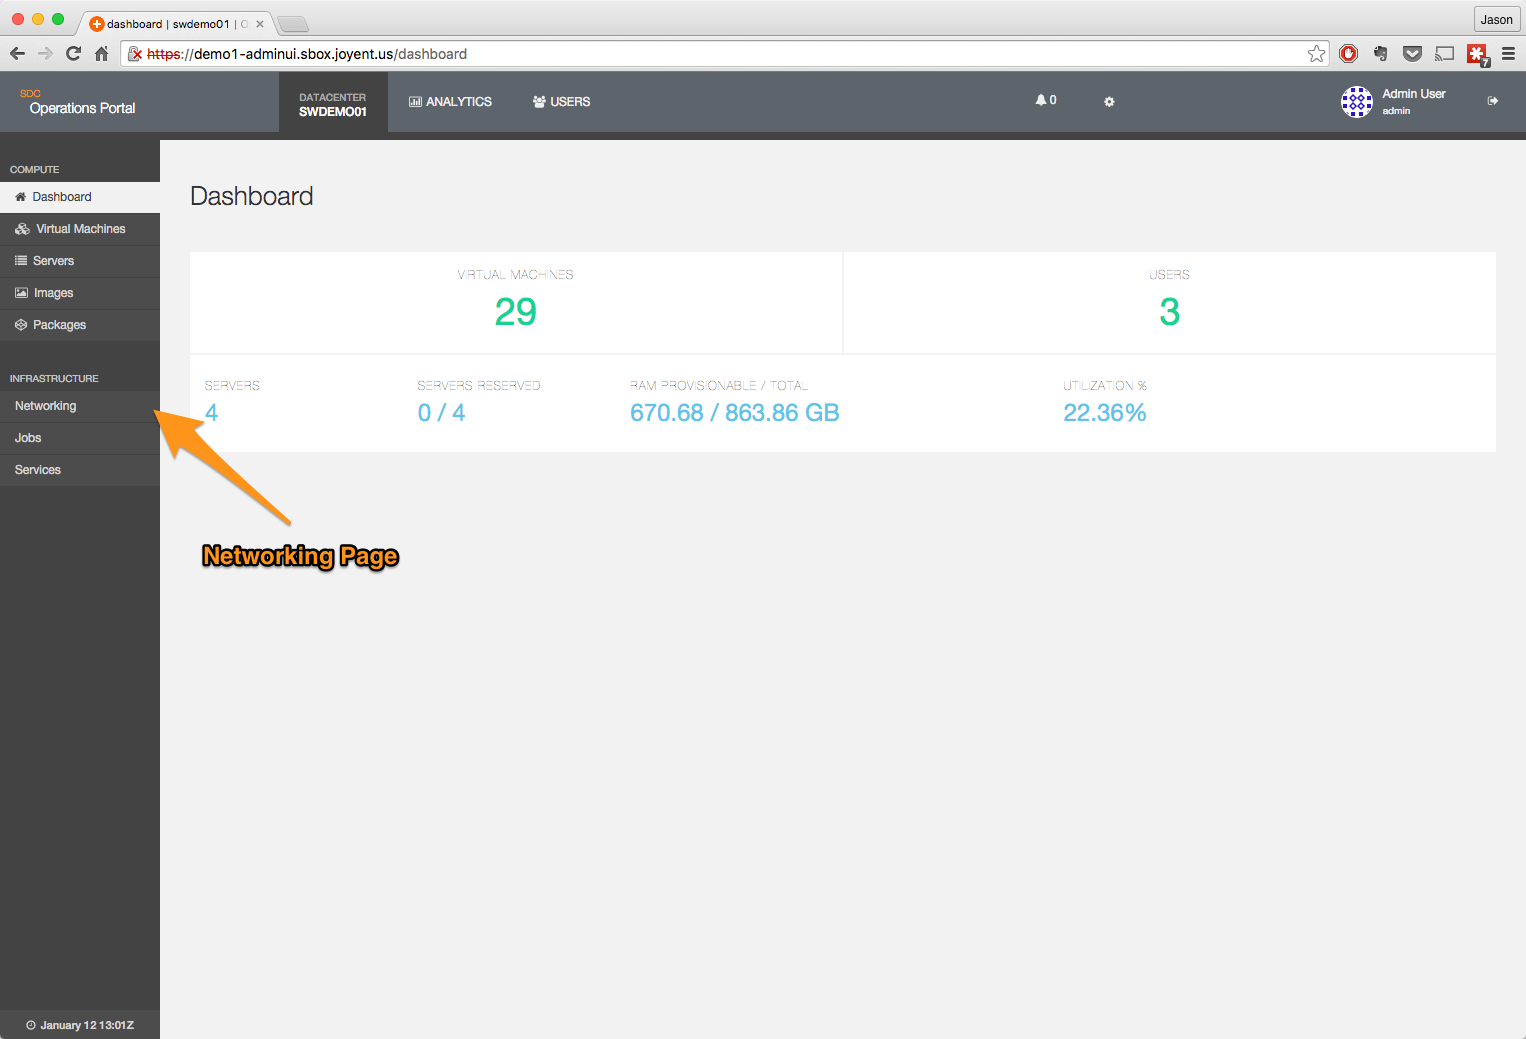
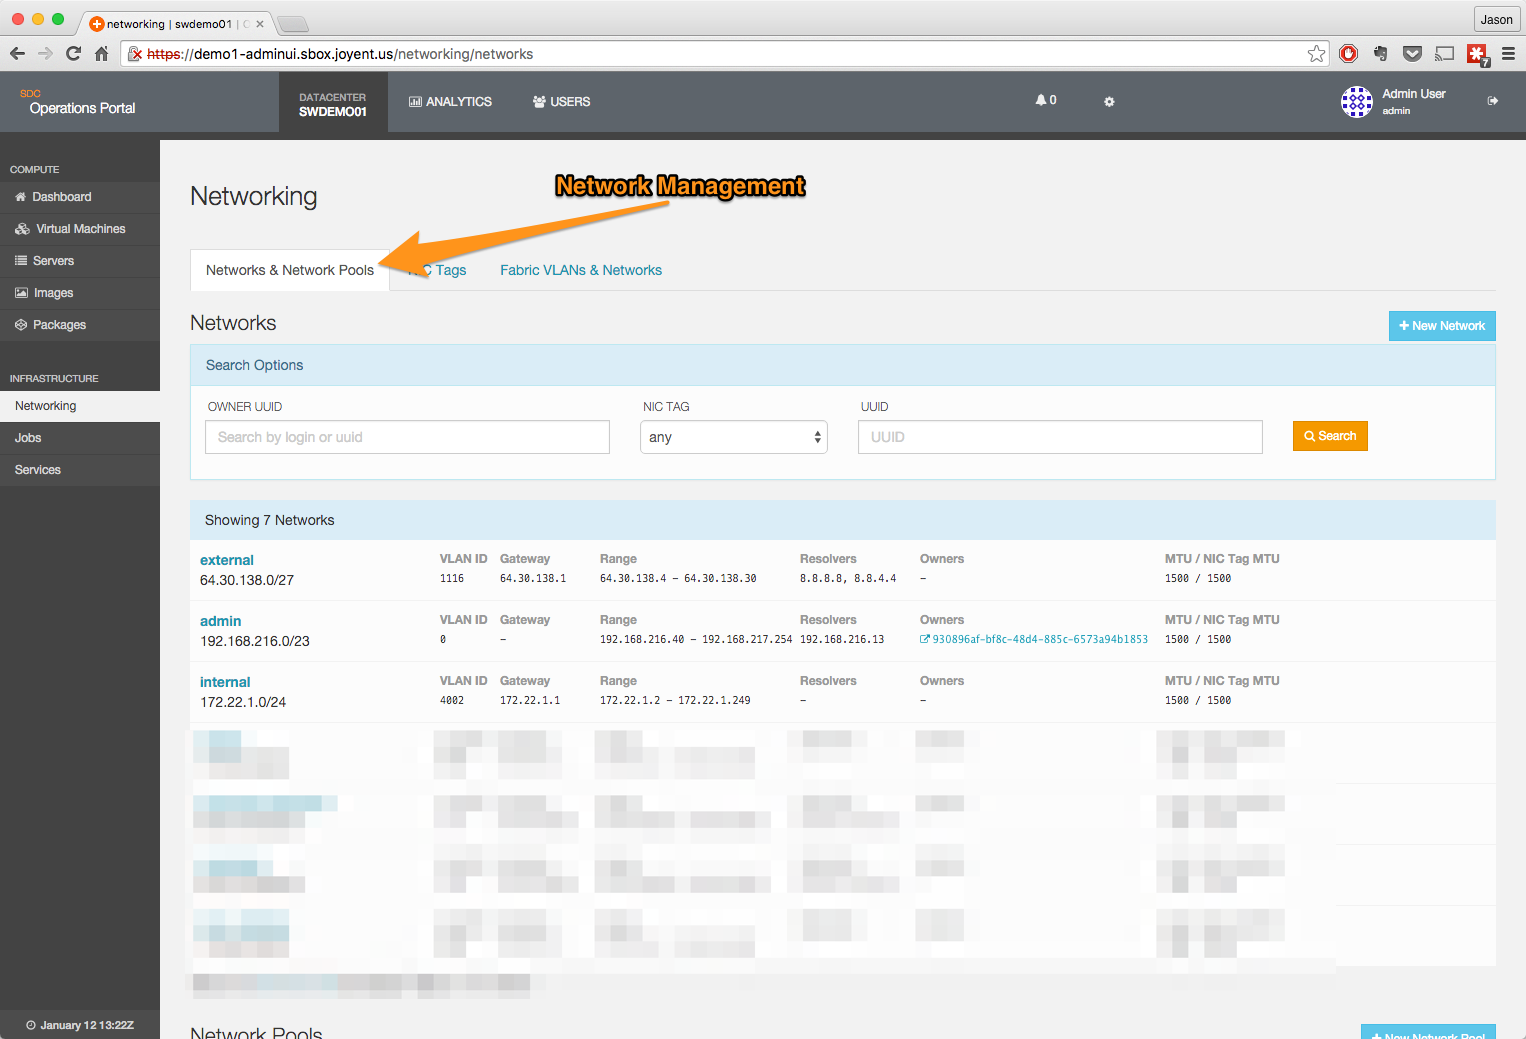
- Navigate to the network page.
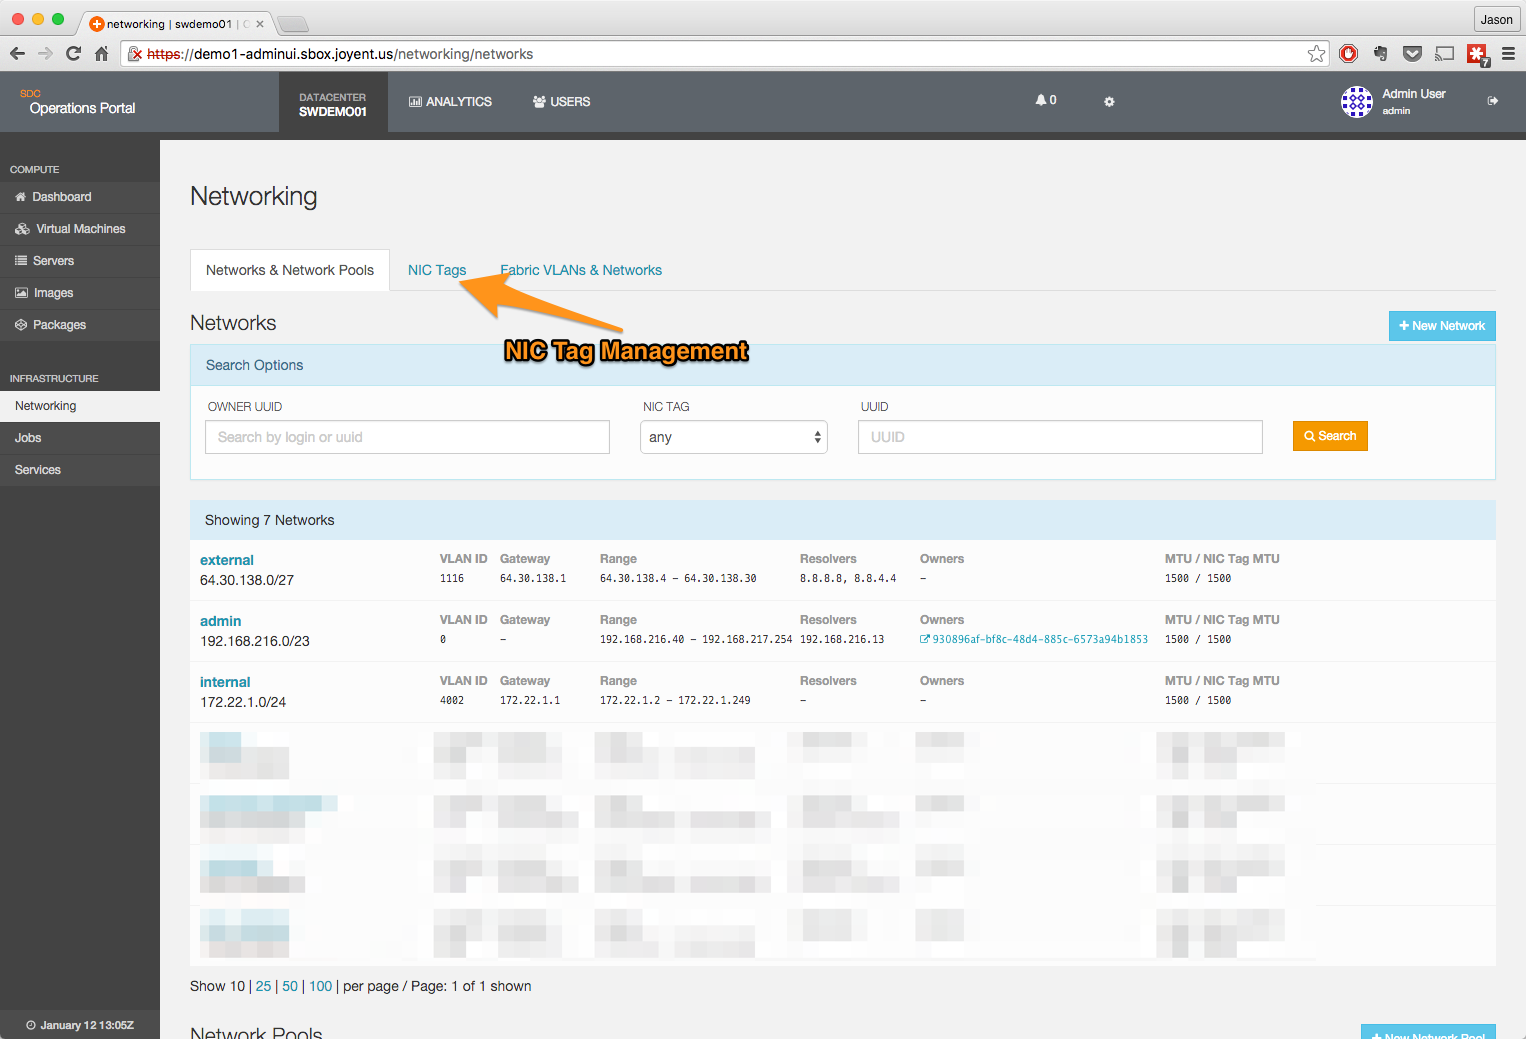
- Click on the NIC Tag heading.
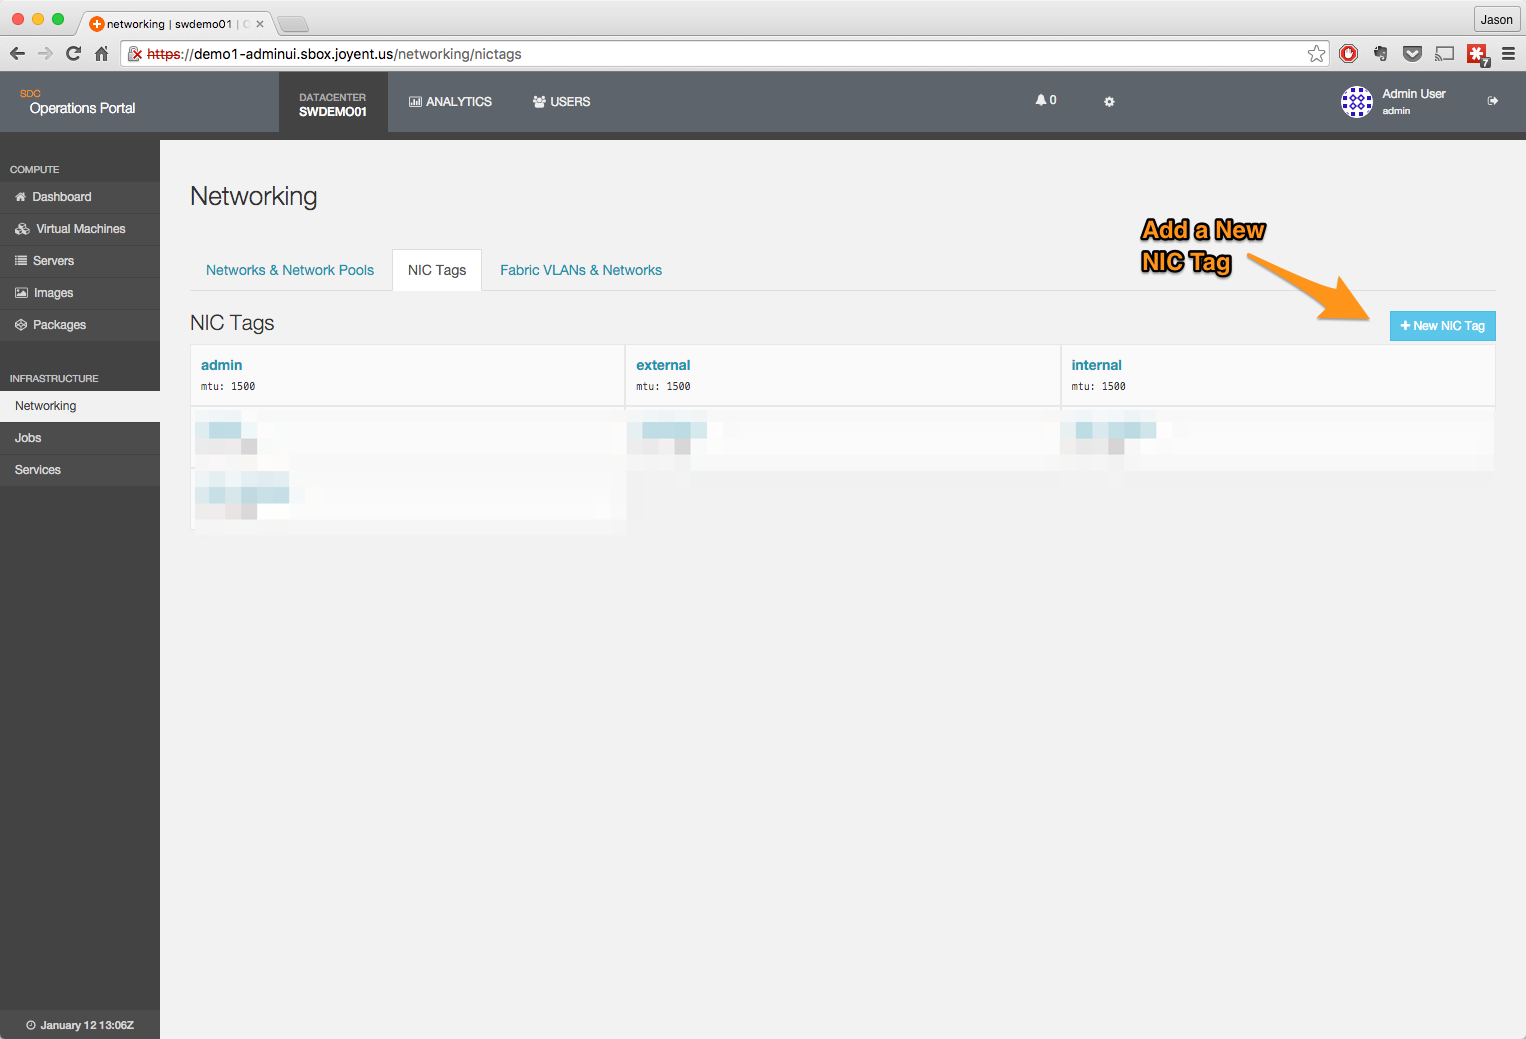
- Click on the + New NIC Tag button.
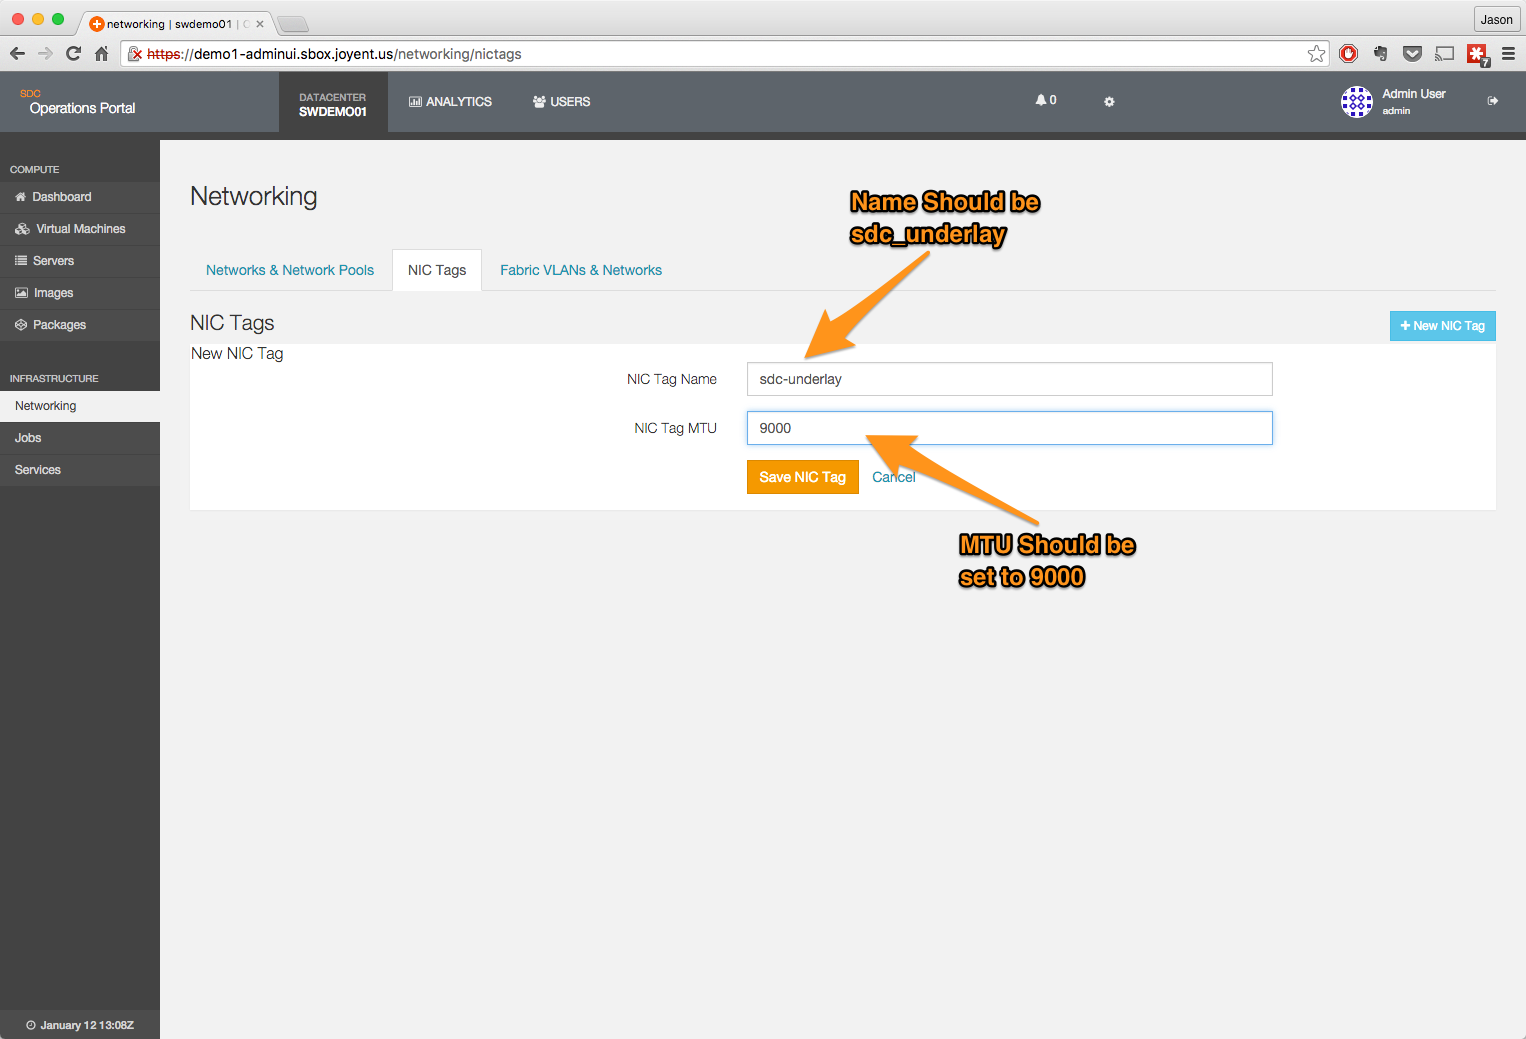
- Create the tag.
- The name should be set to sdc_underlay.
- The NIC MTU should be set to 9000.
Create the underlay network
From the network page, click on the Networks & Network Pools heading.
Add the new network.
- Network name should be sdc_underlay.
- Owner should be set to the admin user.
- Subnet, Gateway, Provision Range, Routes, DNS Resolvers, and VLAN ID should be set to match your network definition.
- MTU should be set to 9000.
Once the information has been entered, click on Save Network and the network will be saved into Triton.
Create external NAT pool
This pool is used to provide addresses to the NAT zone that is used to provide access to the Internet from the fabric networks. It does not need to be an external-facing network, but does need to be able to NAT to the Internet. Additional networks can be added later.
The NAT pool will require one per user per fabric in the data center; the IP address will be allocated and the NAT zone created the first time the user spins up an instance on their fabric network.
- Navigate to the Networks & Network Pools page.
- Click on the + New Network Pool button.
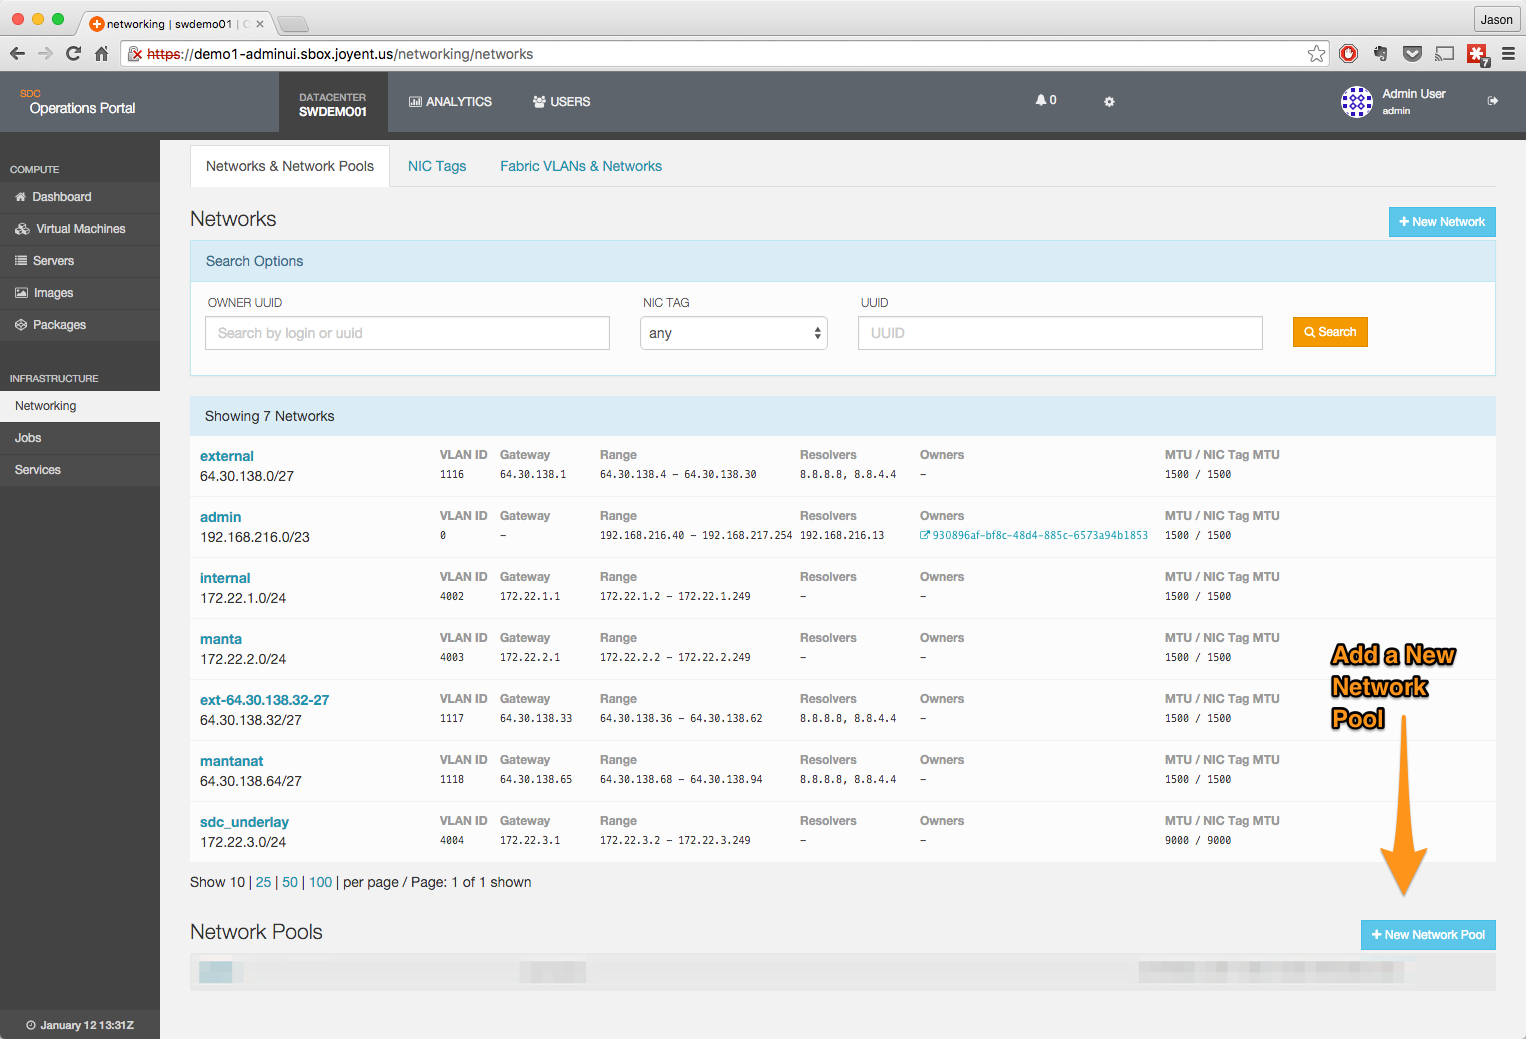
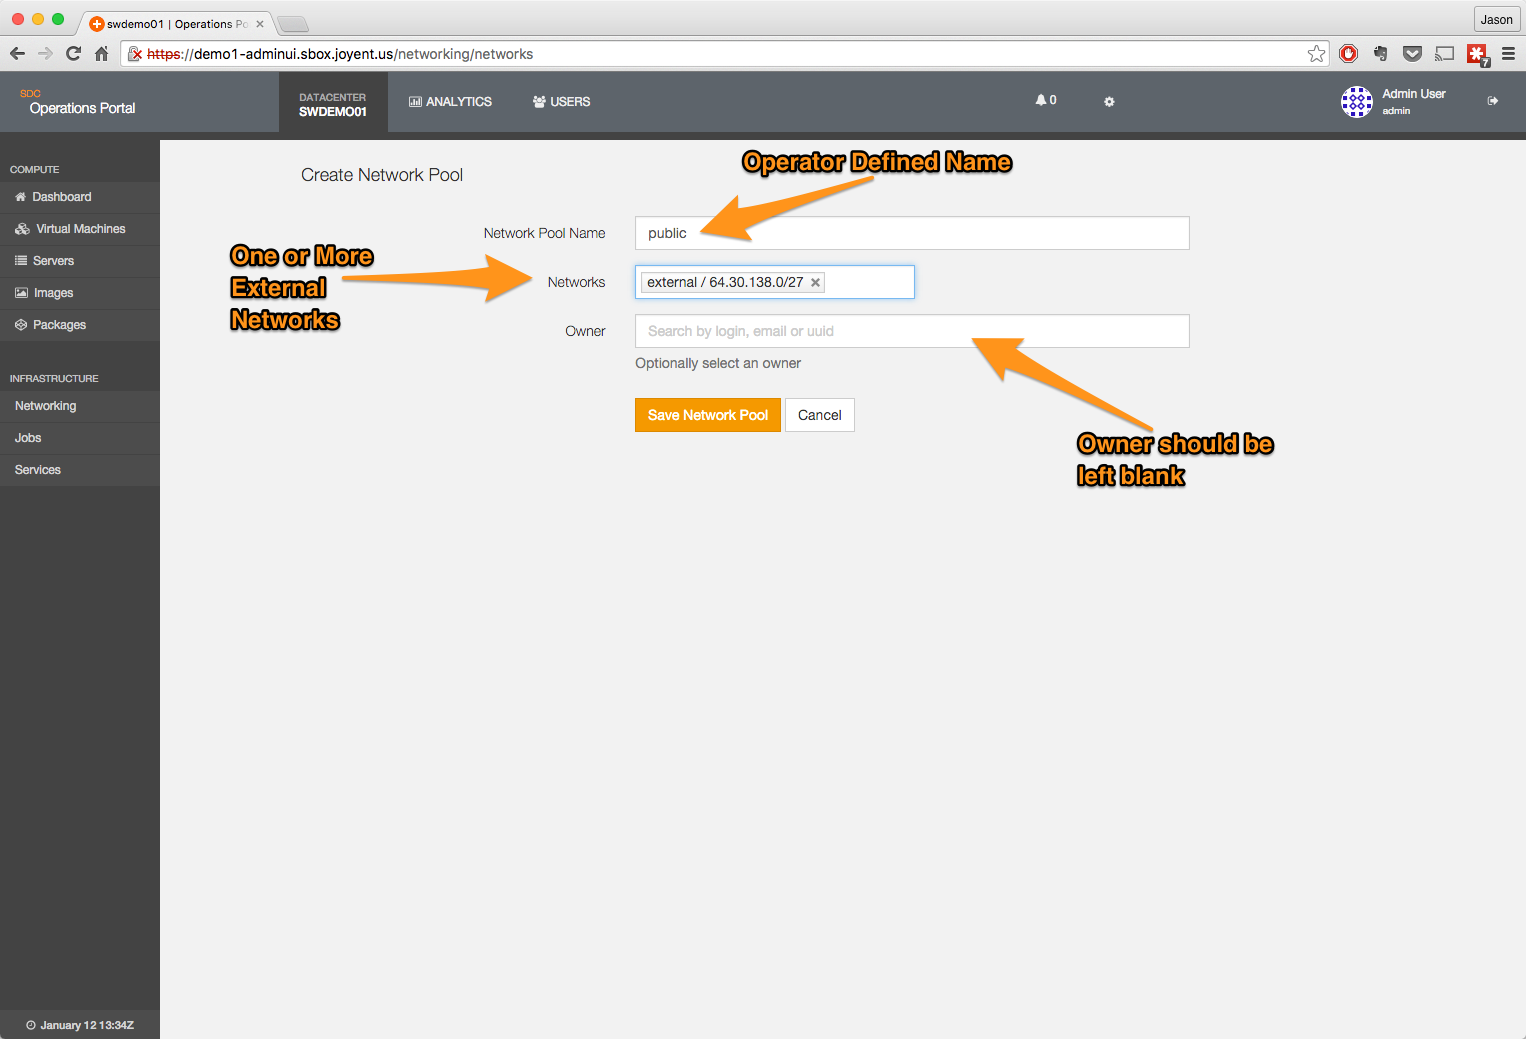
- Fill in the information for the new network pool.
- The name is user-defined, but for our examples we will use public; common convention is to use sdc_nat.
- Add one or more networks; these should be externally facing networks or at least networks that can NAT to the Internet.
- The owner should be left blank; this allows all users in the installation access to the pool.
Create the fabric configuration file
Create the fabric_cfg.json configuration file on the head node.
The only value that needs to be added is the UUID for the NAT Pool.
{
      "default_underlay_mtu": 9000,
      "default_overlay_mtu": 8500,
      "sdc_nat_pool": "NATPOOL-UUID",
      "sdc_underlay_assignment": "manual",
      "sdc_underlay_tag": "sdc_underlay"
}
Add the sdc_underlay tag to compute nodes
The sdc_underlay tag should be added to all compute nodes participating in the fabric networking. Compute nodes without this tag will not be able to host instances with fabric networking enabled.
If you are using link aggregation, you will need to put the nictag on the aggregate.
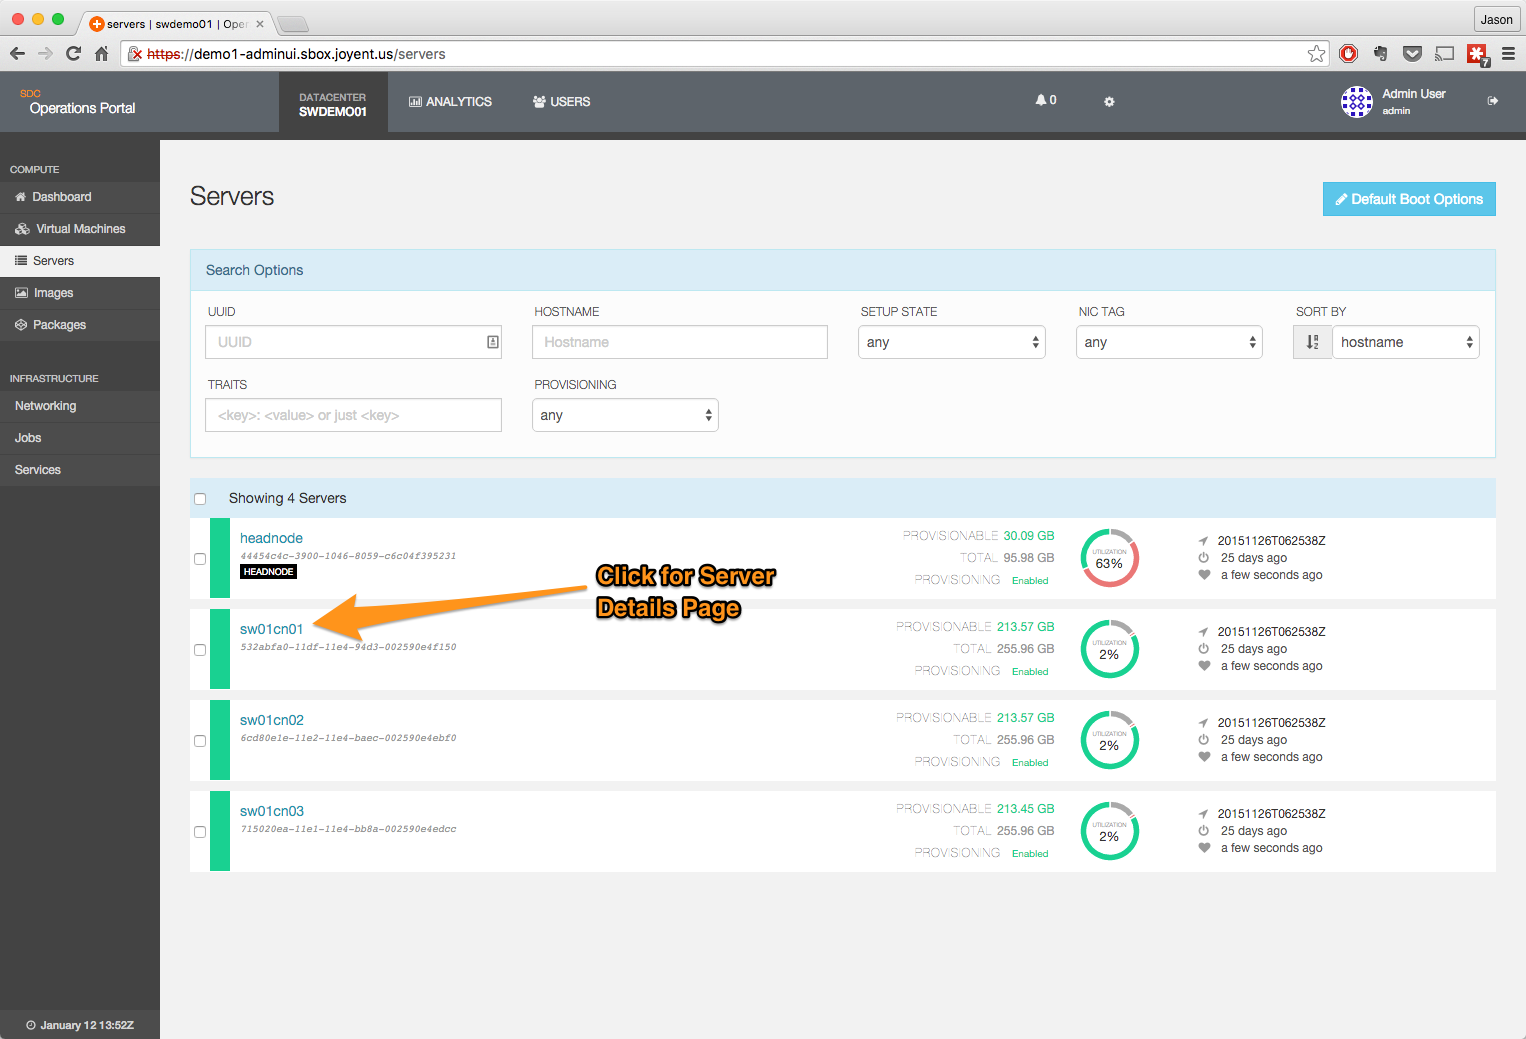
- Navigate to the server page.
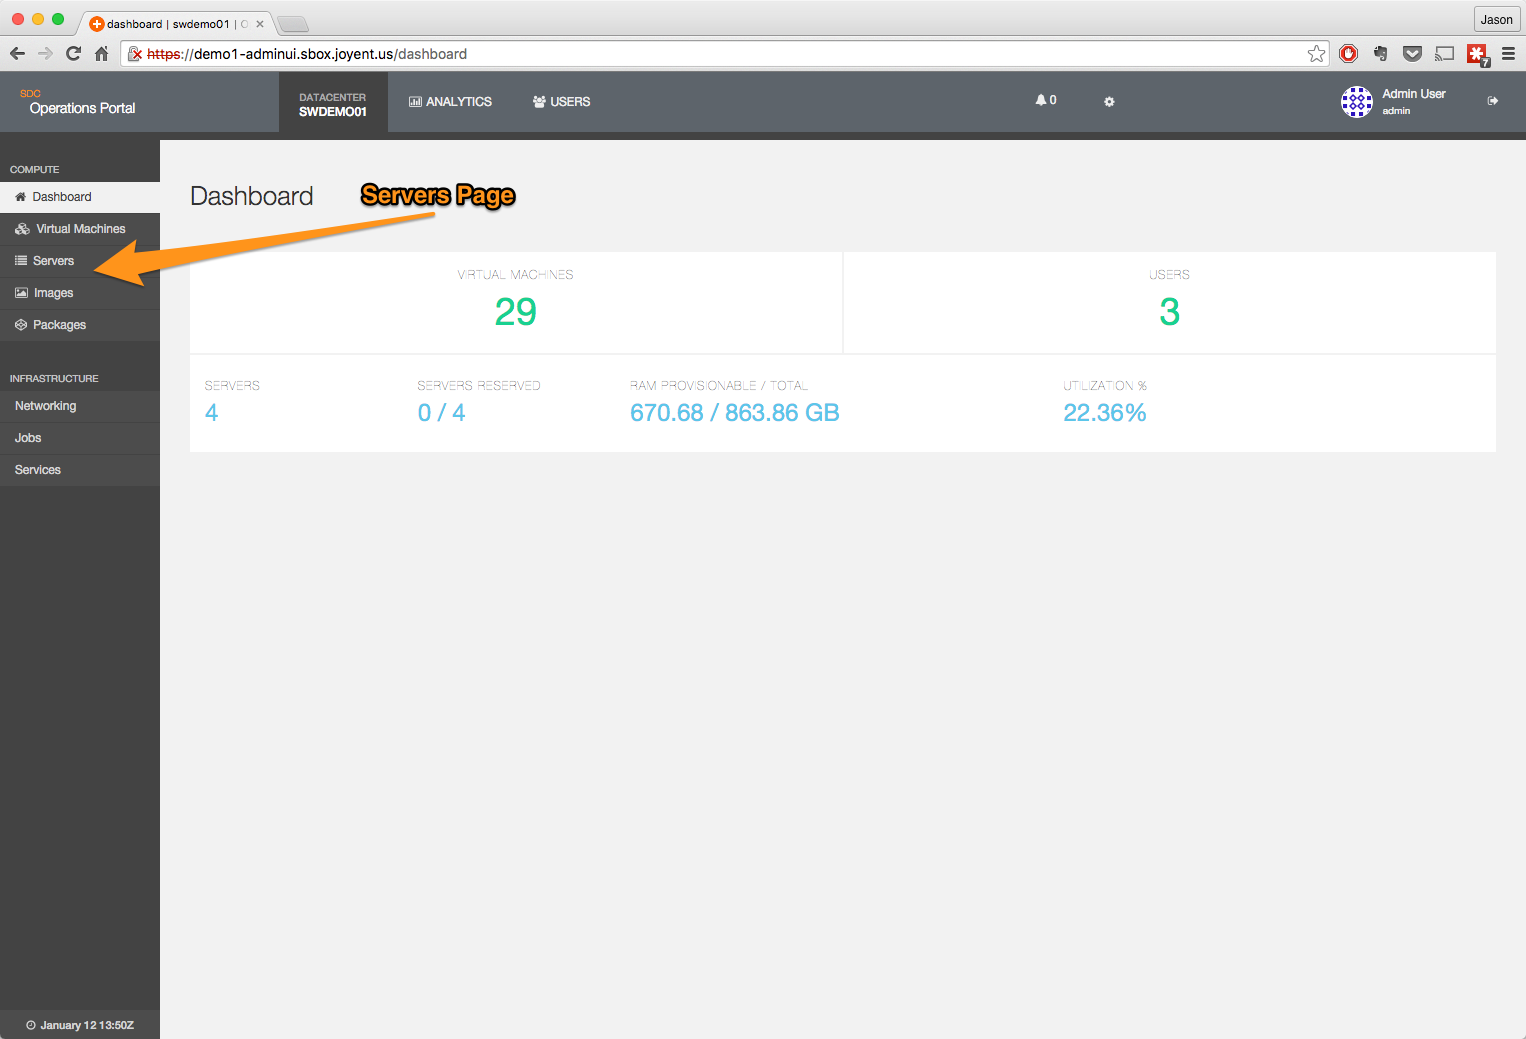
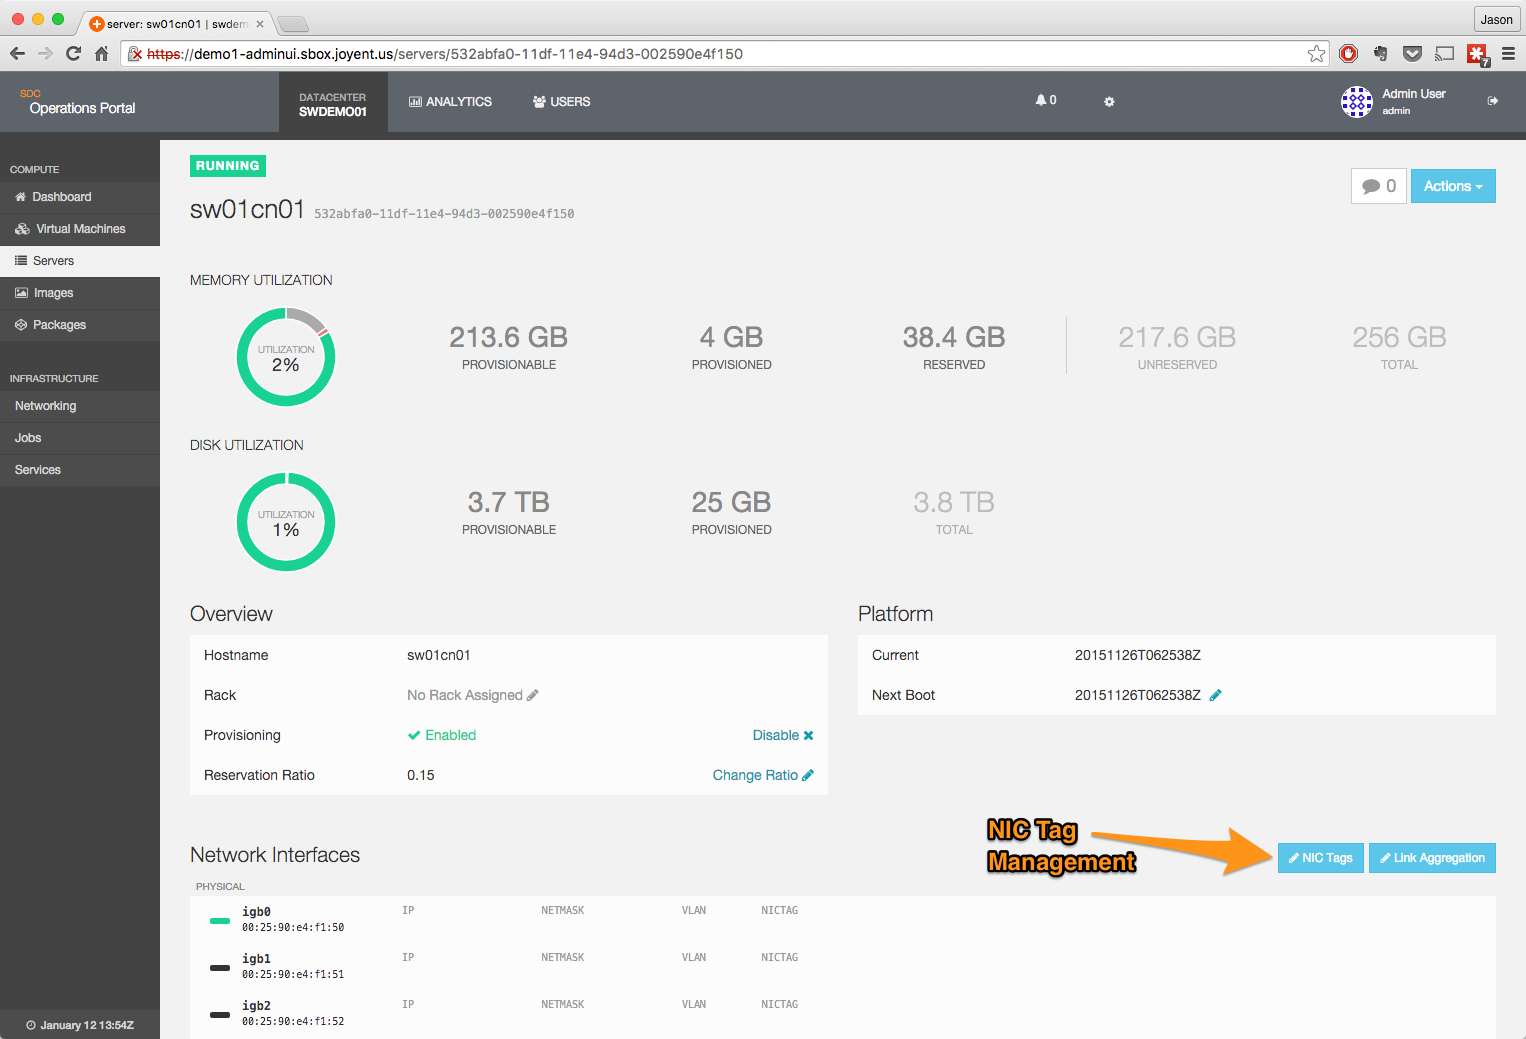
- Click on a server to bring up the details page.
- Click on the NIC Tags edit button.
- Add the NIC Tag to the appropriate interface.
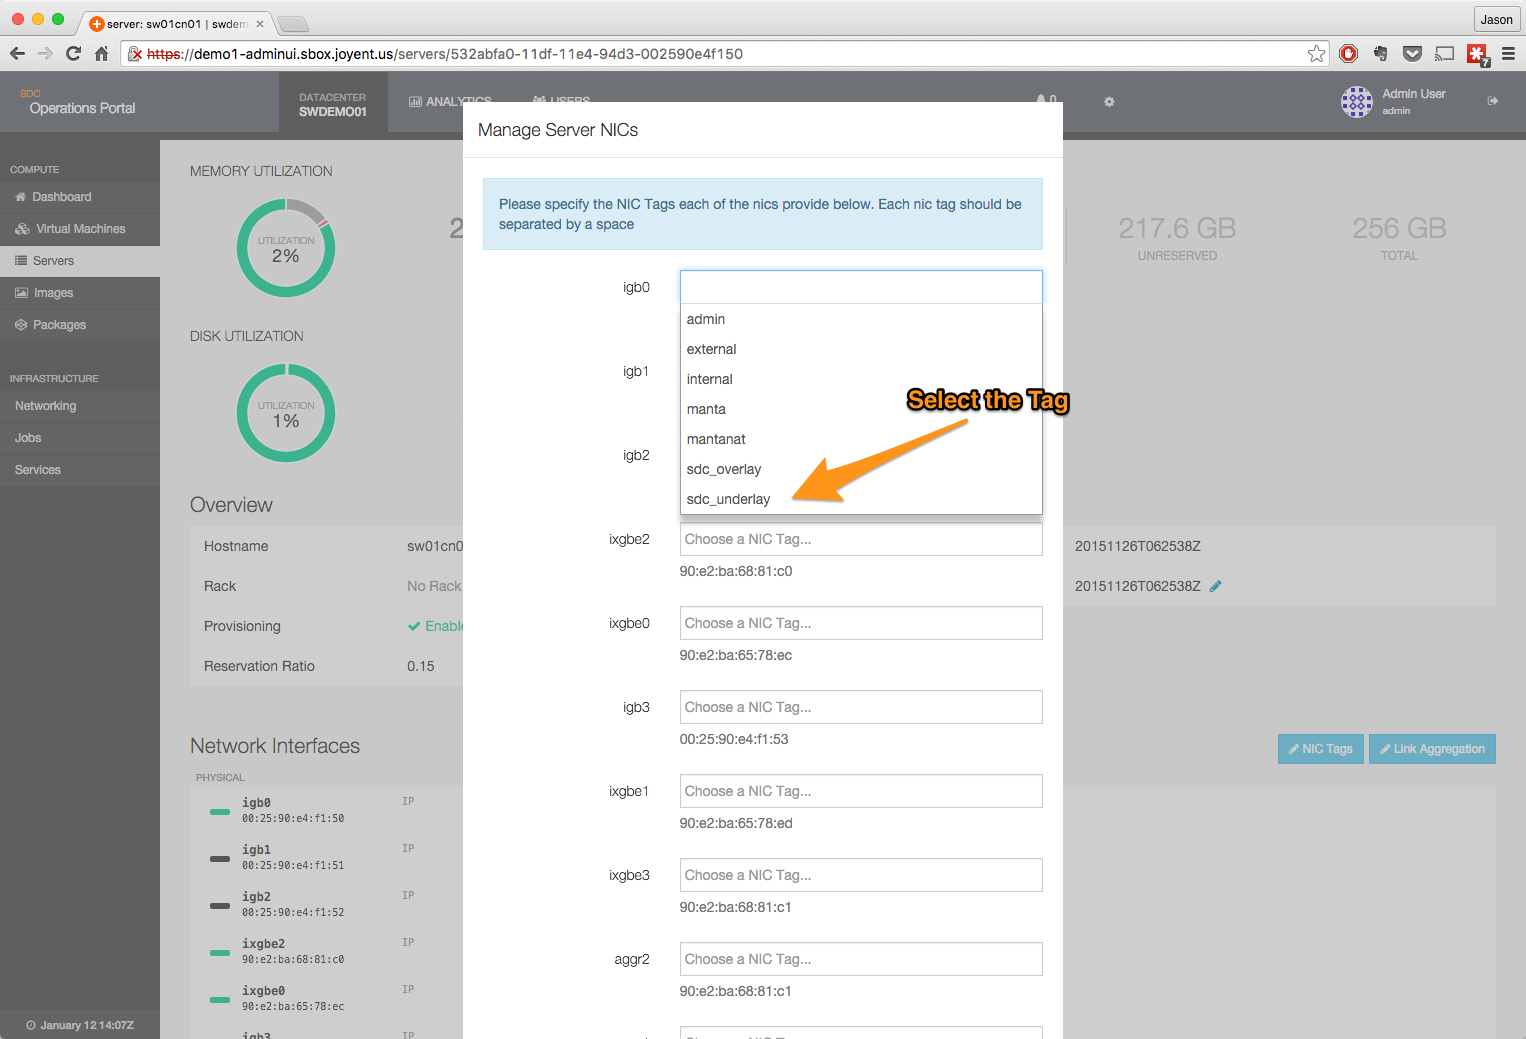
- Once all tags have been added, click to save changes.

This will spawn an update job; when the job is complete you will see the NIC Tags on the interface (or aggregate) you selected. 
Boot up the new or repaired server. Then confirm the server is up and running.
command
The example below assumes the fabric_cfg.json file is in the directory you are running the command from. Adjust as necessary.
headnode# sdcadm post-setup fabrics -c ./fabric_cfg.jsonGet the UUID of the underlay network:
headnode# sdc-napi /networks?name=sdc_underlay | json -H 0.uuidGet the UUID of the compute nodes you are operating on; these all should be tagged with the sdc-underlay nictag:
headnode# sdc-server listThis command will need to be run once for each cloud node that has been tagged with the sdc-underlay NIC tag:
headnode# sdcadm post-setup underlay-nics <UNDERLAY_NETWORK> <CN_UUID>All CN's that are taking part in the VXLan network need to be rebooted; they will not work properly until this is done.
Setup docker
Run the following command to setup the Docker service:
headnode# sdcadm post-setup docker
headnode# sdcadm experimental update dockerlogger
For compute nodes added after the first-time setup, you will need to install the dockerlogger on them by executing:
headnode# sdcadm experimental update dockerlogger --servers ${CN1},${CN2},...Older Docker setup procedure
The Docker setup procedure changed in Triton DataCenter version 20160609. For versions of Triton before 20160609, use this older procedure:
headnode# sdcadm experimental update-docker --servers none
headnode# sdcadm experimental update dockerlogger
Enable docker logging options
With sdc-docker there is now (limited) support for the --log-driver and --log-opts functions. Important differences include:
sdc-dockerdoes not support thejournalddriver at all- The
--log-opt syslog-addresscan only be used with the tcp/udp format. Theunix://pathformat is unsupported as that expects to write to arbitrary host locations. - The
syslog-addressoption is required when using the syslog log-driver - The
fluentd-addressoption is required when using the fluentd log-driver - When using any log drivers other than
json-fileandnone, additional processes will run in your container to handle the logging. All hosts specified will be resolved from the container, which allows logging on a fabric network which may not be exposed elsewhere.
The platform image in use on a compute node must support a given log driver before it can be used. Specifying a log driver that is not supported by a compute node that you are provisioning to will result in one of the following:
- The driver will be ignored completely (on older platforms).
- The VM will fail to boot after being created.
- The driver's options will be ignored (eg. max-file, max-size on json-file).
The enabledLogDrivers SAPI metadata option has been provided to enable control over the allowed list of log drivers that can be specified. This can be adjusted by the operator as compute nodes are moved to newer platforms that provide more logging options.
For example, to enable the json-file and none drivers the following should be run on the head node.
headnode# sdc-sapi /services/$(sdc-sapi /services?name=docker \
| json -Ha uuid) -X PUT -d \
'{ "metadata": { "ENABLED_LOG_DRIVERS": "json-file,none" } }'
To verify the setting run the following.
headnode# sdc-sapi /services/$(sdc-sapi /services?name=docker \
    | json -Ha uuid)  | json -H metadata.ENABLED_LOG_DRIVERS
Check Docker endpoint
Determine the Docker endpoint
headnode# sdc-vmadm ips -p $(sdc-vmname docker)To check if the endpoint is set, run:
    headnode# sapiadm get $(sdc-sapi /services?name=cloudapi \
| json -H 0.uuid) | json -Hag metadata.CLOUDAPI_SERVICES
If this does not return your docker_endpoint you can set it via the following procedure:
headnode# docker_endpoint="tcp://XX.XX.XX.XX:2376"
headnode# cloudapi_svc=$(sdc-sapi /services?name=cloudapi | json -H 0.uuid)
headnode# sapiadm get $cloudapi_svc \
    | json -e "
        svcs = JSON.parse(this.metadata.CLOUDAPI_SERVICES || '{}');
        svcs.docker = '$docker_endpoint';
        this.update = {metadata: {CLOUDAPI_SERVICES: JSON.stringify(svcs)}};
        " update \
    | sapiadm update $cloudapi_svc
The Docker endpoint uses a self-signed certificate by default. If you wish to use a certificate please see adding SSL certificates to endpoints for instructions on how to add a certificate.
Enable Volumes
Before you can enable volumes, you first need to setup fabric networks.
Having fabric network support already configured, enabling volumes is straighforward. This will download the volapi image and create the volapi zone on the headnode.
sdcadm post-setup volapiEnable volume support in CloudAPI and Docker. This will configure each service accordingly. Note: this will cause the service to restart.
sdcadm experimental nfs-volumes cloudapi
sdcadm experimental nfs-volumes docker
Enable automount support for continers. Note: automount support is not available for HVM instances. HVM instances should instead use cloud-init, or other config management system. As with the previous commands, this will cause the services to restart.
sdcadm experimental nfs-volumes cloudapi-automount
sdcadm experimental nfs-volumes docker-automount