Configuring and managing networks
Instructions on creating, configuring, and managing logical networks and logical network pools in Triton DataCenter
Note: To view a larger version of any image, please click on it and a full sized version will open in a new window.
What is a logical network?
Logical networks in Triton model core network configurations to enable Triton to define Virtual Network Interfaces and IP addresses for instances. Logical networks define the following:
- Network segment
- Gateway
- Provisionable IP Range
- VLAN id (use 0 for untagged VLANs)
- DNS resolvers
- Associated NIC Tag
Logical networks are associated with physical interfaces through the use of NIC tags. NIC tags are applied to a physical interface on a compute node and to logical networks. When an instance is provisioned the Virtual NICs are linked to the physical NIC based on the NIC tag. To learn more about managing NIC tags, please see NIC Tags
By default, there are three logical networks created during setup:
- admin network: used for communication and management between the head node and a compute node.
- external network: allows instances on a compute node to connect to the Internet.
- underlay network: allows instances on a compute node to participate in a fabric network.
For more details on the admin, underlay, and external networks, see installing Triton.
Creating a new network
-
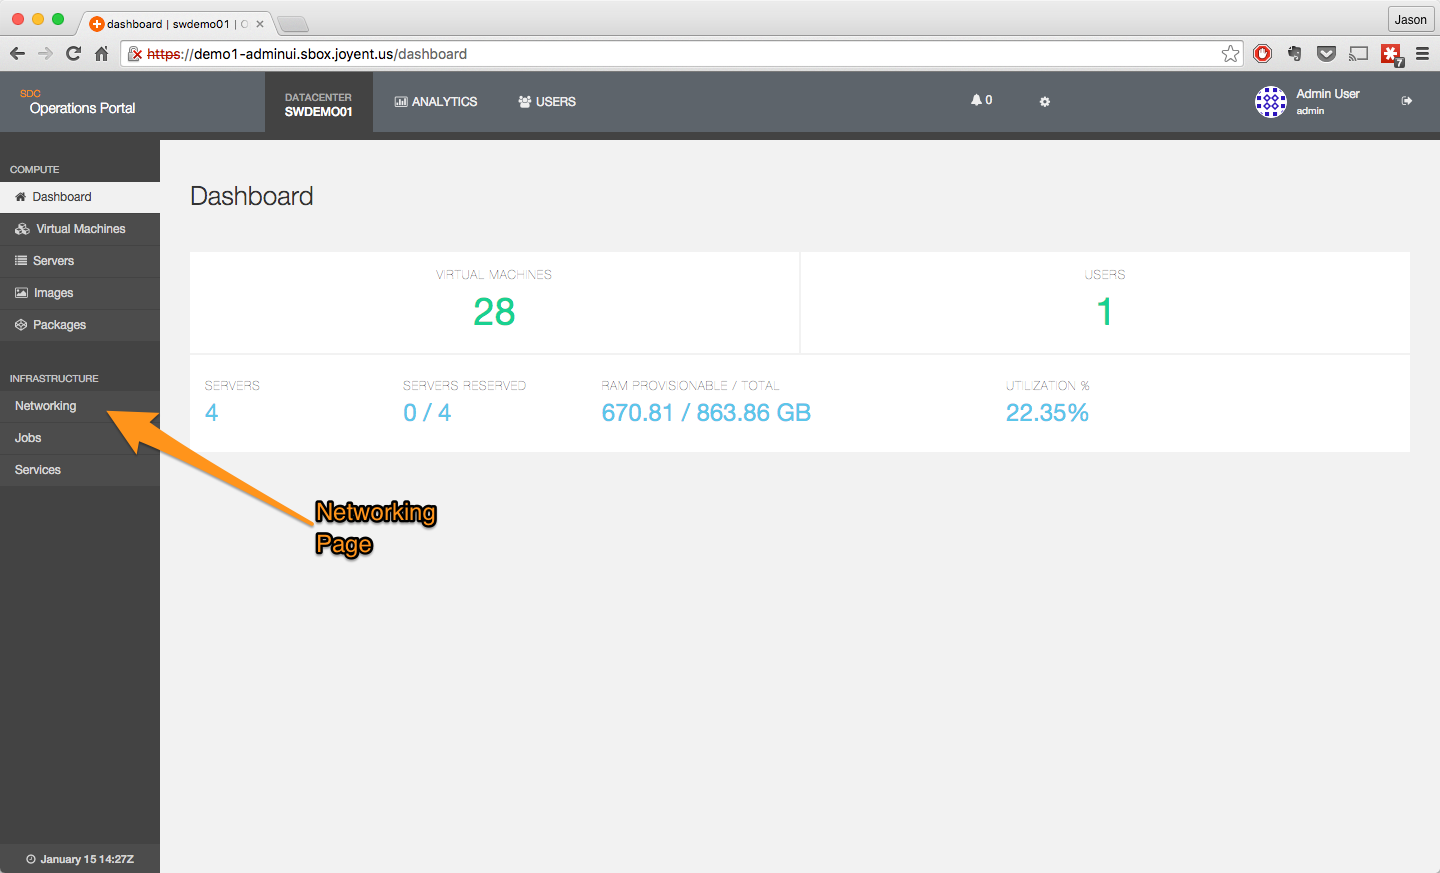
To create a new network in the Operations Portal, login and navigate to the Networking page. This is done by clicking on the Networking text on the sidebar.
-
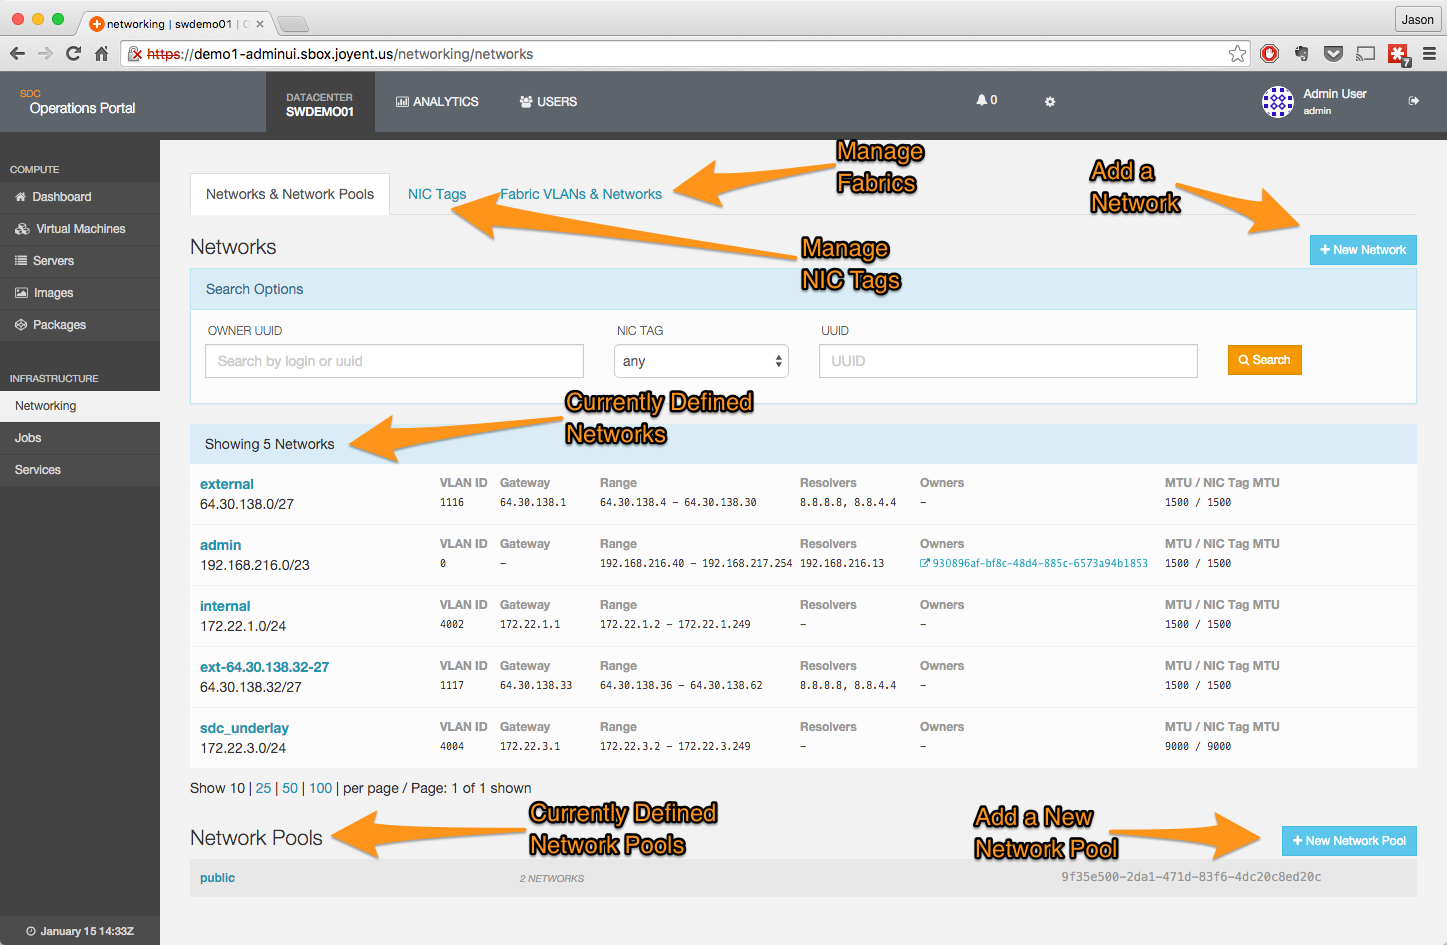
Clicking on that will bring up the main networking page:
-
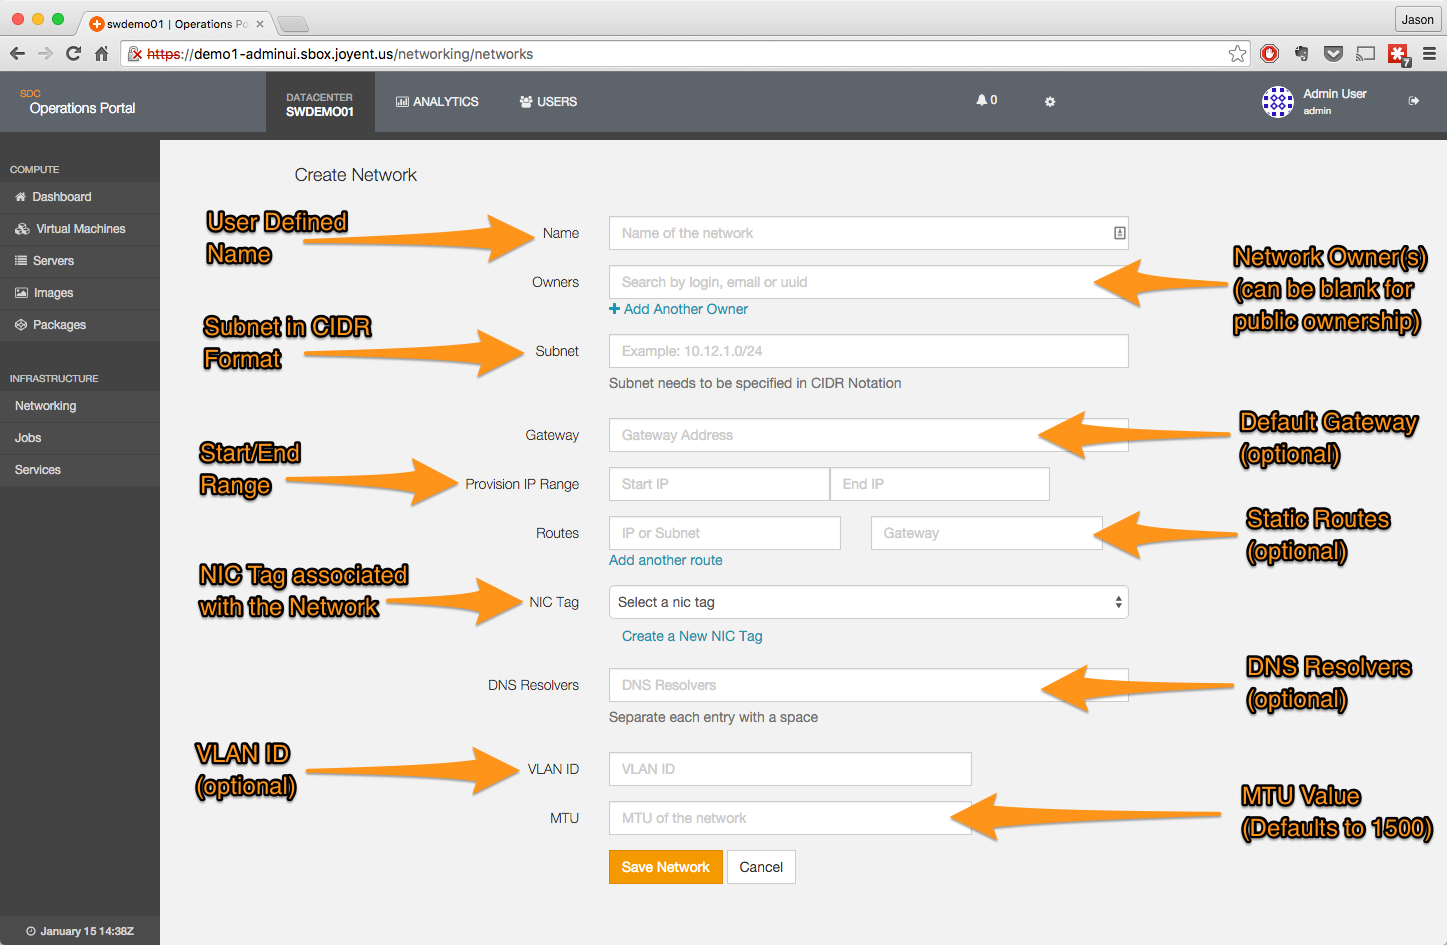
From there, click on the + New Network button which will bring up the detail page for the network being created.
-
Enter the details, and then click on the Save Network button; if there are any errors, the interface will issue an error message and outline the offending data in red. If this happens, correct the error and re-save the data.
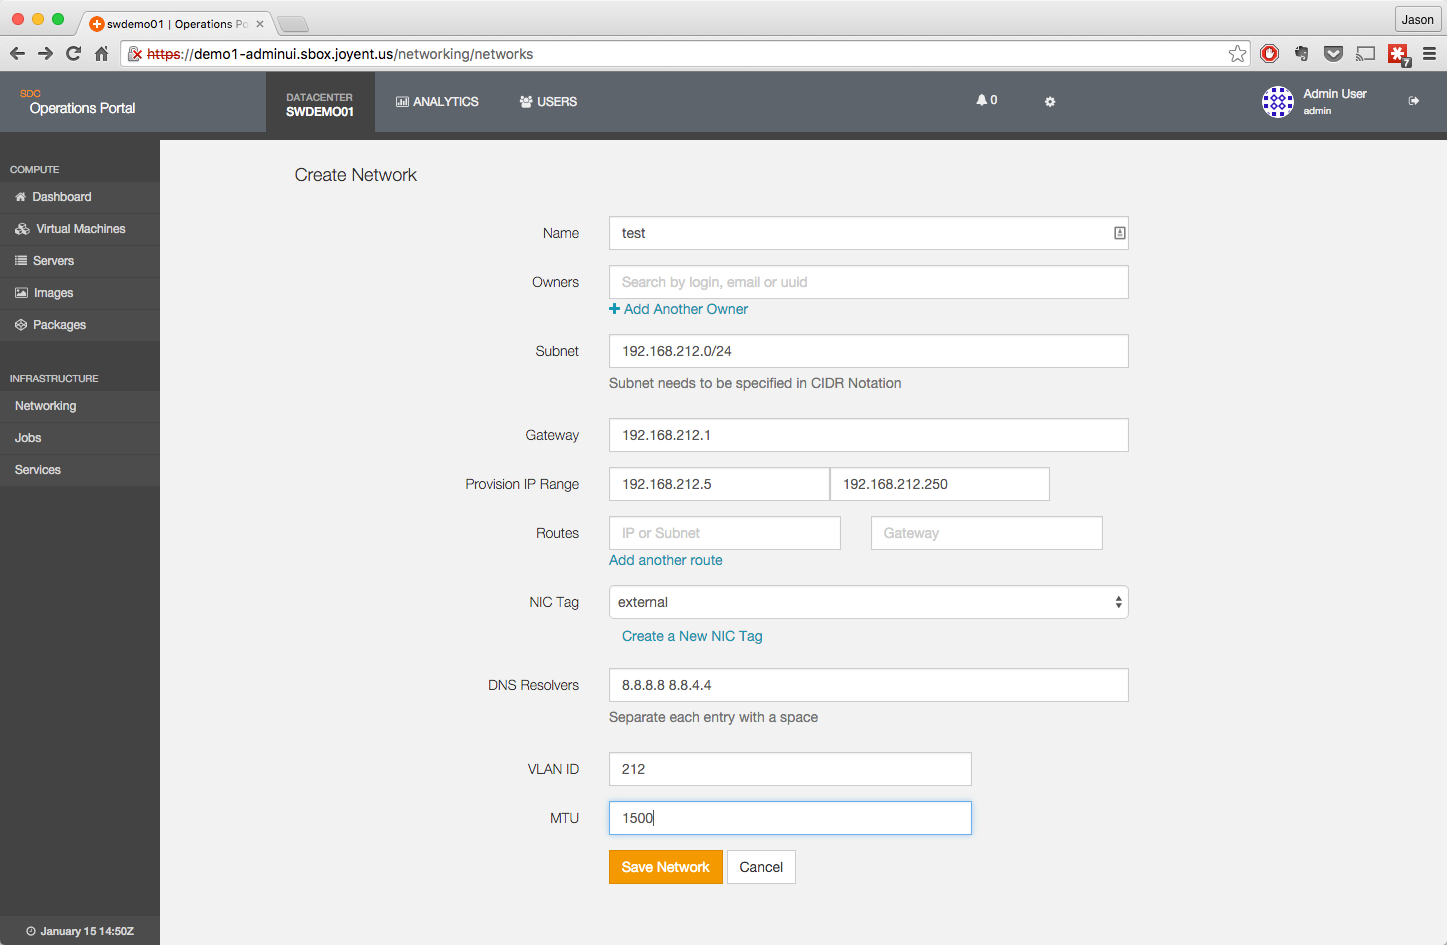
-
The new network has been created, and will be visible in the Networking page.
-
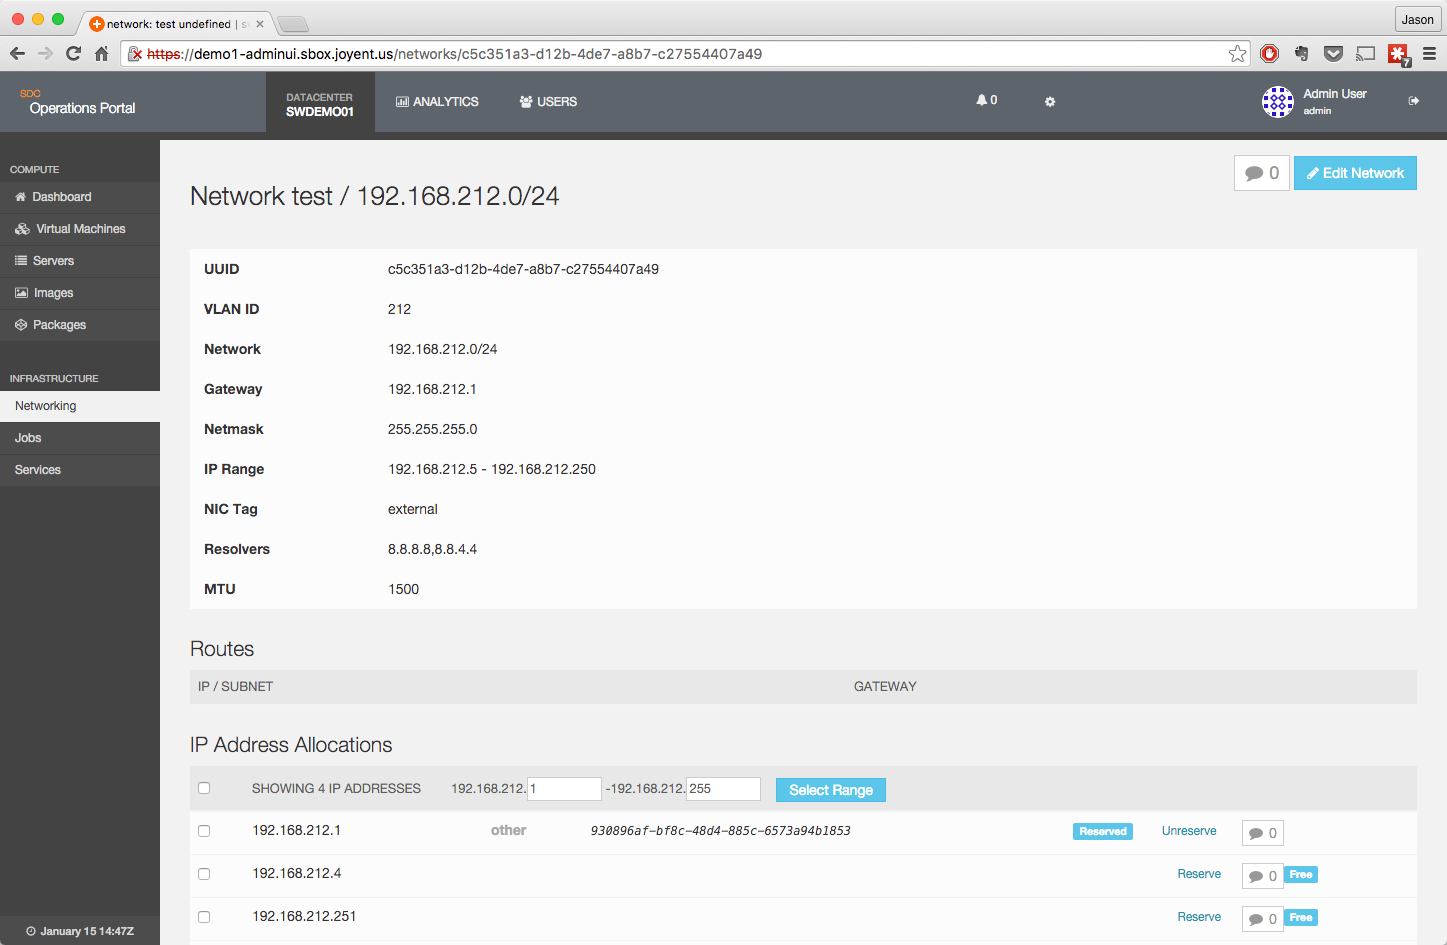
Clicking on the network name will show the detail page for that network.
Watch the Video to Learn How to Use the Triton Network Command
Notes:
- Make sure when you add the Subnet information, that it is in CIDR format (i.e. 192.168.212.0/24).
- A new NIC Tag can be created, should this new network require one. Keep in mind that logical networks can only be associated with one NIC tag. Please see NIC tags for more information about managing nic_tags.
- VLAN ID translates to the NIC tag used on tagged VLANs. If the VLAN is untagged use zero or blank.
- These steps only address networking from the point of Triton and does not cover the configuration of networking equipment to support any VLANs, gateways, etc.
- Data objects for IP Addresses are not pre-allocated in Triton. That is, there will be no entries in the Operations Portal for a network until they have either been used by a provision or pre-allocated via sdc-napi.
Listing networks
-
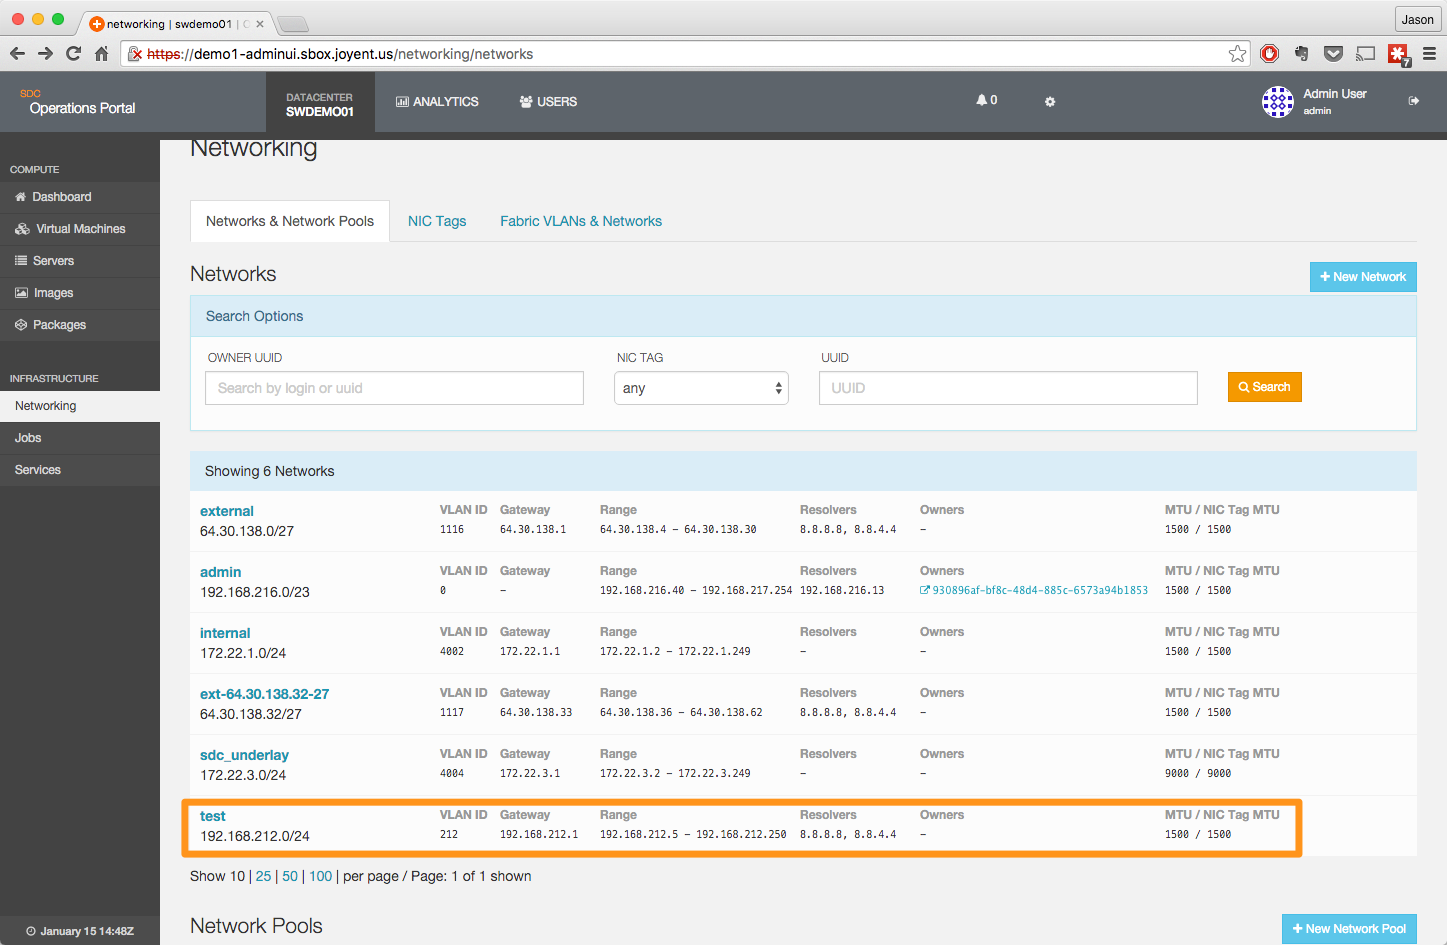
To list all available networks from the Operations Portal, login to the Operations Portal dashboard and click on the "Networking" menu option on the sidebar.

-
This will take you to the Networking page, which will list all available networks and network pools currently defined in the installation. Clicking on the name of a network, such as the test network shown here will bring up the detail page.

-
Detail page for the test network.

Updating a Network
-
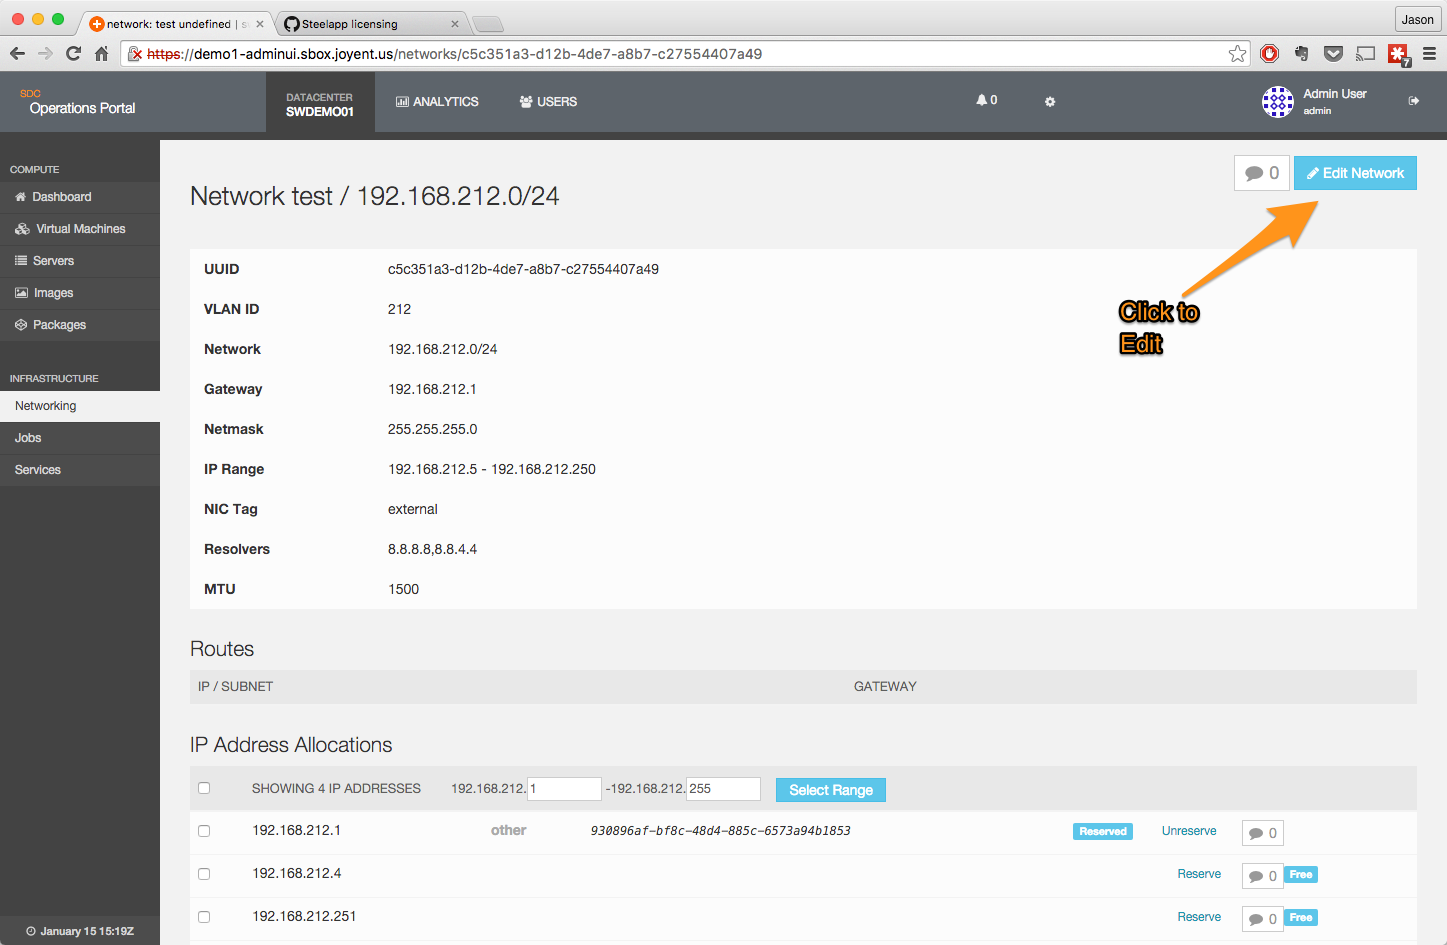
To update an existing network, click on the name of the network you wish to update from the list that's provided on the Networking page (in the image example below, we'll be updating the test network). Clicking on the network name brings up the detail page for that network, where you can access the edit functions.
-
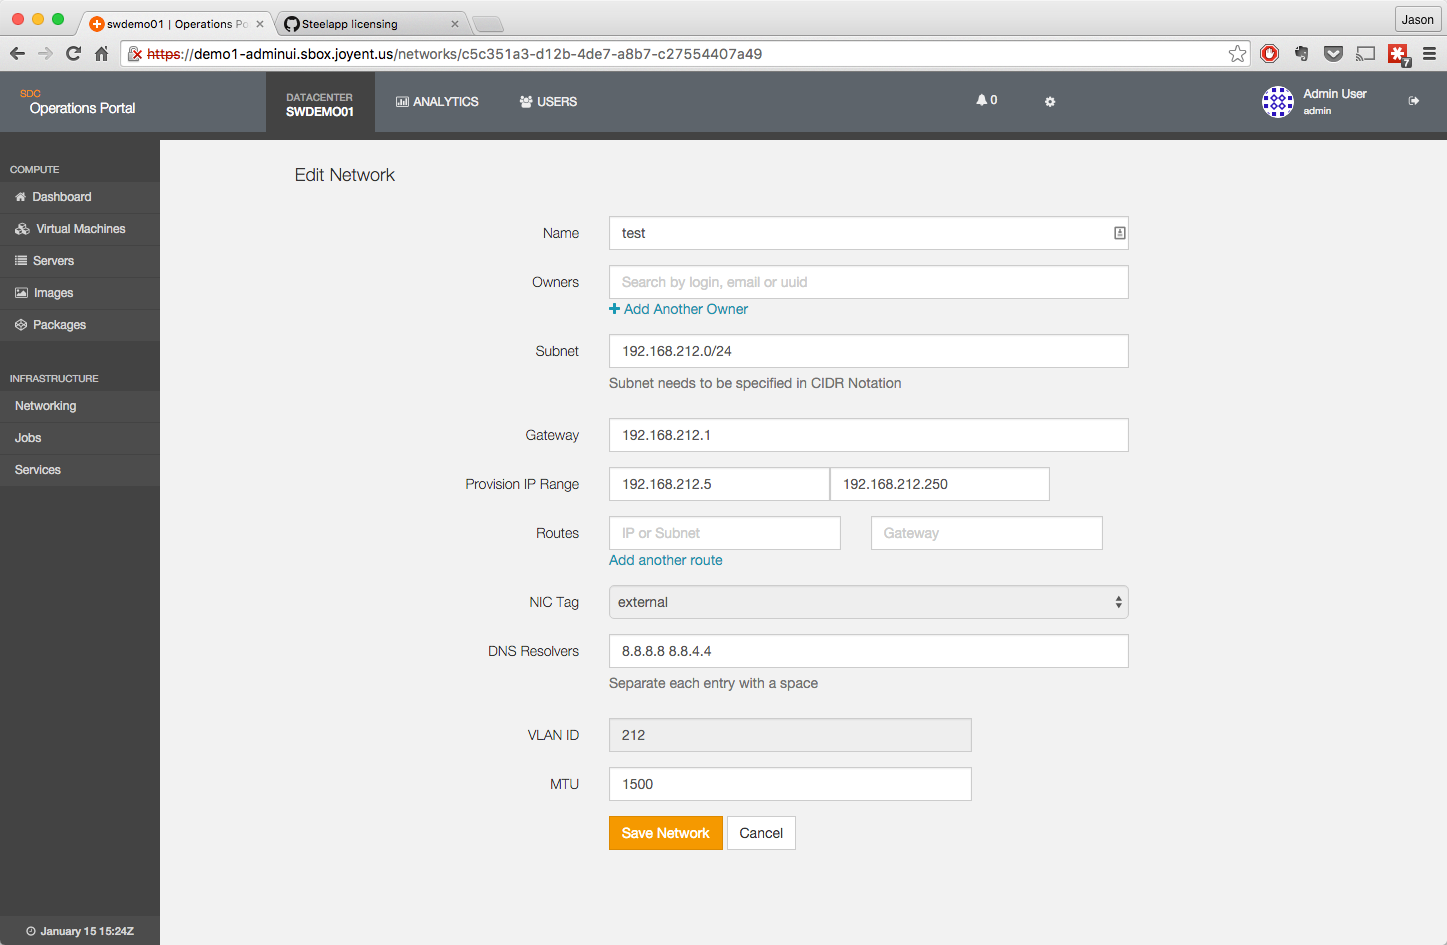
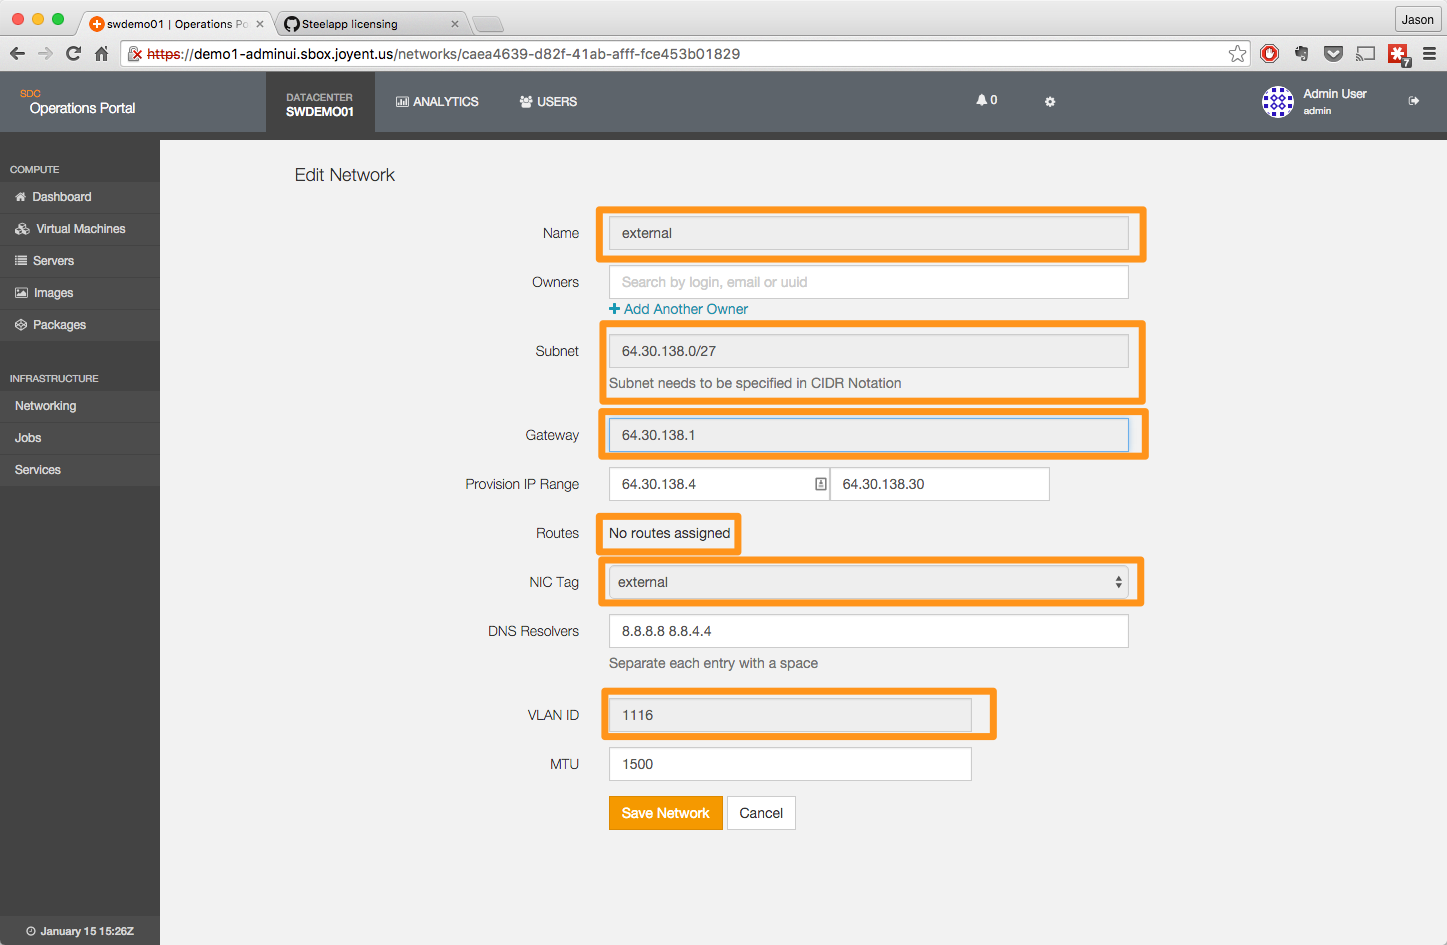
Clicking on Edit Network opens a new page with the details of the network pre-populated in the fields. Changes can be made at this point, and then the changes saved.
-
In the case of a network that has existing instances provisioned, certain changes are not allowed, specifically:
- Network Name
- Subnet
- Gateway
- Routes
- NIC Tag
- VLAN ID
-
The fields above will be greyed out on the edit interface.
Deleting networks
-
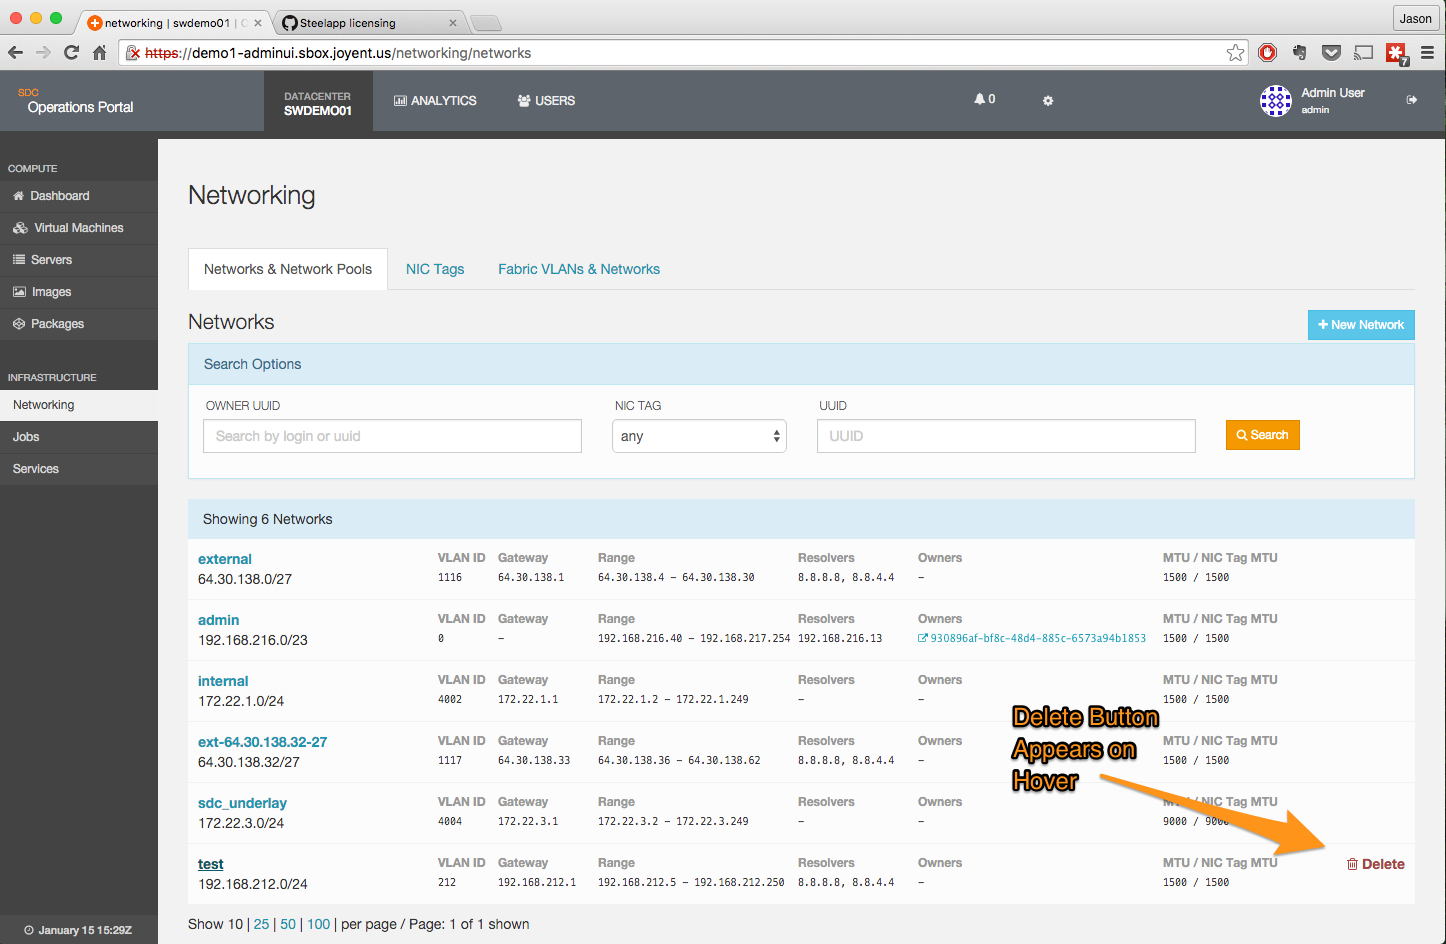
To delete a network from the Operations Portal, navigate to the Networking page and hover the mouse anywhere over a network. The word Delete and the trash can icon will appear in red.
-
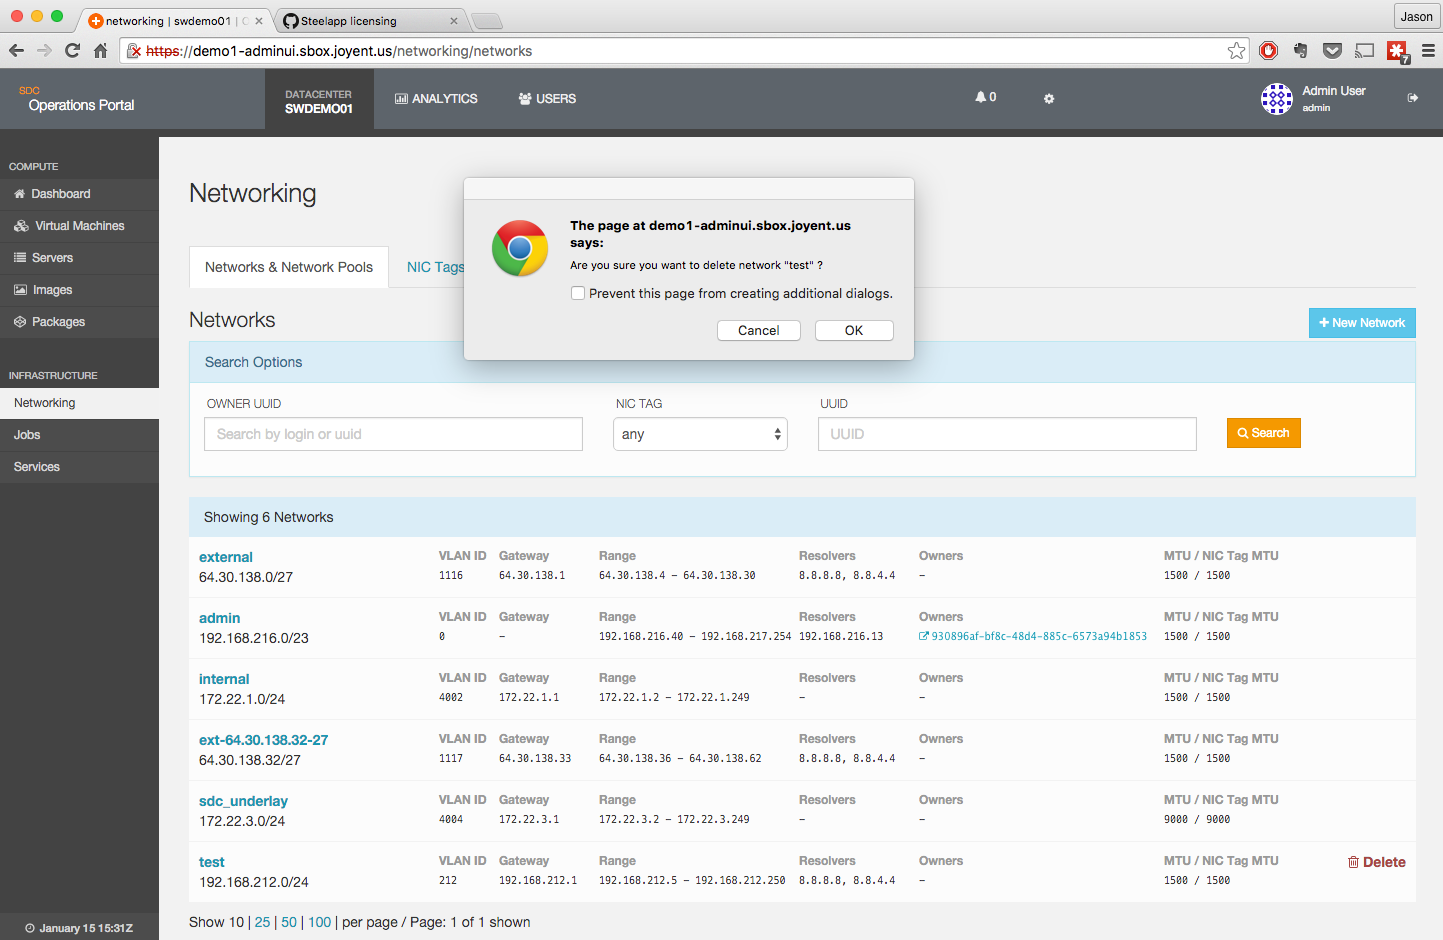
Clicking on the delete button will bring up a confirmation dialog.
-
Once the dialog is confirmed, the network will be deleted and the main network page will be reloaded.
-
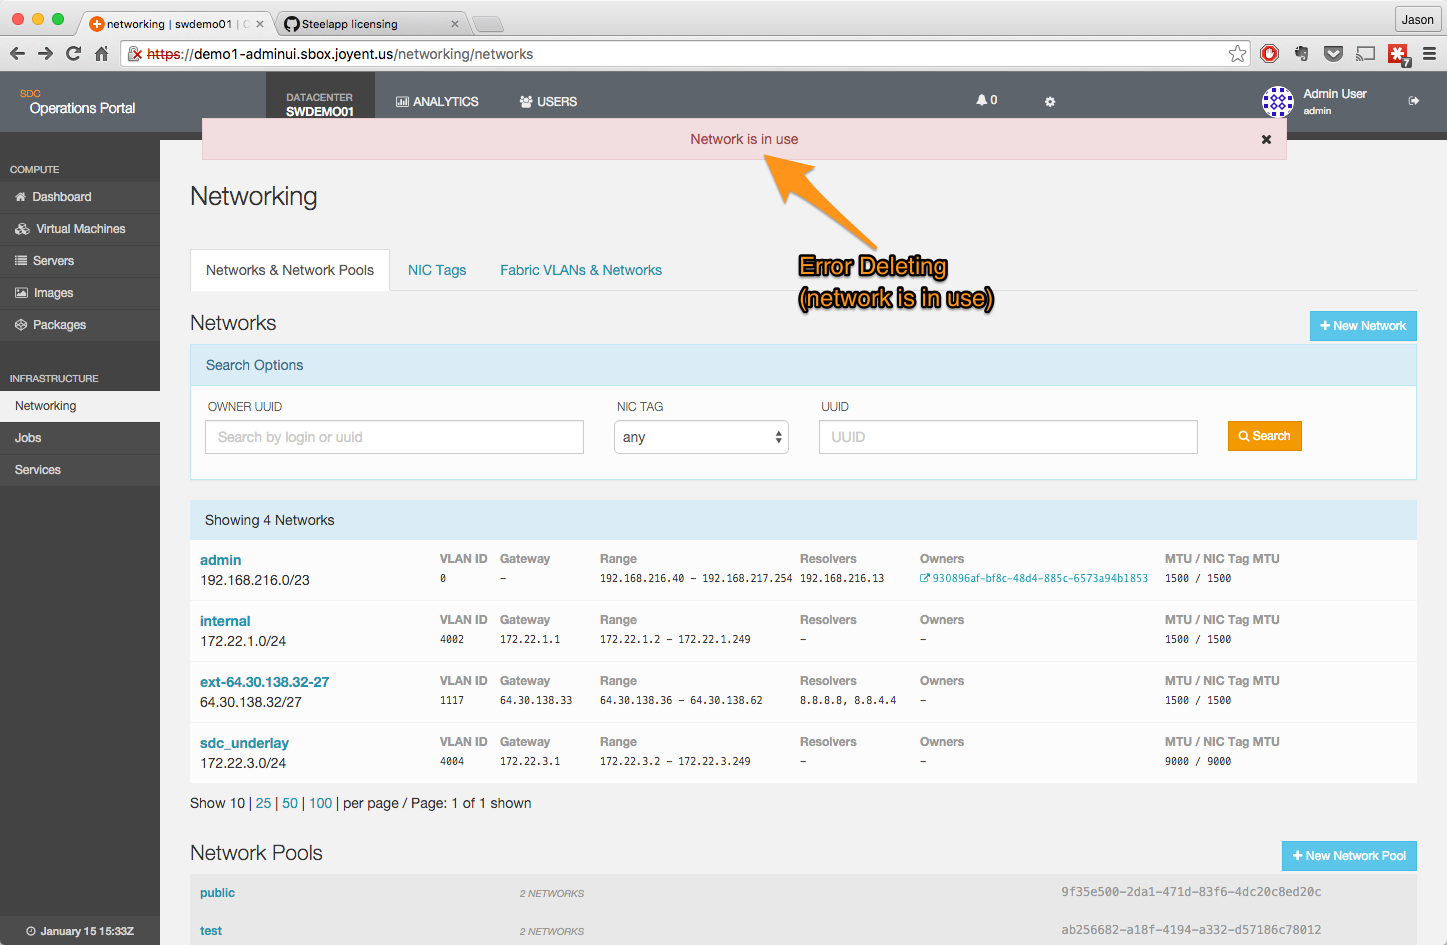
Attempting to delete a network that is currently in use will result in an error on save.
What are logical network pools?
Logical network pools are collections of logical networks that can be used when provisioning instances. The goal behind logical network pools is to minimize any potential of running out of IPs quickly by grouping a set of logical networks together that a NIC can be provisioned from.
The order of logical networks in the networks property of a pool is important, as NAPI will use the order of logical networks specified to try to provision an IP until it succeeds (or until it runs out of logical networks).
The Operations Portal interface is used to create network pools.
Creating a network pool
-
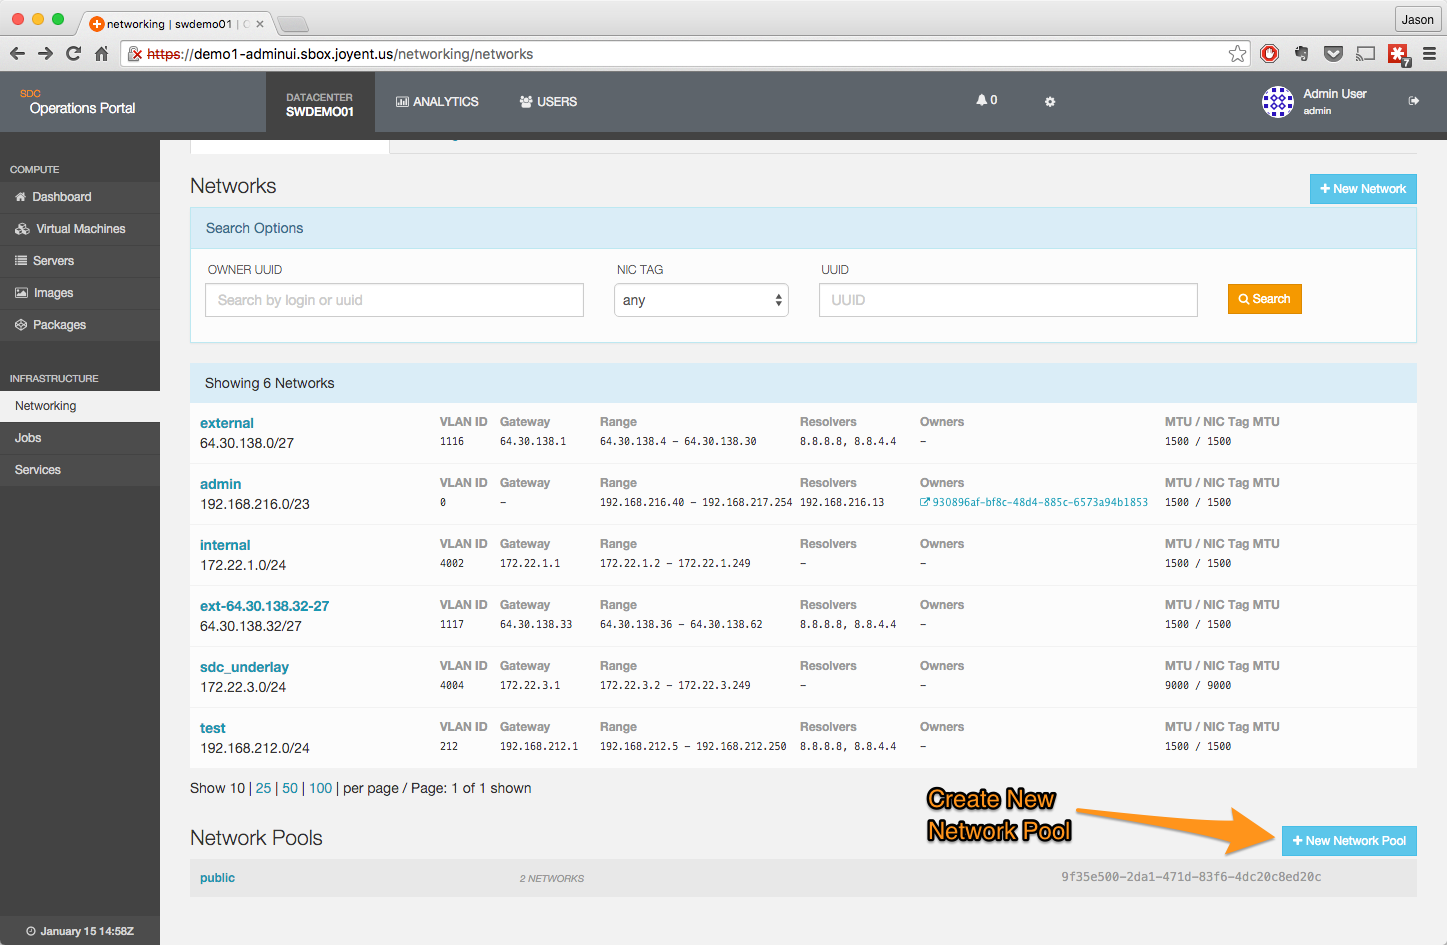
To create a new network pool from the Operations Portal, login and navigate to the Networking page, then click on the Create Network Pool option:
-
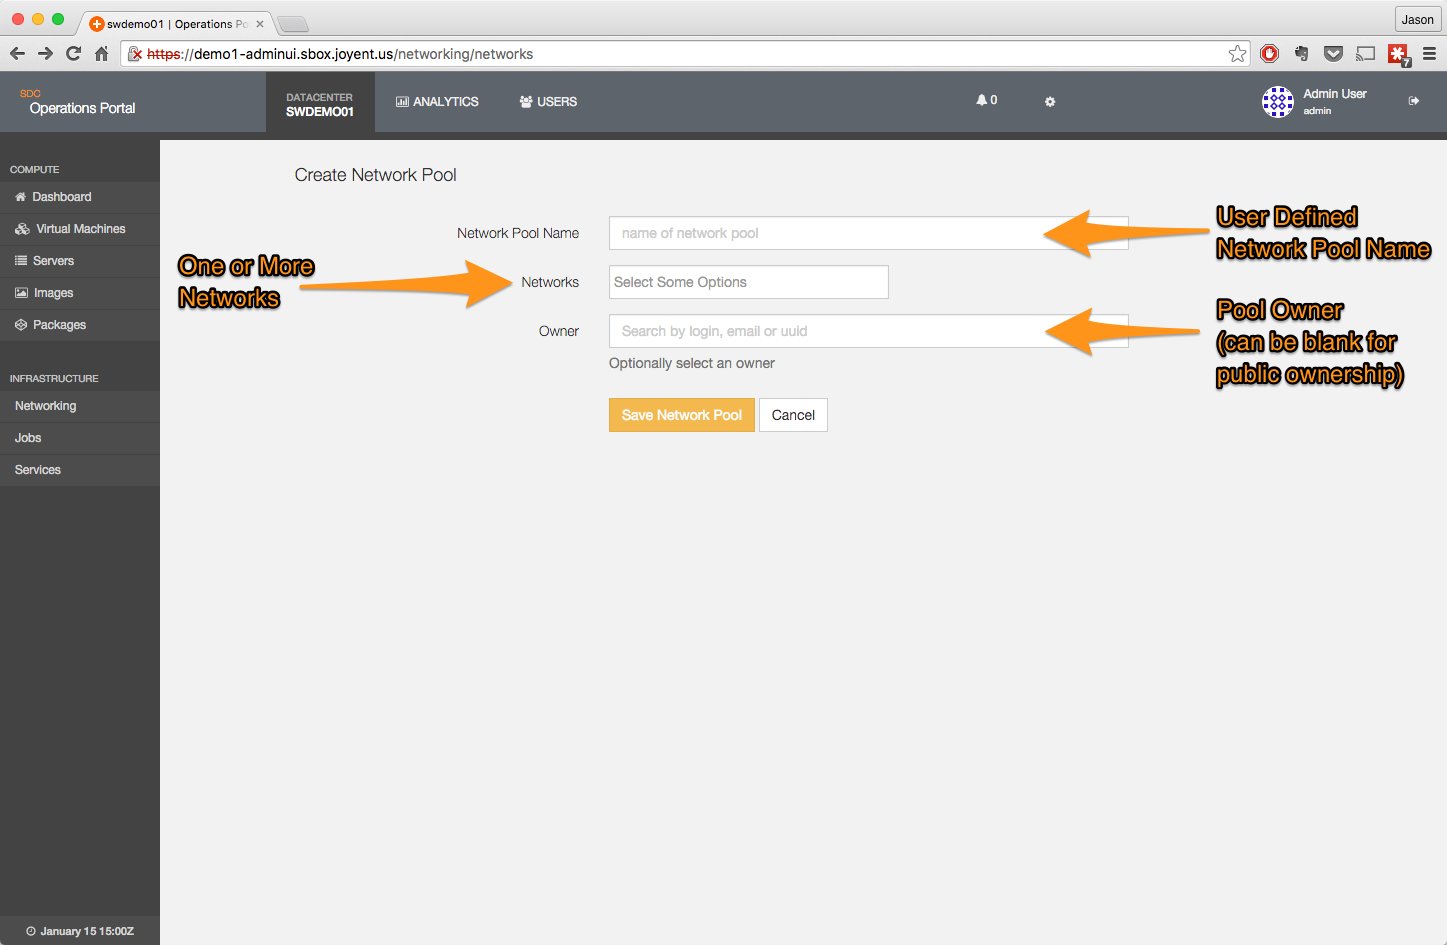
This will open a page to accept the details on the new network pool.
-
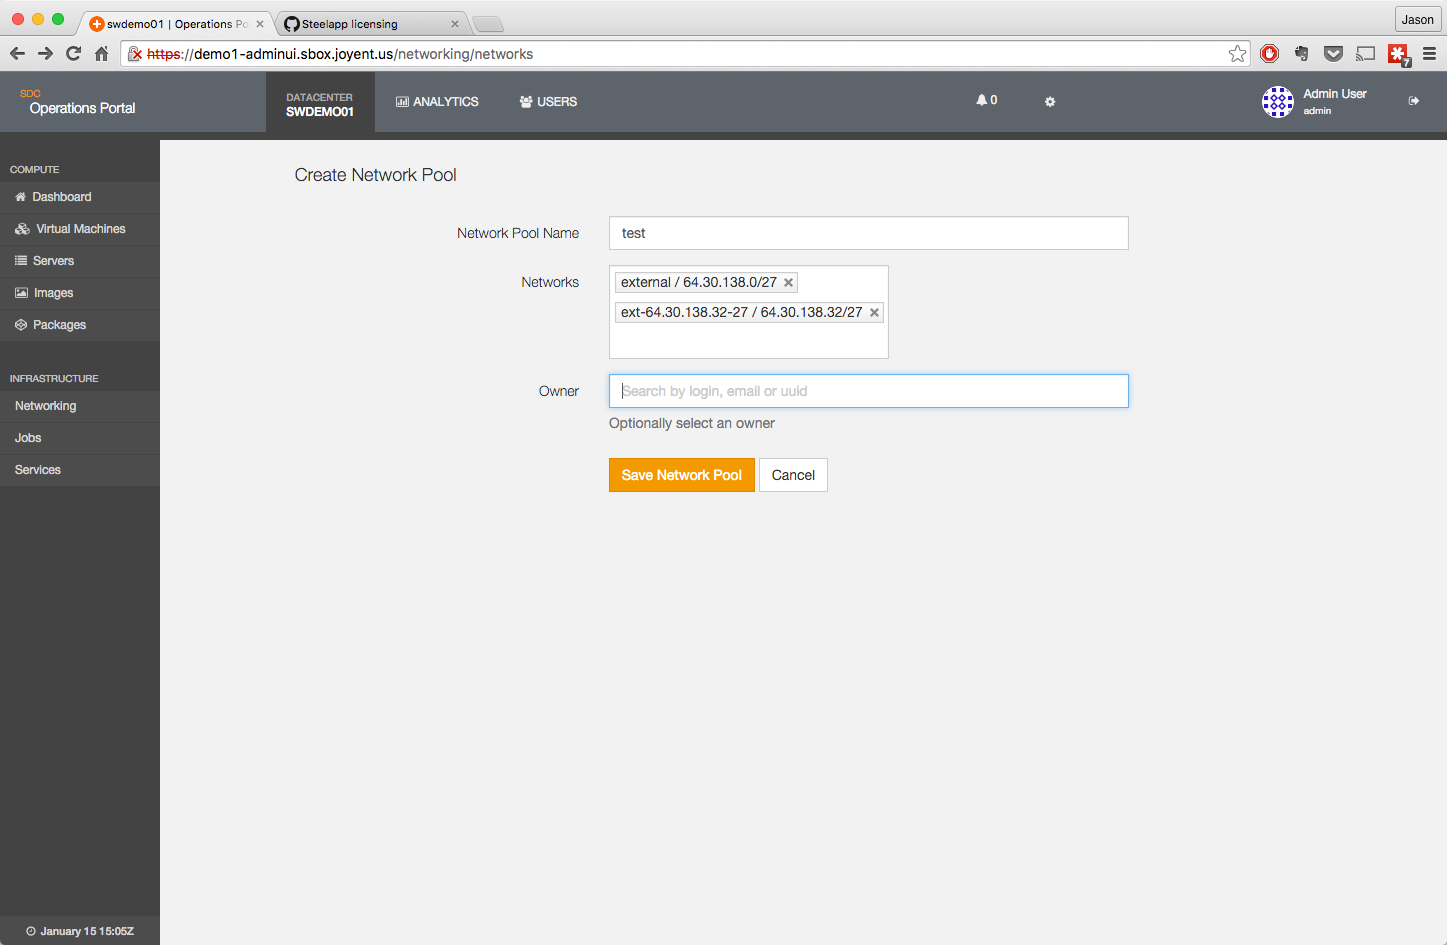
Once you have entered your data, click the Save button to commit the changes into Triton.
-
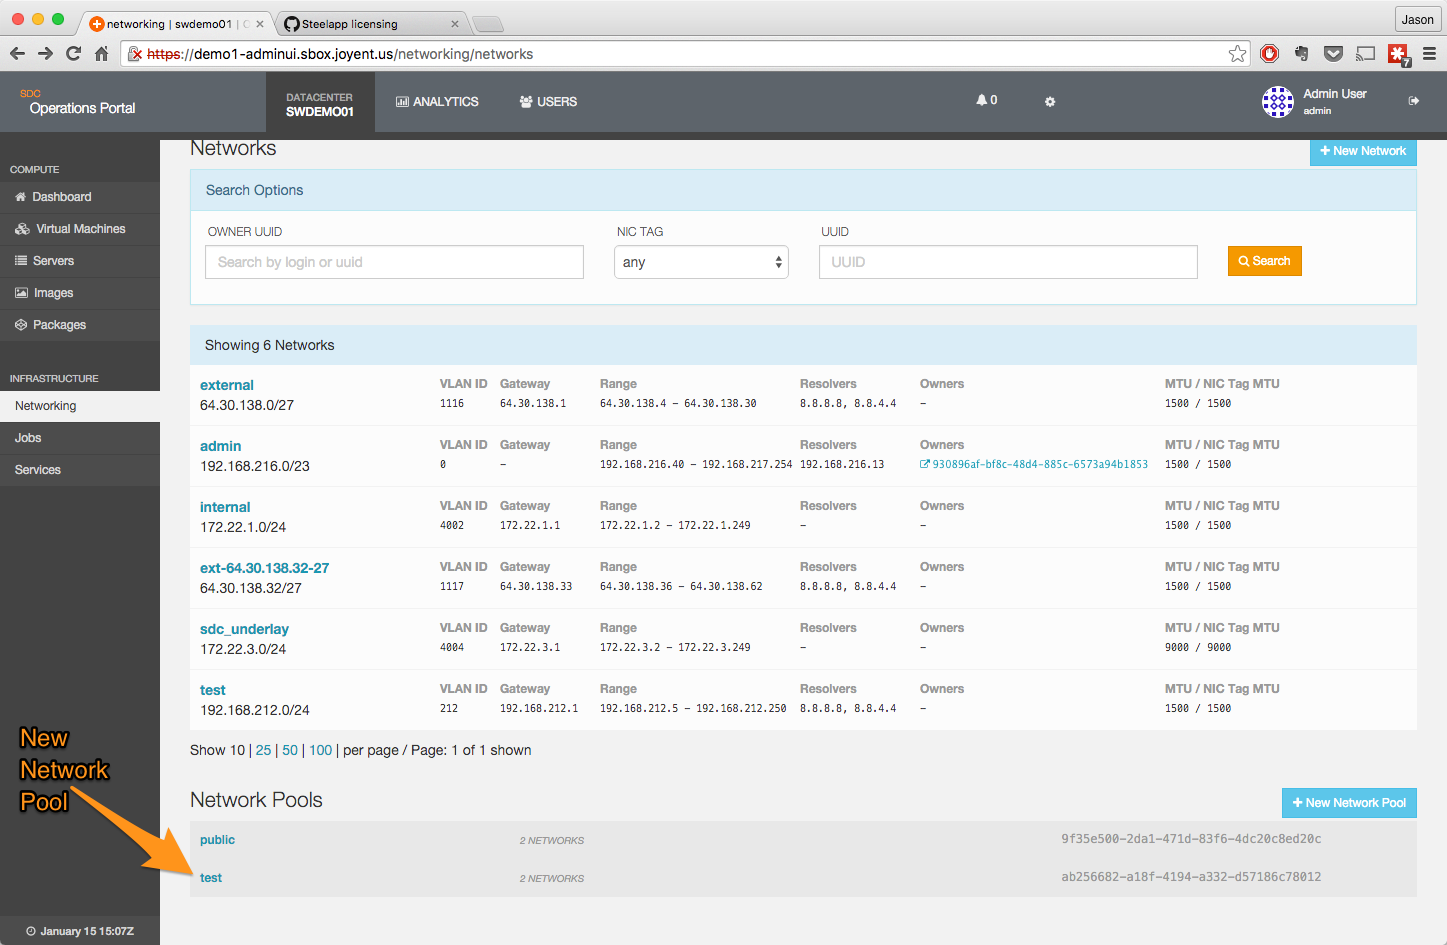
The network pool will now appear on the main networking page.
-
Clicking on the network pool will show the detail page for that pool; note that this does not open in a separate window, but rather shows on the network page.
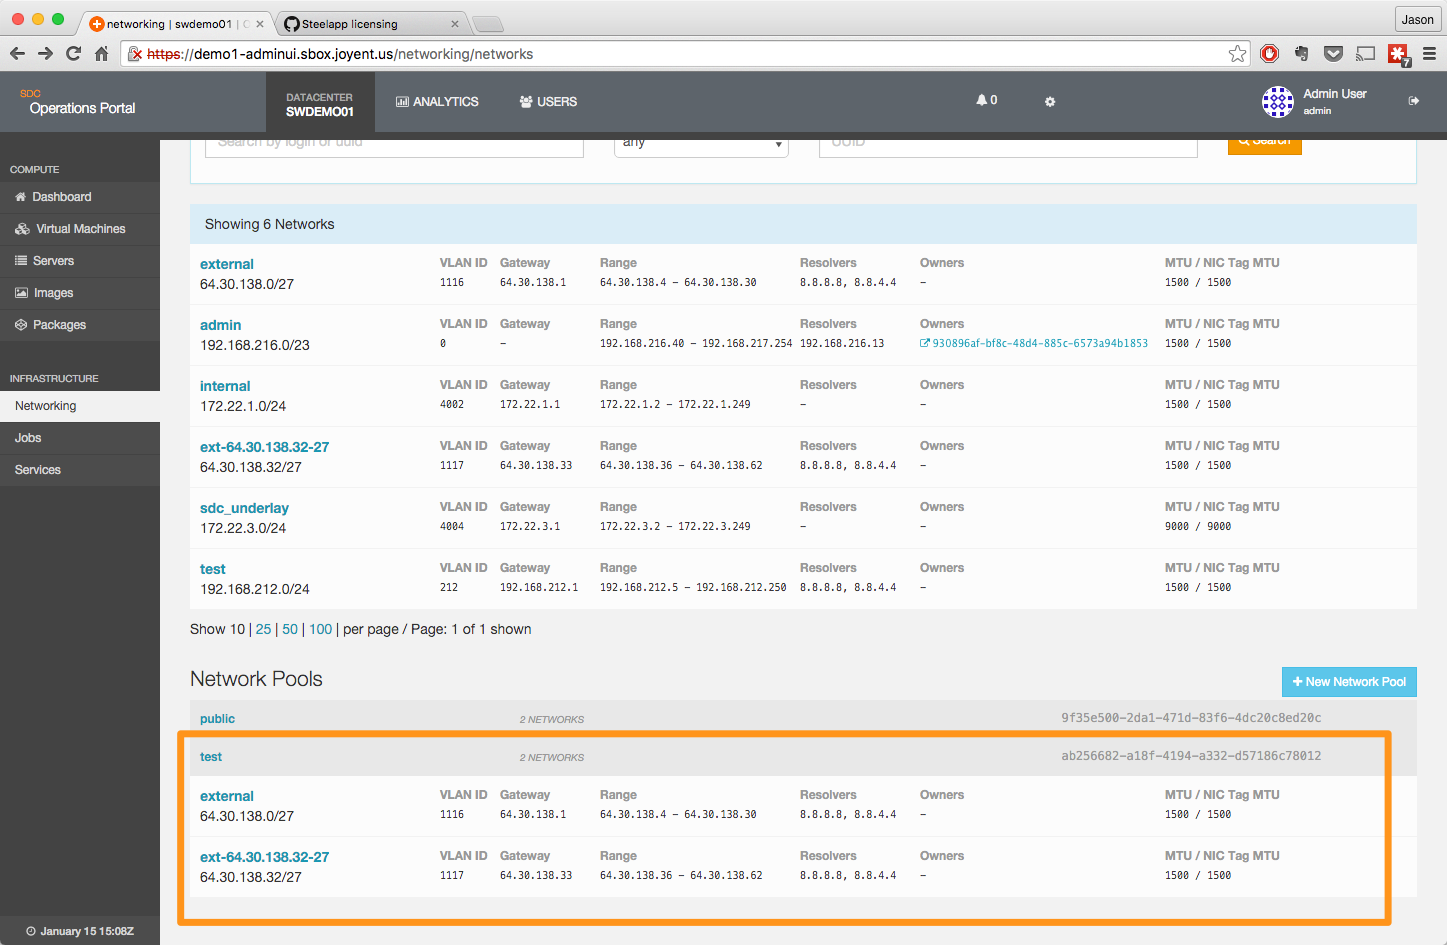
Notes:
- When specifying the name of the network pool, it is useful to choose a name that is meaningful to the network types (i.e. public/private) that are being added to the pool.
- Clickin on Networks will provide a drop down list of available networks to choose from. The NIC tags of the networks you choose must match (meaning, you can't have a network tagged with
externaland a network tagged withinternaladded to the same network pool). - Optionally, an owner can be specified for that network pool; if no owner is specified the network pool is publicly accessible.

