NIC Tags
This document describes what NIC Tags are and how to use them in Triton.
Logical networks and NIC Tags
Triton Enterprise uses logical networks to group a wide array of network information such as network segment, physical network adapters, IP subnets, and VLAN ids. Logical networks are used both on head nodes and compute nodes, and are associated with physical interfaces by using a system called NIC Tags. Physical interfaces can be tagged with one or more NIC Tags, and these NIC Tags are associated with logical networks. This allows an operator to control the flow of logical network data over physical links. NIC Tags are represented as words within Triton, such as external and internal.
During the process of installation, logical networks and associated tags are created for three key networks.
| Network | Tag | Purpose |
|---|---|---|
| Admin | admin | Used for management and communication beteween head node, compute nodes, and service zones. This tag should never be used for any networks other than the Admin network created at install time. |
| External | external | Created at install time but not assigned to compute nodes; this network is designed to provide connectivity to the Internet (or internal Intranet w/ NAT) for both service zones and end-user instances. This tag can be used on other networks offering the same connectivity. |
| Underlay | sdc-underlay | This network is internal to the Triton Network Fabrics (VXLan) implementation, and should not be used by any other networks. |
Viewing NIC Tags
-
Log into the Operations Portal.
-
Click on Networks, and then select the NIC Tags panel.

-
The interface will show the current NIC Tags you have defined.
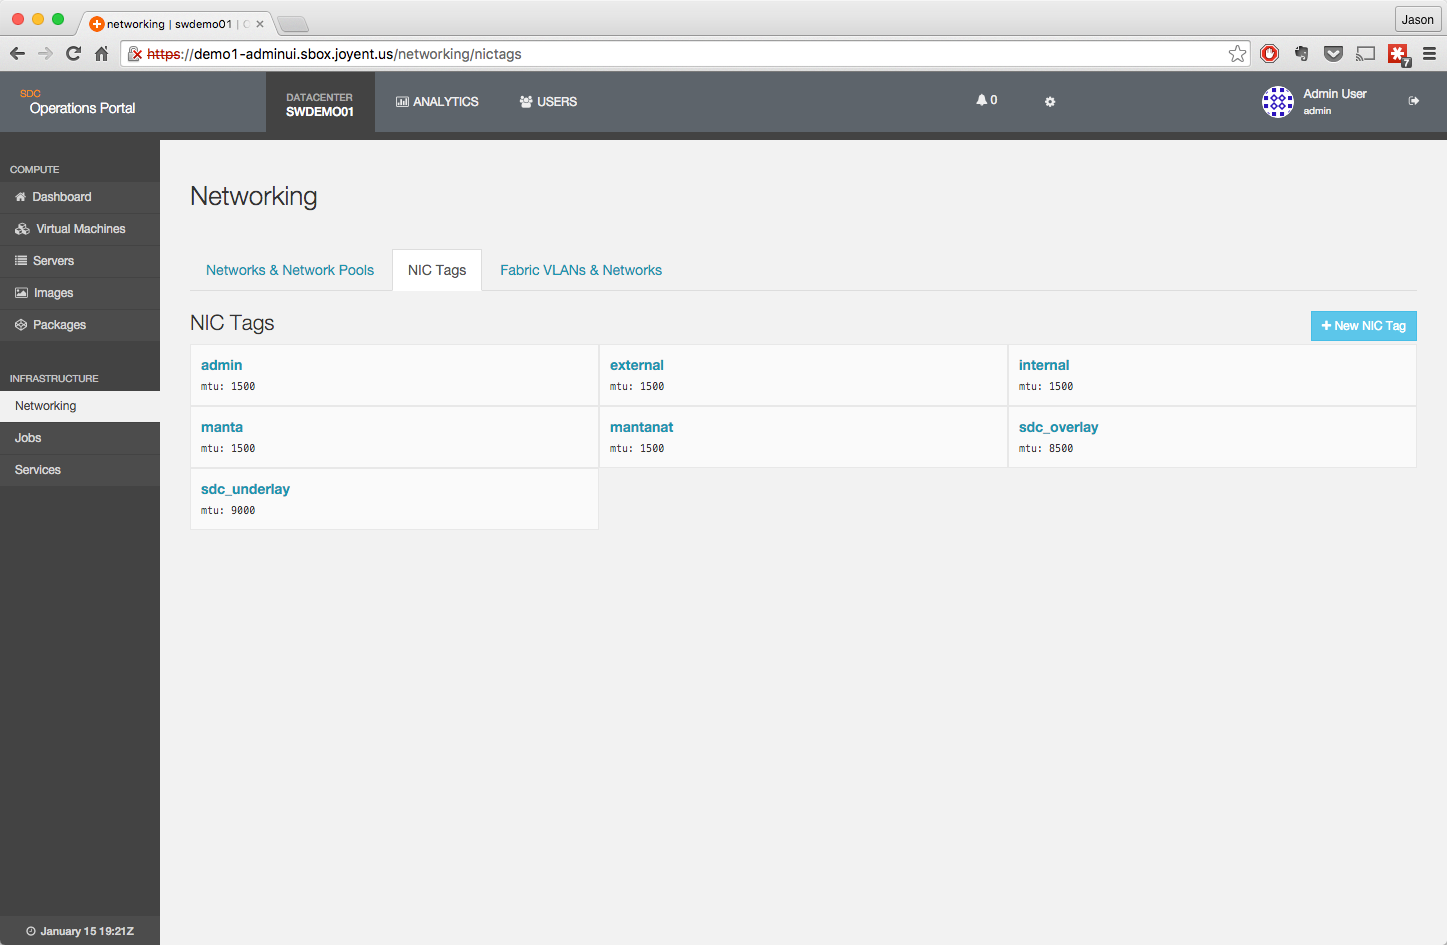
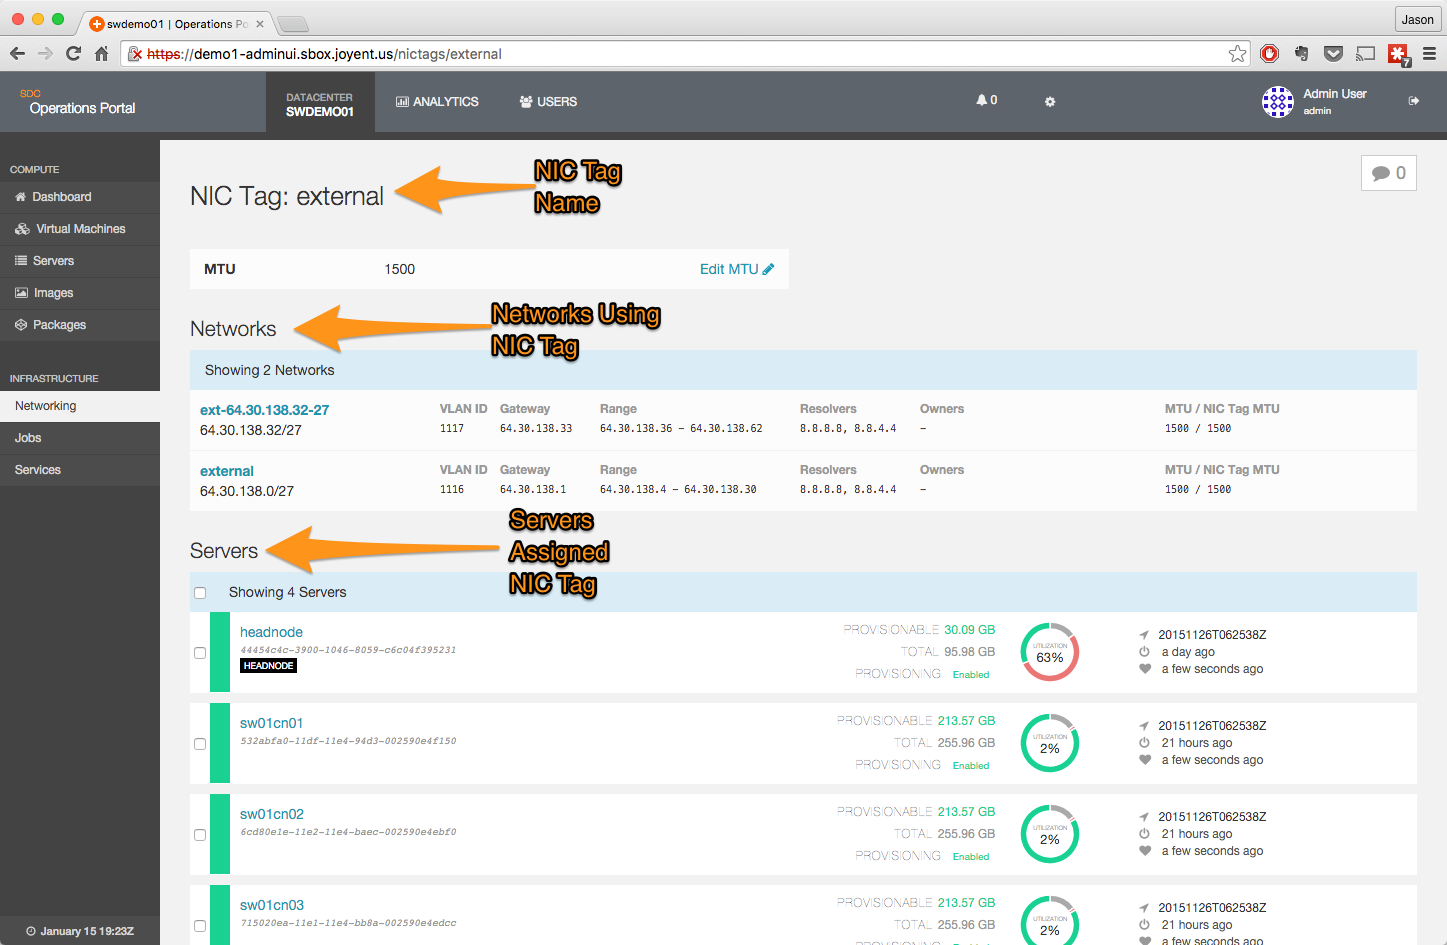
- Clicking on a NIC tag will provide additional detail, including the MTU, the networks that are associated with the NIC Tag, and the compute nodes that are currently tagged with the NIC Tag.
Creating a NIC Tag
-
Log into the Operations Portal.
-
Click on Networks, and then select the NIC Tags panel.

-
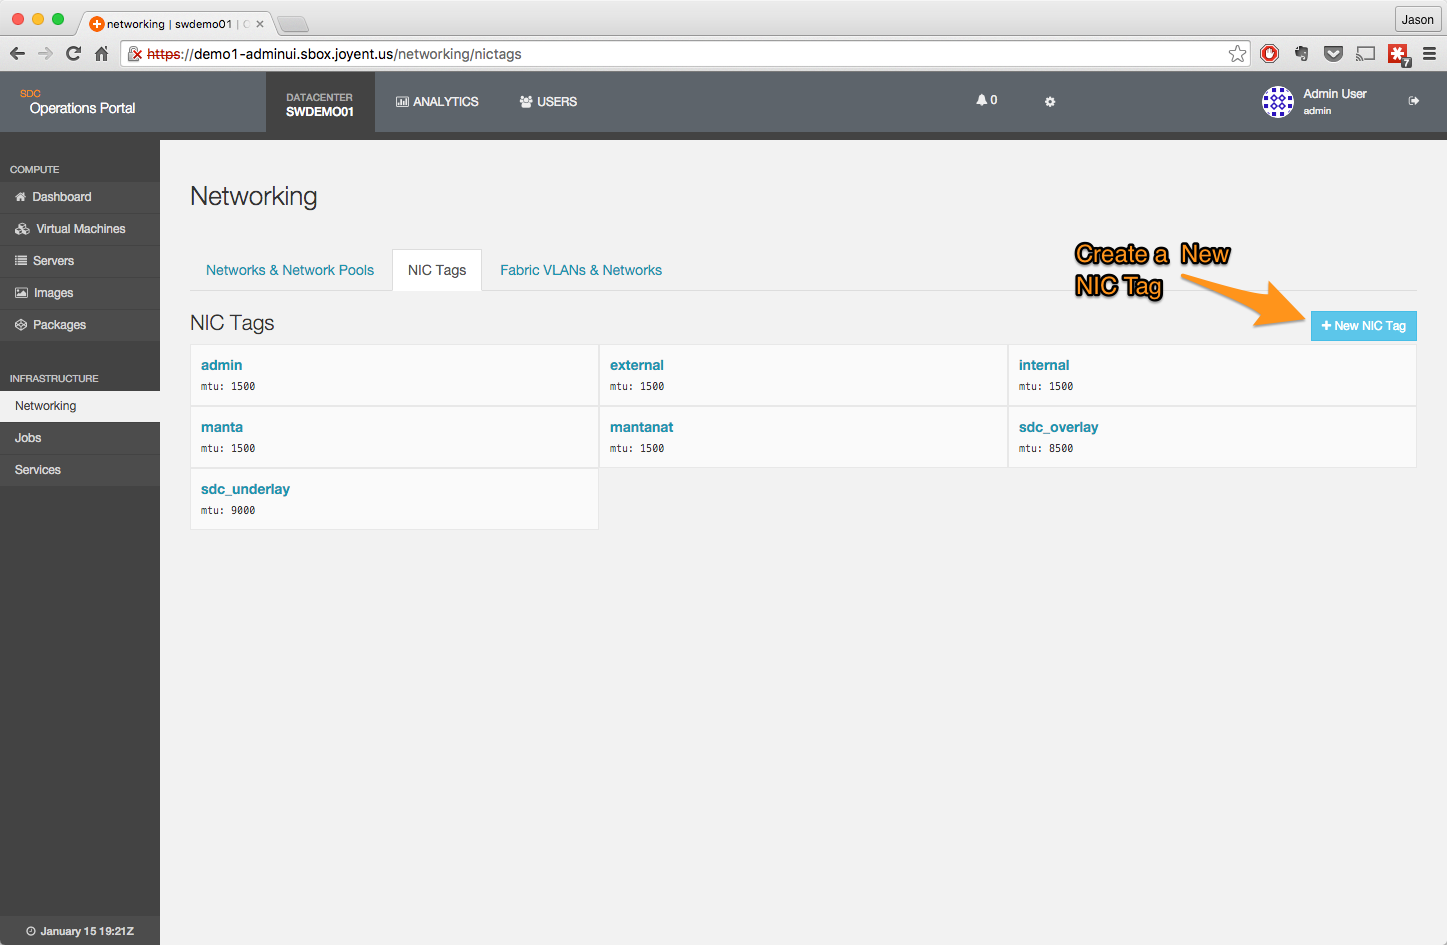
Click on the **+New NIC Tag" button
-
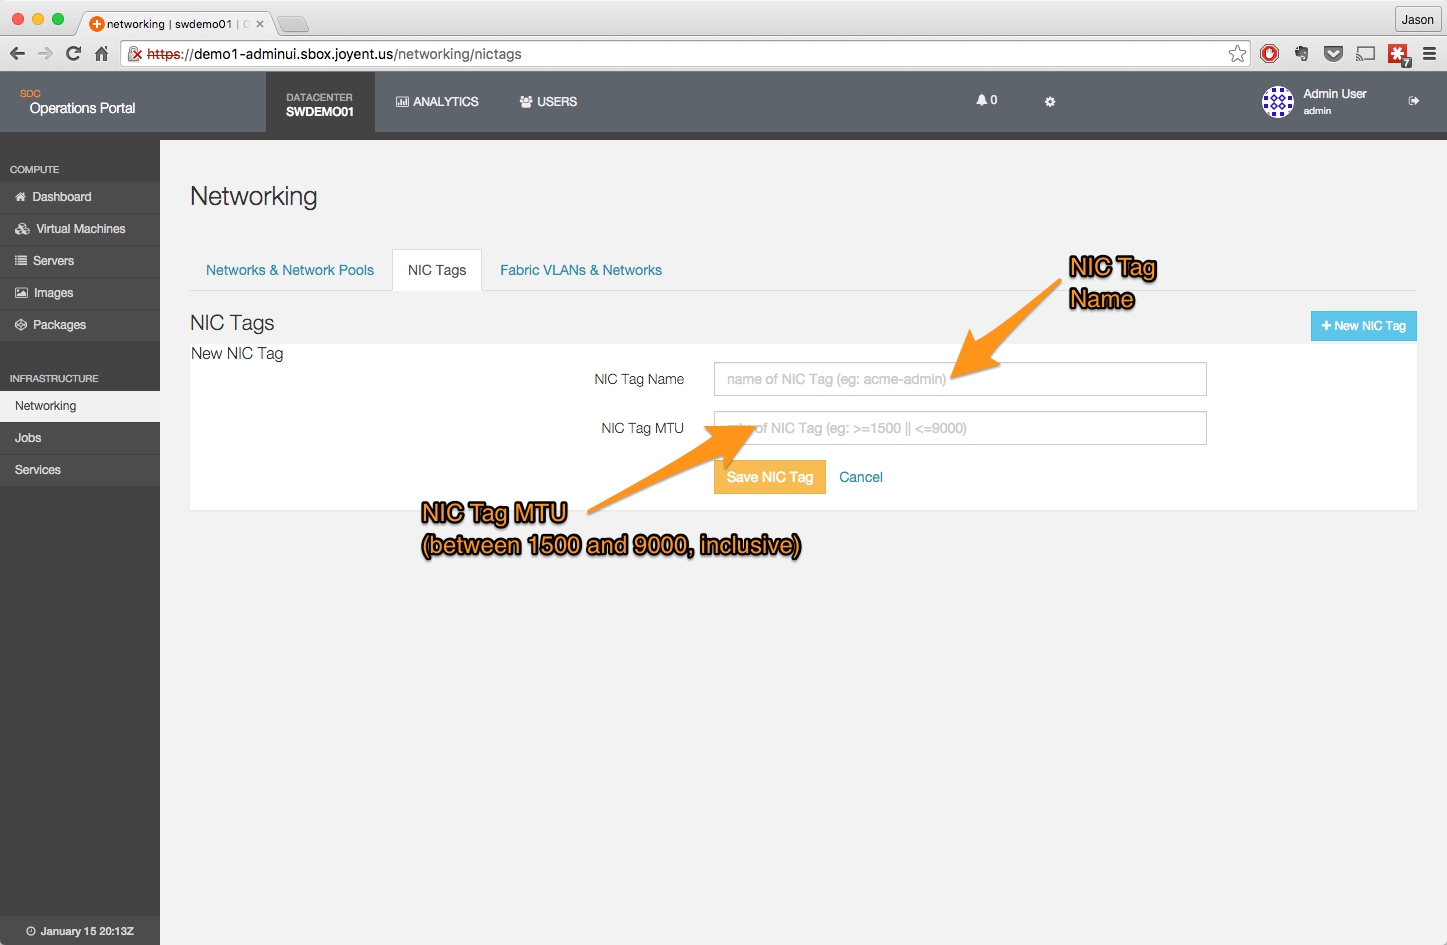
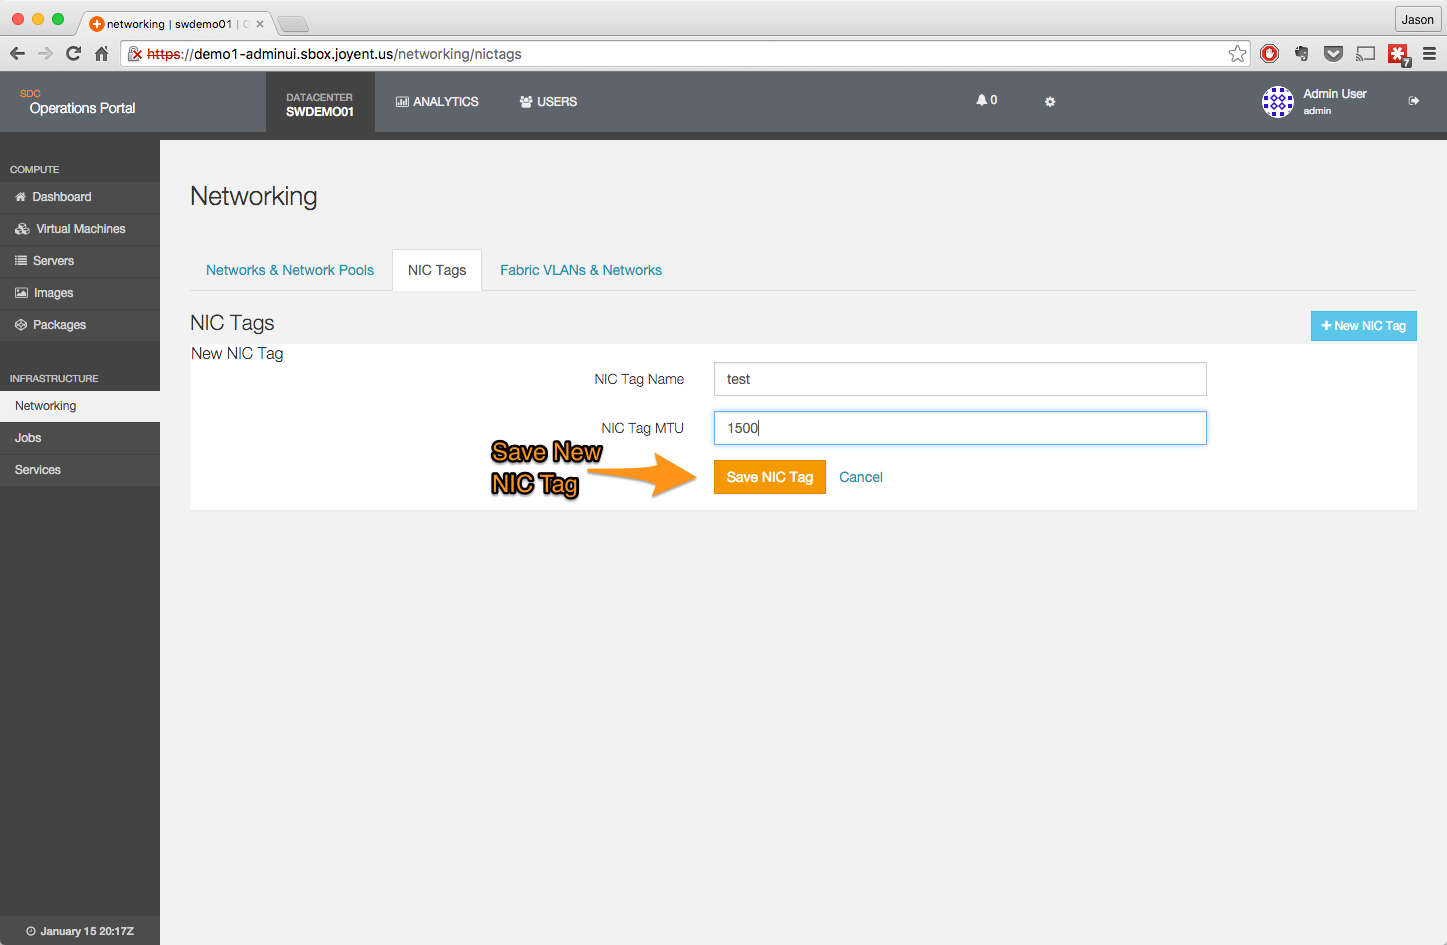
A new page will open, allowing the input of the NIC Tag name and MTU.
-
Once the data has been entered, the tag can be saved.
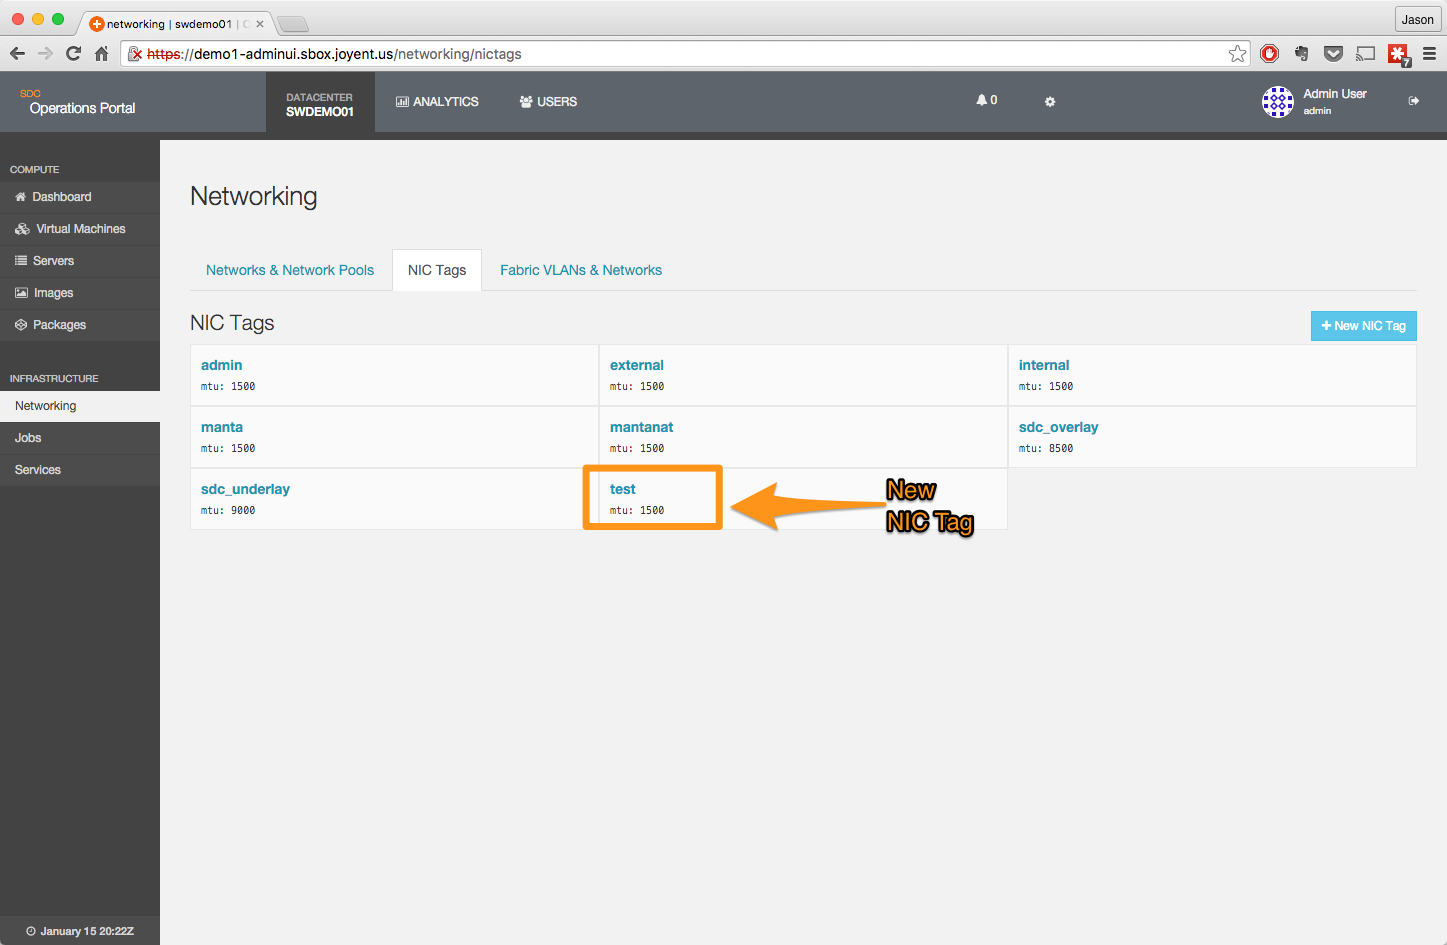
- The new NIC Tag will appear in the list.
Notes:
-
NIC tag names can contain only the characters A-Z and a-z, and the
-(hyphen) and_(underbar) character. -
Unlike in SDC 6.5, NIC Tags are now independent of packages.
-
Data objects for IP Addresses are not pre-allocated in Triton. That is, you will not see all the entries in the Operations Portal for a network until they have either been used by a provision or allocated via sdc-napi.
- The value given for MTU defines the maxiumum message transmission unit (MTU) of the network. This value cannot be changed once a network is in-use by Triton.
Deleting a NIC Tag
-
Log into the Operations Portal.
-
Click on Networks, and then select the NIC Tags panel.

-
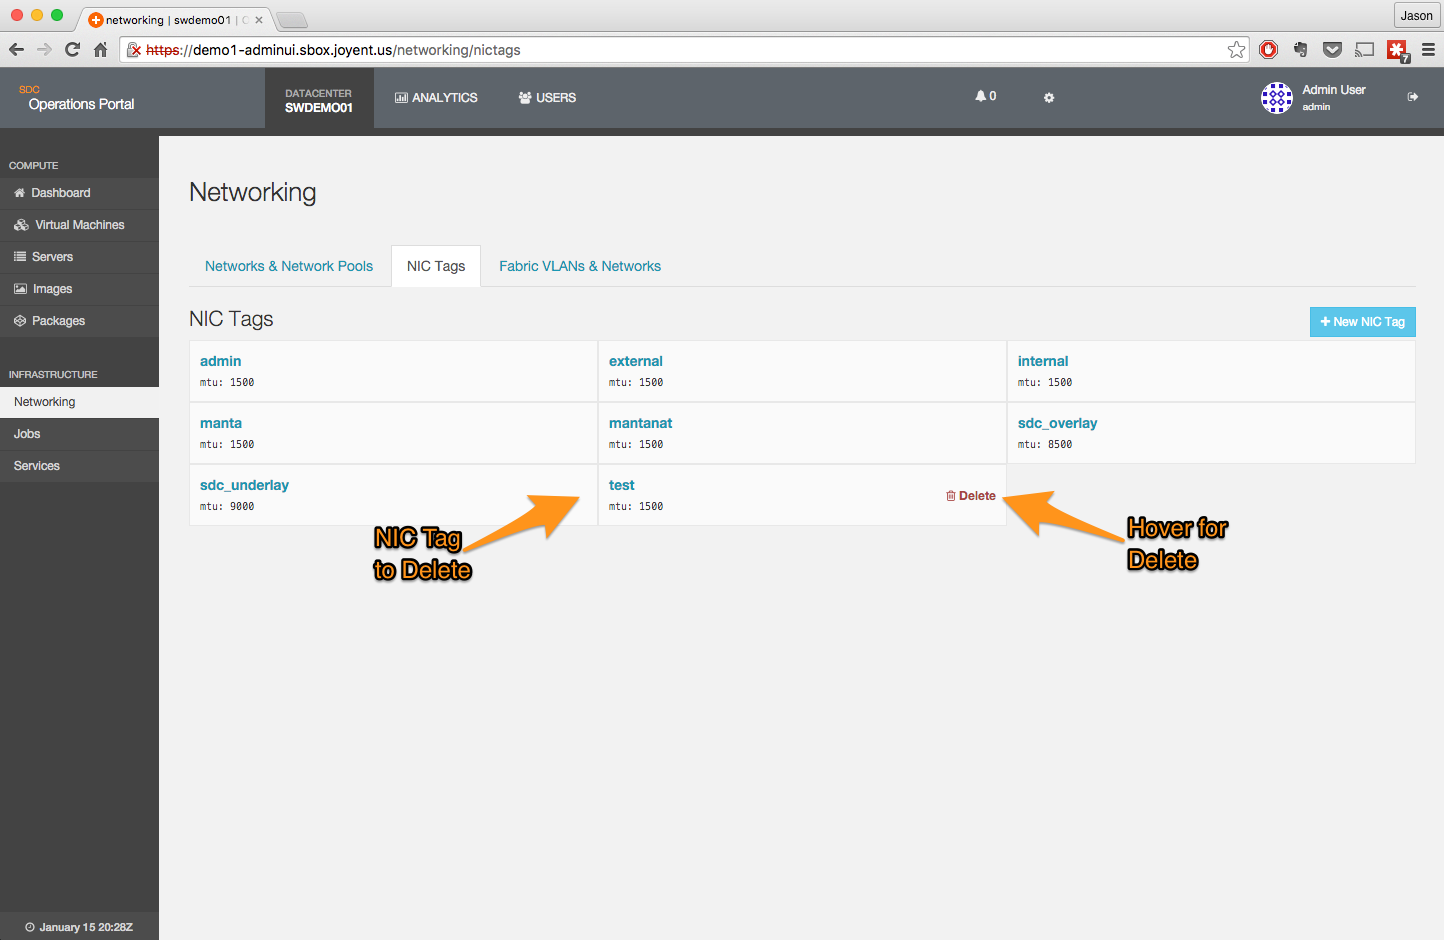
Hover over the right side of the NIC Tag that you wish to delete; a red trash icon on the text DELETE will appear.
-
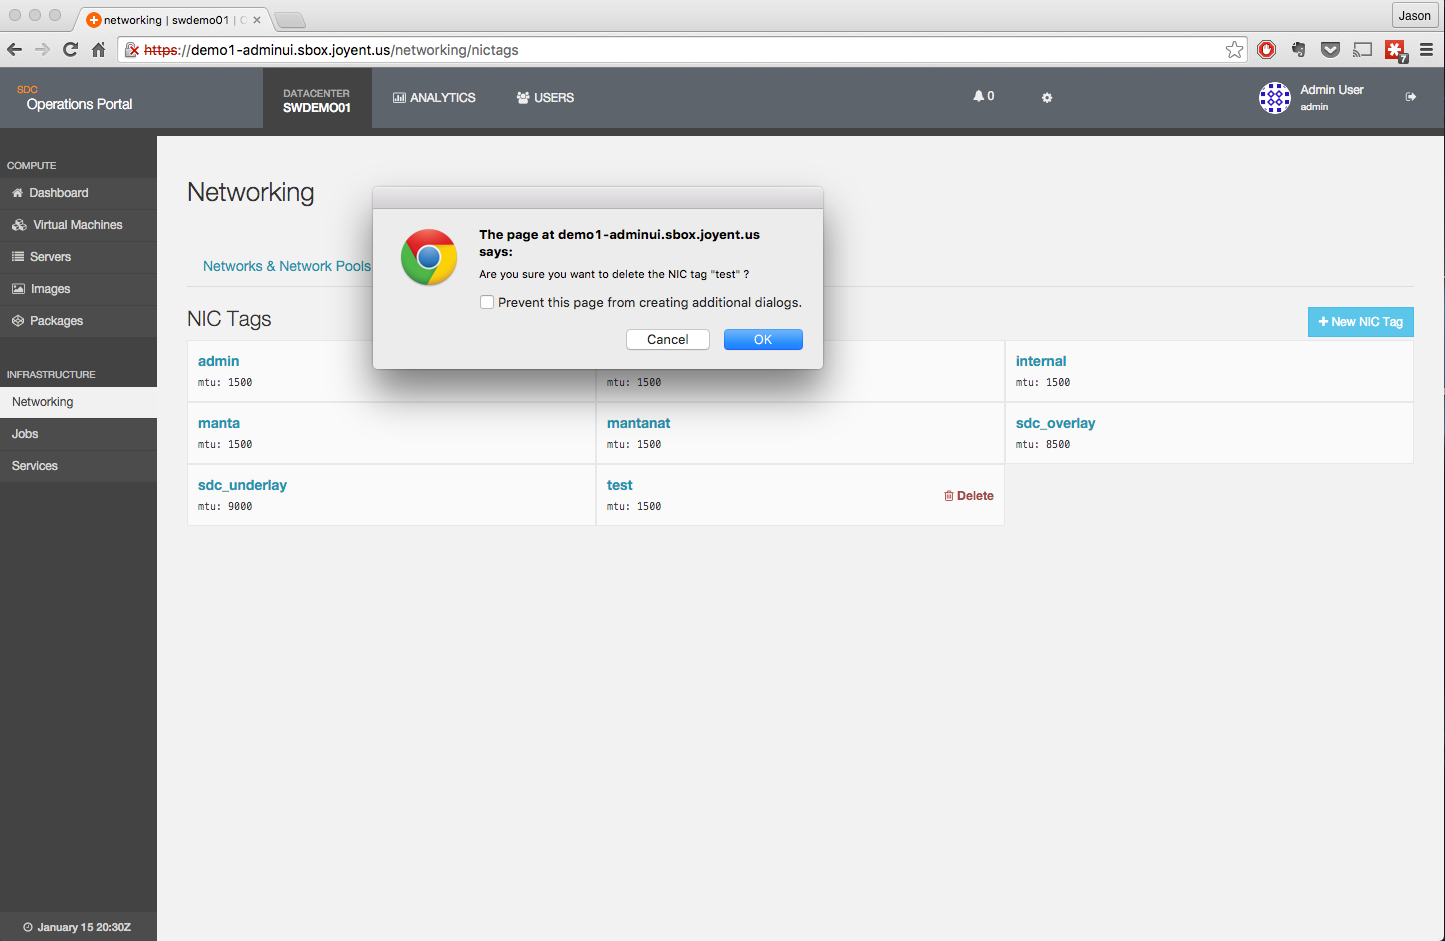
Clicking on DELETE will bring up a confirmation dialog.
-
Once the action is verified, the NIC Tag is deleted.
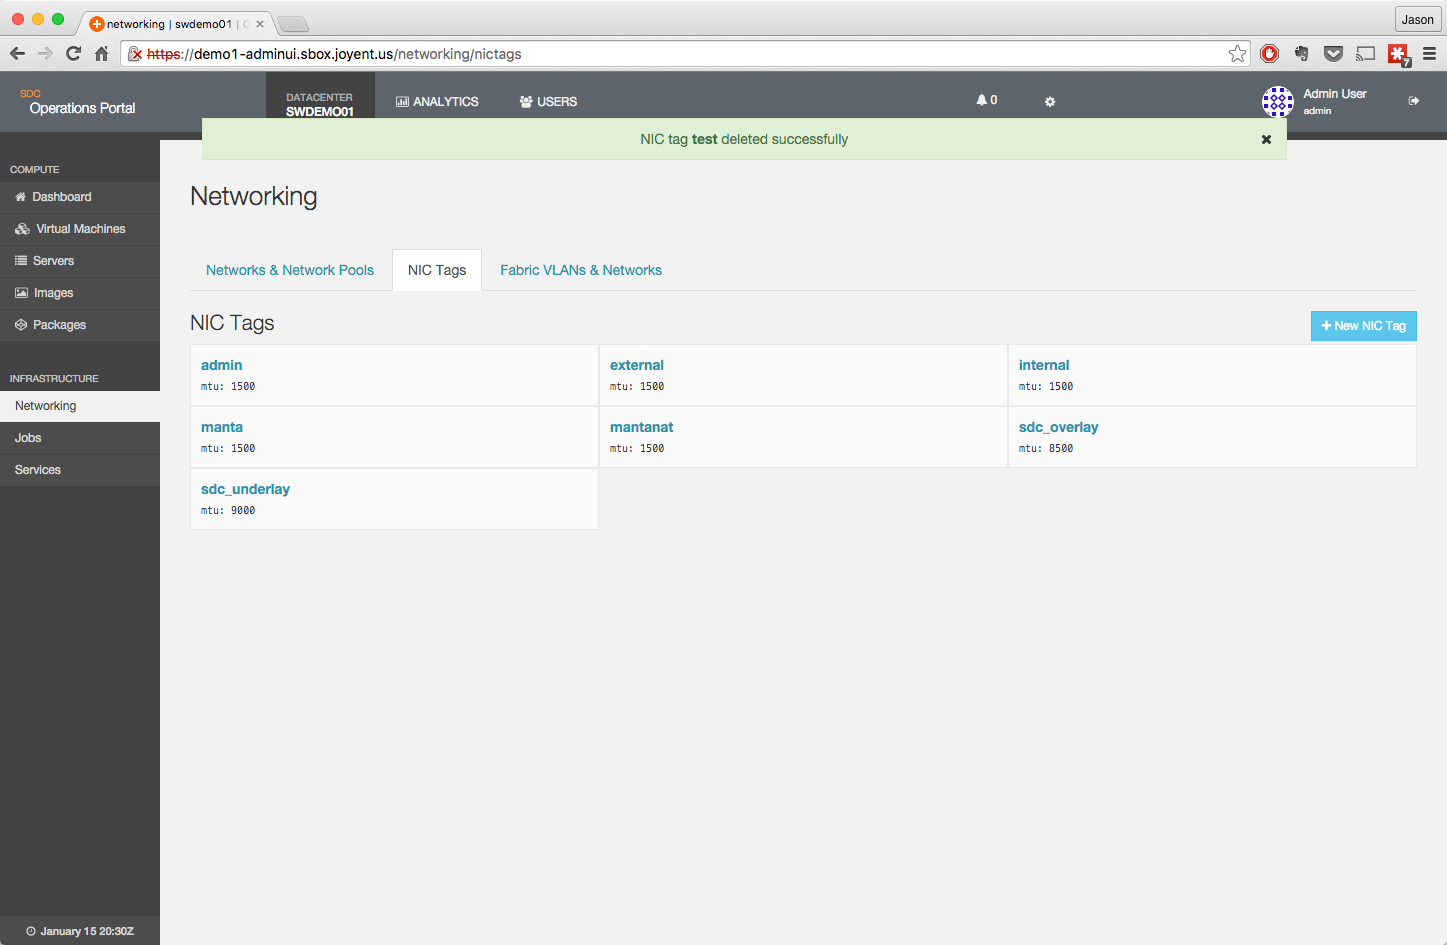
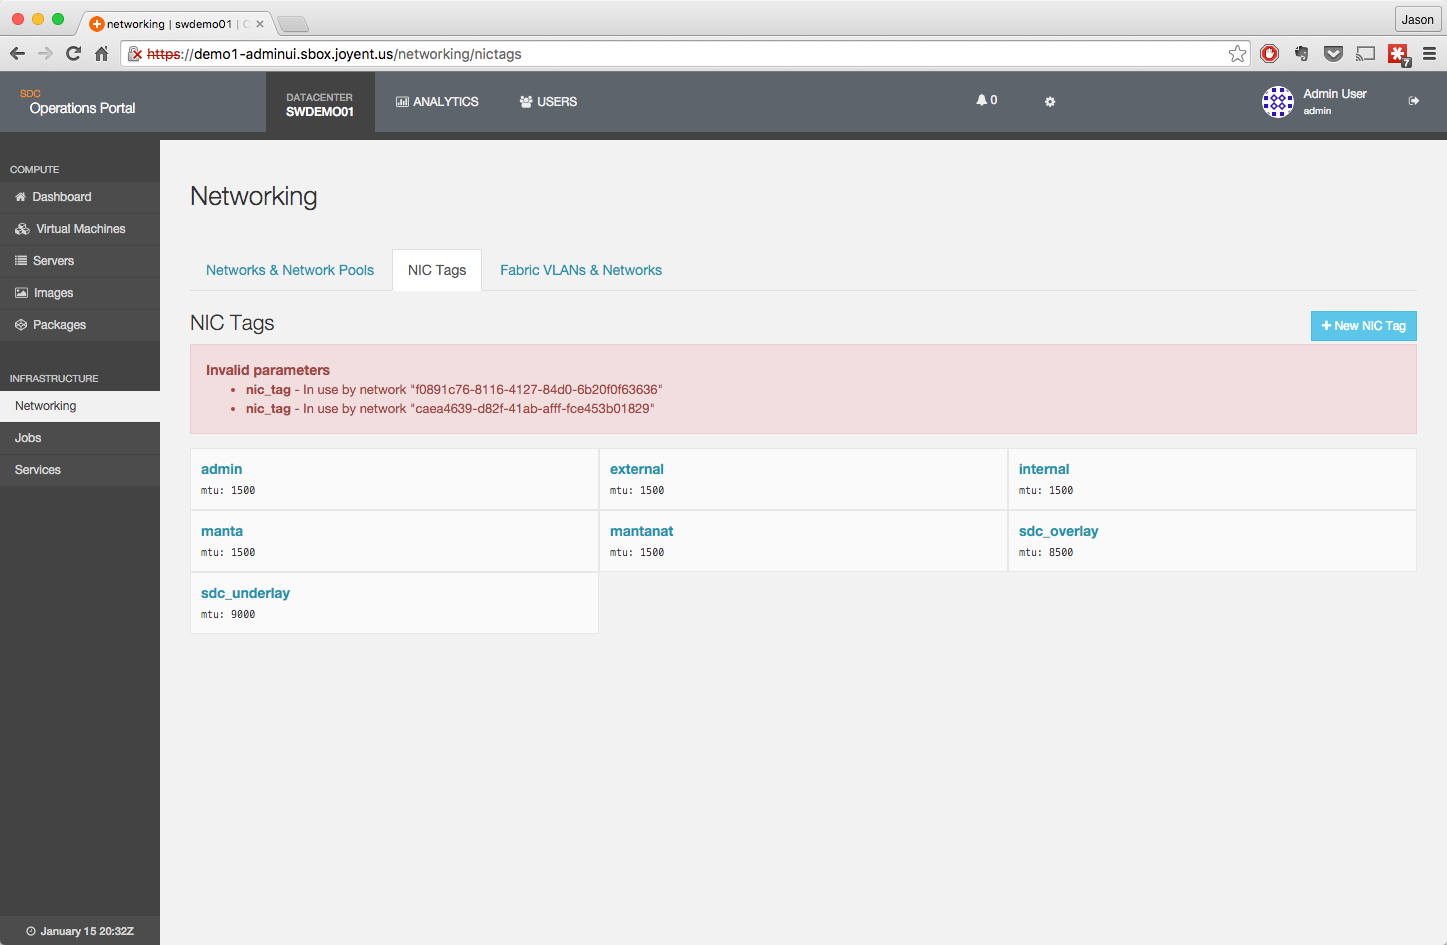
- Note that it is not possible to delete a NIC Tag that is in use by a network. The delete process will fail with the following error message if attempted.
Assigning, deleting, or listing NIC Tags on a compute node
NIC Tags can be viewed in two places in the Operations Portal.
-
In the NIC Tag detail page, under the "Server" section.

- On the server page under either the Physical or Aggregates section of the Networking section.

NIC Tags can be edited in either the NIC Tag Editor for Aggregates or Physical Links or in the Link Aggregation Editor for Aggregates.
-
The Interface NIC Tag Editor can be selected via the NIC Tags button on the server page.
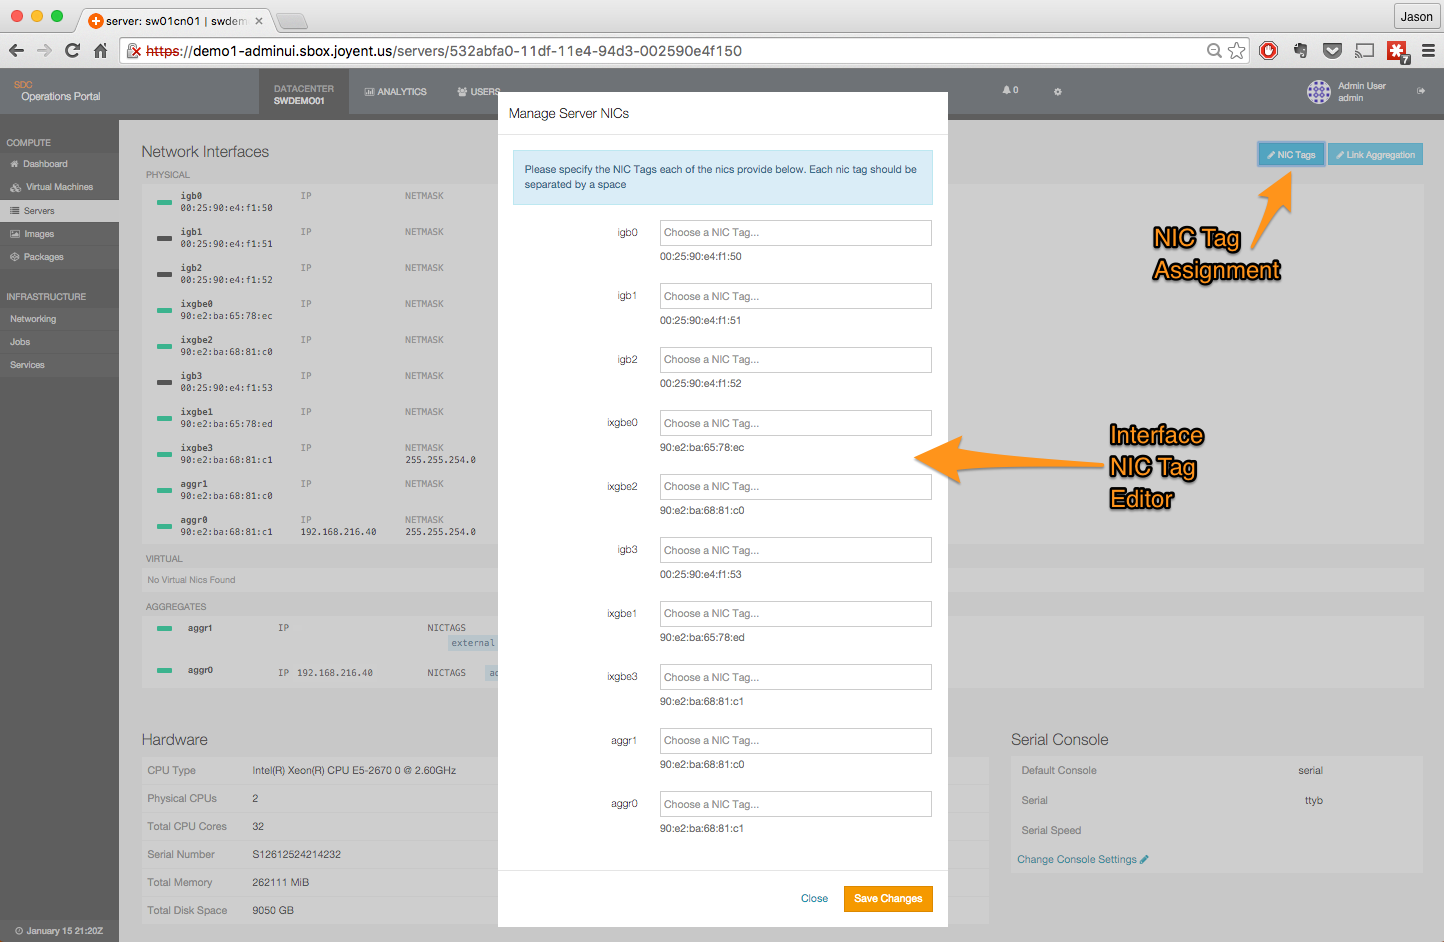
- To add a NIC Tag, click in the box labled *Choose a NIC Tag** and select the appropriate tag from the drop-down.
-
To delete a NIC Tag, click on the small x on the right end of the tag name. The tag will be removed.
- When done, click Save Changes.
- The Link Aggregation Editor can be selected via the Link Aggregation button on the server page.
- Click on Link Aggregation and then on the Edit button for one of the Aggregates.
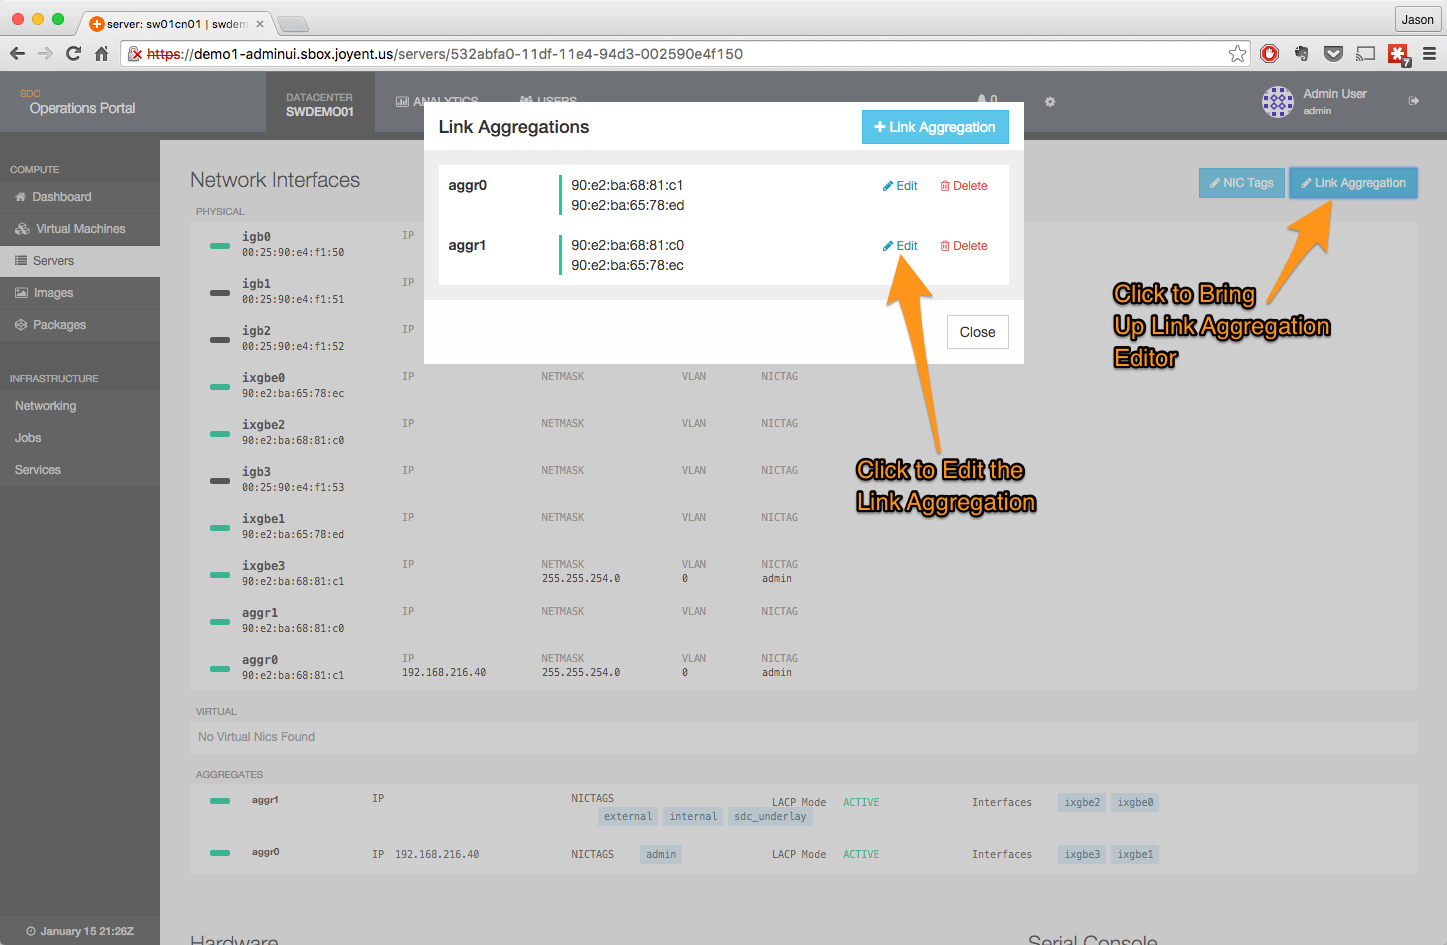
- This will bring up a screen showing the currently assigned NIC Tags along with detail on the aggregations.
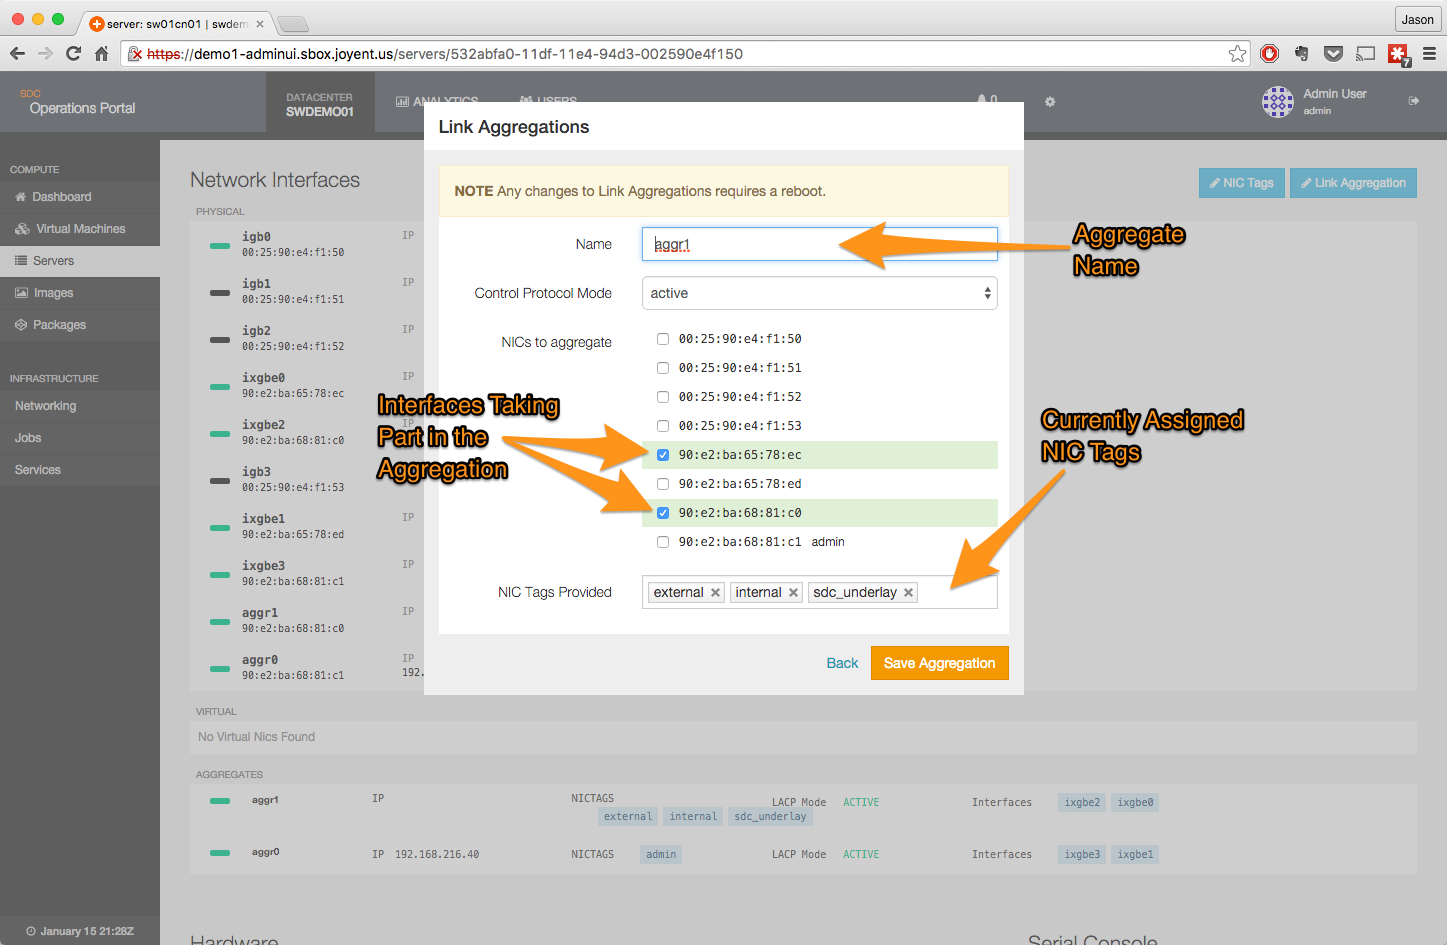
- To add a tag, click in the box labled NIC Tags Provided and select the appropriate tag from the drop-down.
- To delete a NIC Tag, click on the small x on the right end of the tag name. The tag will be removed.
- Once complete, click the Save Aggregation button.
- Note that any changes to aggregations, including NIC Tags, require a reboot.
- Click on Link Aggregation and then on the Edit button for one of the Aggregates.
Notes:
-
Remember, compute nodes should not have an external IP address and should communicate only on the admin network for security reasons. Only instances should communicate on public networks.
-
Unlike in SDC 6.5, the addition of a NIC Tag to a compute node does not require the CN to be rebooted.
- When you add or remove a NIC Tag from a compute node, an update job will be spawned. The details of this job can be reviewed under the Jobs page.
