Start containers with `docker run`
When you execute docker run, an individual container is spun up with its own file system, networking, and process tree. Each Docker container runs on bare metal in your selected data center, with no need to setup or maintain hosts.
The docker run command is often composed of many parts. For example, let's create an Nginx container.
$ docker run -d -p 80 --name webserver nginxWithin this command:
docker runtells your application to start running-ddetaches from the container, meaning your application runs in the background and not the foreground-p 80tells Triton to give the container an interface on the public internet and expose port 80--name webserverdeclares the name of your new containernginxis the image that will be built into a container
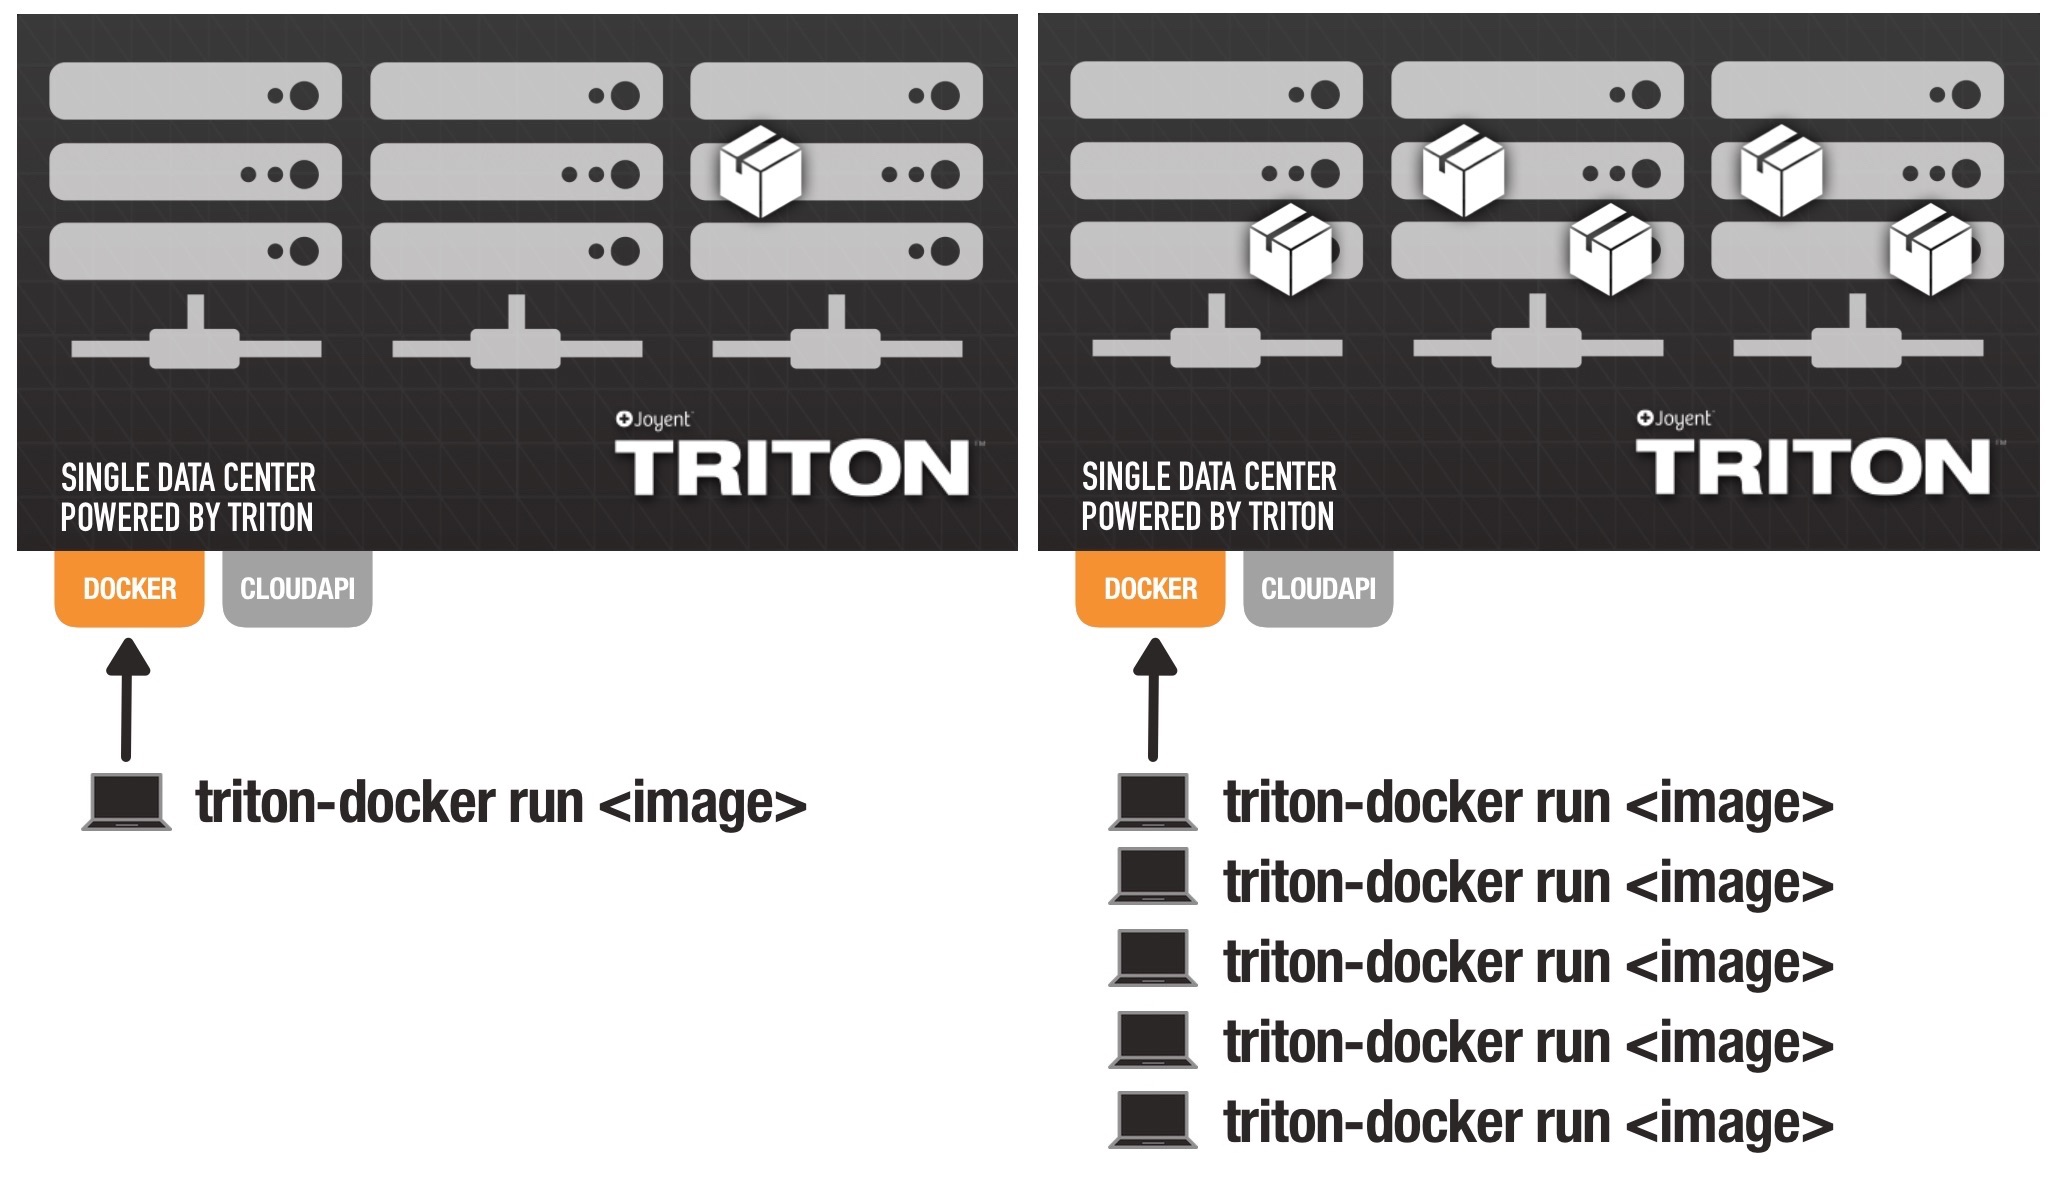
Every time you docker run, your container is provisioned on an available server in that data center. If you do five docker runs, your five containers will probably be running on five different physical servers. You can get some control over where in the data center your container runs by using affinity filters. You can add an affinity filter with either environment variables or with a label.
There are several other ways to modify docker run to customize your container. You can set the RAM, CPU, and storage for each container, as well as specify networks and ports. You can even control the placement of your container.
On Triton, docker run is similar to triton instance start, although triton instance start cannot start Docker containers and the docker commands cannot start hardware VMs or infrastructure containers.
Using the portal
Follow the instructions below, or watch the screencast.
Login to the Triton portal. From the Dashboard, click the Create a Compute Instance button, then select Docker Container.
Follow the prompts on the screen to select the base software image, which includes any Docker images you've previously added to the data center. You can also get new images from a Docker registry by clicking on Pull more images. Continue to select the package type which will determine the ram, disk and CPU resources for your container. Finally, adjust optional settings such as the container name, public IP, Triton CNS, and more.
When finished, click the Launch button to create and start your container.
Once created, you will notice your container displayed in the grid within the Instances section of the Compute tab of the portal. The container status will be indicated as either provisioning, running or stopped. If it is labeled as provisioning, the container is still being set up. When finished, your new container should be listed as running.
In order to access the container, you need the IP address. The primary IP address will be listed next to the container's name in your instances list. To get all of the IP addresses and other instance details, click on the name of your new container. The IP addresses will be listed under Summary.
Watch the screencast
It's easy to create Docker containers in the Triton portal.
Controlling container placement
Building "cloud-scale" applications means designing to accommodate failure, and that requires distributing application components so that localized failures don't take down the entire application. Some people also want to control placement to keep components close together for theoretically faster network performance between them.
By default, Triton makes a reasonable attempt to spread all containers (and non-Docker containers and VMs) owned by a single account across separate physical servers.
Triton supports many of the affinity options defined for Docker Swarm. They can be expressed both by overloading environment variables (-e 'affinity:<filter>') or setting a Docker label for the container (--label 'com.docker.swarm.affinities=["<filter>","<filter>"]').
We recommend setting a loose anti-affinity for each of your application components (keep nodes of your databases separate from each other, for example). The following demonstrates that for a number of containers all named mysql-<number>:
$ docker run --name mysql-3 --label 'com.docker.swarm.affinities=["container!=~mysql-*"]' autopilotpattern/mysqlThat rule can also be seen in context in a Docker Compose file.
To see where your containers are, use the Triton CLI tool:
$ triton instances -o name,compute_node | sort
NAME             COMPUTE_NODE
wp_consul_1      f57ce6d4-18d3-11e4-bb70-002590ea597c
wp_consul_2      8a818a00-e289-11e2-8944-002590c3ebfc
wp_consul_3      c78dd9de-e064-11e2-b0c9-002590c3edd4
wp_memcached_1   34e1bf1e-b766-11e2-900f-002590c32058
wp_memcached_2   d088b3f6-2f7e-11e3-b276-002590c3ed68
wp_memcached_3   d088b3f6-2f7e-11e3-b276-002590c3ed68
wp_mysql_1       cdec4e60-2f7d-11e3-8c56-002590c3ebec
wp_mysql_2       f57ce6d4-18d3-11e4-bb70-002590ea597c
wp_mysql_3       69590e24-2f7e-11e3-a59d-002590c3f140
wp_nfs_1         f57ce6d4-18d3-11e4-bb70-002590ea597c
wp_nginx_1       aaa7da0a-2f7d-11e3-9d09-002590c3ed18
wp_nginx_2       561221be-e291-11e2-8a70-002590c3edd0
wp_prometheus_1  69590e24-2f7e-11e3-a59d-002590c3f140
wp_wordpress_1   44454c4c-3300-1035-804e-b4c04f383432
wp_wordpress_2   69590e24-2f7e-11e3-a59d-002590c3f140
wp_wordpress_3   f57ce6d4-18d3-11e4-bb70-002590ea597c
This CLI example will reveal any piling of instances:
$ triton insts -H -o compute_node | sort | uniq -c | sort
   1 34e1bf1e-b766-11e2-900f-002590c32058
   1 44454c4c-3300-1035-804e-b4c04f383432
   1 561221be-e291-11e2-8a70-002590c3edd0
   1 8a818a00-e289-11e2-8944-002590c3ebfc
   1 8f836eda-1cf6-11e4-a382-002590e4f380
   1 aaa7da0a-2f7d-11e3-9d09-002590c3ed18
   1 c78dd9de-e064-11e2-b0c9-002590c3edd4
   1 cdec4e60-2f7d-11e3-8c56-002590c3ebec
   2 d088b3f6-2f7e-11e3-b276-002590c3ed68
   3 69590e24-2f7e-11e3-a59d-002590c3f140
   4 f57ce6d4-18d3-11e4-bb70-002590ea597c